
25 Best Painted Rock Ideas to Try
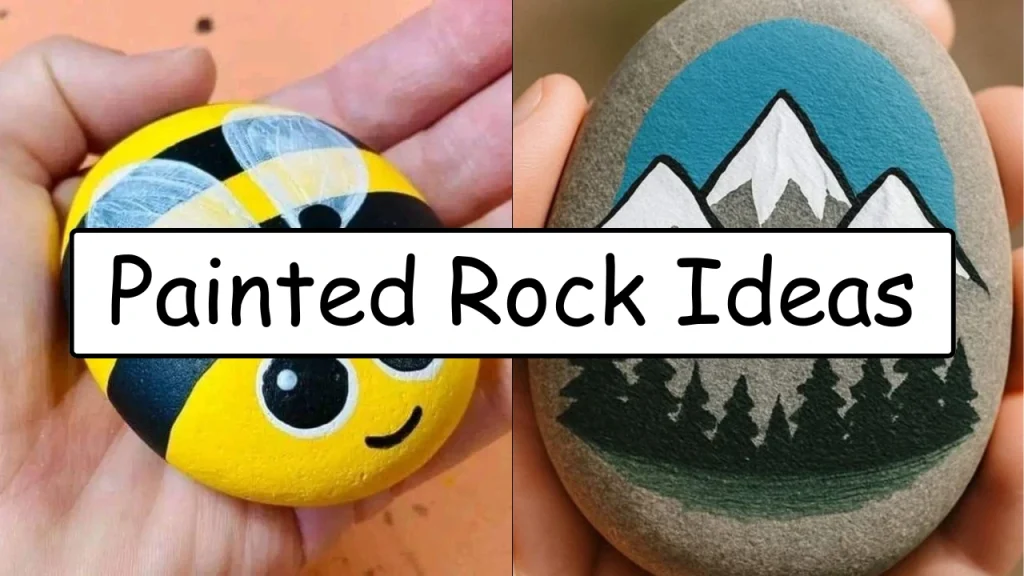
Rock painting is one of the easiest and most affordable crafts you can pick up on a whim. All you need is a smooth rock, a handful of paint colours, and a bit of creativity, that’s honestly the entire barrier to entry. Whether you’re after a relaxing weekend hobby, something fun to do with the kids on a Saturday, or even a small stack of handmade crafts to sell at a local market, painted rocks are a great place to start.
The best part is you don’t need to be an artist. A lot of the most beautiful painted rock designs are built from simple shapes, dots, lines, and basic patterns that pretty much anyone can pull off with a bit of patience. From cute little animals to colourful flowers and short inspiring quotes, there’s a design here for every skill level, whether you’ve never picked up a paintbrush or you’ve been doing this for years.
In this guide you’ll find 25 of the best ideas out there, fun, beginner-friendly, and popular with people who actually do this regularly. Let’s get into it.
What You Need Before You Start
Before painting your very first project, gather together a few basic supplies. You’ll want smooth, clean rocks to work with, acrylic paint in whatever colours you’re drawn to, paint brushes in a few different sizes, paint pens if you want to handle finer details, a pencil for sketching out your design first, a clear acrylic sealer or outdoor Mod Podge to protect the finished piece, and a cup of water alongside some paper towels for clean-up as you go.
Wash your rocks thoroughly first and let them dry completely before you touch them with paint. A clean surface helps the paint stick a lot better and prevents it from peeling or flaking off later once it’s dry.
1. Ladybug Painted Rock
One of the most popular painted rock ideas out there, and for good reason, is the simple ladybug. Paint the entire rock a bright red first, then add a black line running down the middle to split it into two wing shapes. Paint a black head at one end, and finish the whole thing off with small black dots scattered across the red.
This project is perfect for beginners since it’s quick to make, cute once finished, and almost impossible to mess up no matter how shaky your hand is. Ladybug rocks also make wonderful garden decorations or sweet little gifts for kids who love bugs.
2. Bumble Bee Rock
Turn an oval shaped rock into an adorable bee using alternating yellow and black stripes across the body. Add a pair of tiny white wings toward the top and a small smiling face for extra charm.
These cheerful little rocks look lovely tucked into flower pots, scattered through a garden bed, or used as part of a spring themed decoration display somewhere around the house.
3. Sunflower
Sunflowers are bright, colourful, and honestly surprisingly easy to paint once you break the process down. Start with a dark brown centre in the middle of the stone, then build up layers of yellow petals radiating outward around it, working your way to the edges.
A finished sunflower rock instantly adds a cheerful touch to any garden bed or indoor windowsill display, and it’s one of those designs that looks impressive without demanding much technical skill.
4. Rainbow Rock
Paint a colourful rainbow stretching across the surface of the rock using curved stripes of red, orange, yellow, green, blue, and purple layered one after another.
You can leave the background plain white for a clean, simple look, or paint in a few soft clouds on both sides of the rainbow for an even cuter, more finished appearance once everything’s dry.
5. Mandala Rock
Mandala rocks are made using hundreds of tiny dots arranged carefully into circular, symmetrical patterns radiating out from the centre.
While the finished result looks impressive and intricate, all you actually need is a set of dotting tools, some paint, and a fair bit of patience to work through the repetition. Beginners should start with simple concentric circles before attempting anything more detailed or layered, since the technique takes a bit of practice to get comfortable with.
6. Cactus Rock
Paint a green cactus complete with tiny white spines dotted across the surface and a few small colourful flowers blooming on top for extra detail.
This design works especially well on oval shaped rocks and makes a fun little decoration for a desk, a shelf, or tucked in among an actual succulent planter for a bit of playful contrast.
7. Owl Painted Rock
Owls are among the most loved painted rock designs out there, mainly because their natural round shape matches so well with the rounded shape most rocks already have to begin with.
Use large expressive eyes, small layered feather details, and earthy colours like brown, cream, and white to bring the whole owl to life. It’s a design that looks considerably more detailed than it actually is to paint, which makes it satisfying to finish.
8. Fox Rock
Orange, white, and black paint are all you need to create a cute little sleeping fox curled up on a rock’s surface.
This design looks especially beautiful on smooth oval stones, where the natural curve of the rock already resembles a fox curled up asleep, so you’re really just adding colour and a few small details to bring the illusion together.
9. Turtle
Paint the shell using hexagon shapes or another geometric pattern across the top of the rock, then add a simple green head, a set of small legs, and a little tail peeking out from underneath.
Kids especially seem to enjoy painting turtles specifically, mainly because the shapes involved are simple enough for younger hands to manage without much frustration.
10. Strawberry
Transform an ordinary rock into a realistic looking strawberry using bright red paint as the base, tiny yellow dots scattered across for seeds, and a cluster of green leaves painted at the top.
These miniature strawberries look adorable scattered through a garden bed, or grouped together as part of a broader fruit themed decoration set for a kitchen or patio.
11. Watermelon Slice Rock
Paint the rock a bright pink or red across most of the surface, add a green rind running along one curved edge, and finish everything off with a scattering of tiny black seeds painted across the pink.
It’s a colourful summer craft that comes together quickly and stays simple enough for even total beginners to knock out in one sitting.
12. Mushroom Rock
Cute little mushrooms remain one of the most popular rock painting ideas around, and it’s easy to see why once you try one.
Paint a red cap with white spots for the classic fairy-tale look, or experiment instead with more muted brown woodland mushroom tones for something that feels a bit more natural and understated.
13. Butterfly
Use the rock itself as the butterfly’s body, then paint large colourful wings extending outward across both sides, mirroring each other in pattern and colour.
Bright colours and simple repeating patterns make this a relaxing, low-pressure project that works well for crafters of pretty much any age or skill level.
14. Tree of Life
Paint a sturdy tree trunk rising up from the base of the rock, with branches spreading out and splitting across the remaining surface.
Add colourful leaves depending on whatever season you’re going for, green for spring, warm orange tones for autumn, or soft pink blossoms if you’d rather lean into a spring inspired piece of artwork instead.
15. Mountain Landscape
Tiny landscape paintings are surprisingly beautiful once you try them on a larger, flatter rock surface.
Paint layered mountains fading into the distance, a few pine trees dotted in the foreground, a soft sunset sky blending orange into purple, and perhaps a small lake reflecting it all back, building out a convincing miniature nature scene in the process.
16. Ocean Wave
Blue waves curling across the rock, a strip of sandy beach along the bottom, a scattering of tiny seashells, and a couple of small seagulls flying overhead all come together into a beautiful coastal themed painted rock.
These designs are perfect if you’re drawn to beach inspired home decor and want something small and handmade to add to that aesthetic.
17. Galaxy
Create a magical looking night sky using a blend of black, navy blue, purple, and white paint worked together across the rock’s surface.
Blend the colours together while they’re still wet so they bleed into each other softly, then finish with tiny white dots scattered across for stars, creating a stunning galaxy effect once everything dries.
18. Heart
Simple heart rocks never go out of style, no matter how many trends come and go in the painted rock world.
Paint a solid-coloured background first, then add one large heart centred on top, or scatter several smaller hearts across the surface instead if you’d rather. They make thoughtful little gifts for friends and family, especially around Valentine’s Day or as a small token of appreciation.
19. Inspirational Quote
Choose a short phrase to letter across the rock’s surface, things like “Be Kind,” “Smile,” “Dream Big,” “Stay Positive,” or “Choose Joy” all work well here since they’re short enough to fit neatly.
Simple motivational rocks like these are often hidden around parks and neighbourhoods for strangers to find, or shared directly as thoughtful little gifts for someone going through a hard time.
20. Emoji
Turn ordinary rocks into smiling emojis, laughing faces, heart eyes, or exaggerated surprised expressions using just a few basic colours and simple line work.
They’re incredibly easy to paint from start to finish and stay consistently popular with kids, who tend to love picking out which specific emoji face they want to recreate.
21. Penguin
Paint a classic black and white penguin design complete with a bright orange beak and a pair of tiny orange feet at the base.
Oval shaped rocks naturally resemble a penguin’s rounded body shape already, which makes this one of the easiest animal designs to pull off convincingly, even for someone who’s never painted an animal before.
22. Gnome

Garden gnomes continue to be one of the biggest ongoing trends in the painted rock world, and they show no signs of slowing down anytime soon.
Paint a tall red pointed hat covering most of the rock, a fluffy white beard underneath it, and a tiny nose just barely peeking out from beneath the hat’s brim. These make charming little outdoor decorations tucked among plants or along a garden path.
23. Pumpkin

Orange pumpkins are perfect for fall decorating and come together in just a few simple steps.
Add a few curling green vines trailing off to one side and a brown stem sticking up from the top to create festive Halloween or Thanksgiving decorations that’ll look great grouped together on a porch or windowsill.
24. Christmas Tree

Paint a green Christmas tree shape rising up the rock, decorated with small colourful dots to represent ornaments, and topped off with a little yellow star at the very peak.
These festive little rocks also make cute handmade holiday gifts, whether you’re tucking them into a stocking or handing them out to co-workers and neighbours around the holidays.
25. Flower Bouquet

Instead of painting just a single flower, fill the entire surface of the rock with a mix of colourful daisies, tulips, sprigs of lavender, roses, and tiny green leaves woven throughout.
This design lets you practice a whole range of different flower painting styles all at once while still ending up with one cohesive, vibrant piece of artwork by the time you’re finished.
Tips for Better Painted Rocks
Choosing smooth rocks with a flat surface makes the whole painting process considerably easier from start to finish. If you can, try to collect rocks that don’t have deep cracks or overly rough, bumpy textures, since those make it a lot harder to get clean lines and even coverage.
Apply two thin coats of acrylic paint rather than trying to get away with one thick layer. Thin coats dry faster and leave you with a much smoother, more even finish once everything’s cured.
Let each layer dry completely before you move on to adding finer details on top. This helps prevent your colours from smudging together and turning muddy partway through the process.
Use paint pens for outlines, lettering, and any small intricate details if you find yourself struggling to get clean lines with a regular small brush. They’re a lot more forgiving for beginners working on fine detail work.
And finally, seal every single of your finished project with a clear outdoor sealer once you’re done. This protects your artwork from scratches, moisture, and fading over time, which matters a lot more if you’re planning to display the rocks outside where they’ll be exposed to the elements.
Frequently Asked Questions
What paint works best on rocks?
Acrylic paint is the most popular choice among painters of all genre, mainly because it provides bright, vivid colours, dries quickly between coats, and sticks really well to a clean rock surface without much extra prep work needed.
Do I need to seal painted rocks?
Yes. Applying a clear acrylic sealer or an outdoor Mod Podge helps protect the paint underneath from scratches, direct sunlight, and rain, all of which will otherwise degrade your design a lot faster than you’d expect.
Where can I find them for painting?
You can collect smooth stones from your own yard where that’s permitted, purchase decorative river prop from a garden centre or craft store, or just buy bags of smooth painting rocks online if you’d rather skip the hunting altogether.
Are they waterproof?
They become water-resistant once you’ve applied a quality outdoor sealer over the finished paint, but no finish lasts forever once it’s exposed to the elements outdoors. Reapplying a clear coat every so often helps keep the colours looking vibrant and fresh over time.
Are they good for beginners?
Absolutely, one of the most beginner friendly crafts out there. Most of these projects rely on simple shapes, dots, lines, and basic repeating patterns, which makes this one of the easiest crafts for beginners of literally any age to pick up and enjoy right away.
Final Thoughts
Painted rocks prove that you don’t need expensive supplies or advanced artistic training to create something beautiful and worth keeping. With just a handful of acrylic paints and a smooth stone pulled from your own backyard, you can make colourful decorations, thoughtful handmade gifts, fun family projects, or even a small stack of crafts to sell at a local market.
Whether you start out with something simple like a ladybug, work your way up to a cheerful sunflower, or eventually tackle a detailed mandala design, the most important thing is honestly just enjoying the creative process along the way. Try out different colour combinations, experiment freely with new designs as they come to mind, and don’t be afraid to make each individual rock feel like your own. Before long you’ll have a whole collection of unique painted rocks that are just as fun to make as they are satisfying to display around your home or garden.
