Easy Crochet Bow Tutorial (Step-by-Step Guide for Beginners)
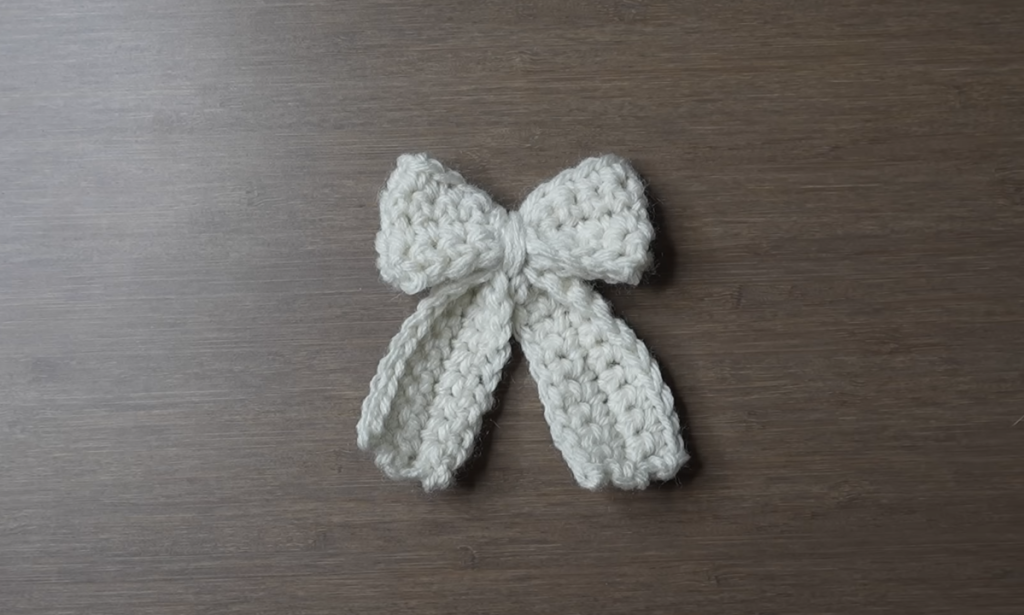
If you’re after a quick, easy and beginner friendly crochet project, this crochet bow is a perfect choice. It’s simple to make, comes together in very little time, and can be used in so many different ways. Attach it to a keychain, decorate a gift, add it to a hat or bag, use it as a hair accessory, or even turn it into cute little home decor.
The best part is that this pattern only uses basic crochet stitches, which makes it ideal if you’re still learning. Even if you’ve never made a crochet bow before, you can easily follow along one step at a time.
In this tutorial I’ll walk you through exactly how to crochet the bow, sew it together, shape it, and even turn it into a keychain if that’s the direction you want to take it.
Finished Bow Size
Using the materials listed below, your finished crochet bow will measure approximately:
- Width: 7.5 cm (about 3 inches)
- Height (including tails): 9 cm (about 3.5 inches)
One of my favourite things about this pattern is how easy it is to customize. Make a smaller bow with fewer foundation chains and fewer rows, or go bigger simply by adding more chains and extra rows.
Materials You’ll Need
- Medium (Weight #4) yarn
- 5.5 mm crochet hook
- Scissors
- Yarn needle
- Keychain clasp and split ring (optional if making a keychain)
For this tutorial I used Red Heart Super Saver yarn in the colour Aran, a medium weight (Category 4) acrylic yarn. The whole project uses less than 10 grams of yarn, which makes it an excellent stash busting project.
If you go with a different yarn weight, your finished bow may come out slightly larger or smaller, and that’s completely fine if you’re customizing the design anyway.
Crochet Abbreviations Used
Since this pattern is beginner friendly, here’s what we’ll be using:
- ch = Chain
- sc = Single Crochet
- st = Stitch
Don’t worry if these are new to you, I’ll explain everything as we go along.
Before You Begin
This project is made in two separate pieces.
The first rectangle becomes the main bow. The second rectangle becomes the hanging tails that sit underneath the bow.
Both pieces are made in almost exactly the same way, which makes this a great project for practicing your single crochet.
Crochet the Main Bow Piece
Step 1: Make a Slip Knot

Start by making a slip knot and placing it onto your crochet hook. If you’re new to crochet, don’t make the knot too tight, your hook should slide through the loop comfortably.
Step 2: Chain 21
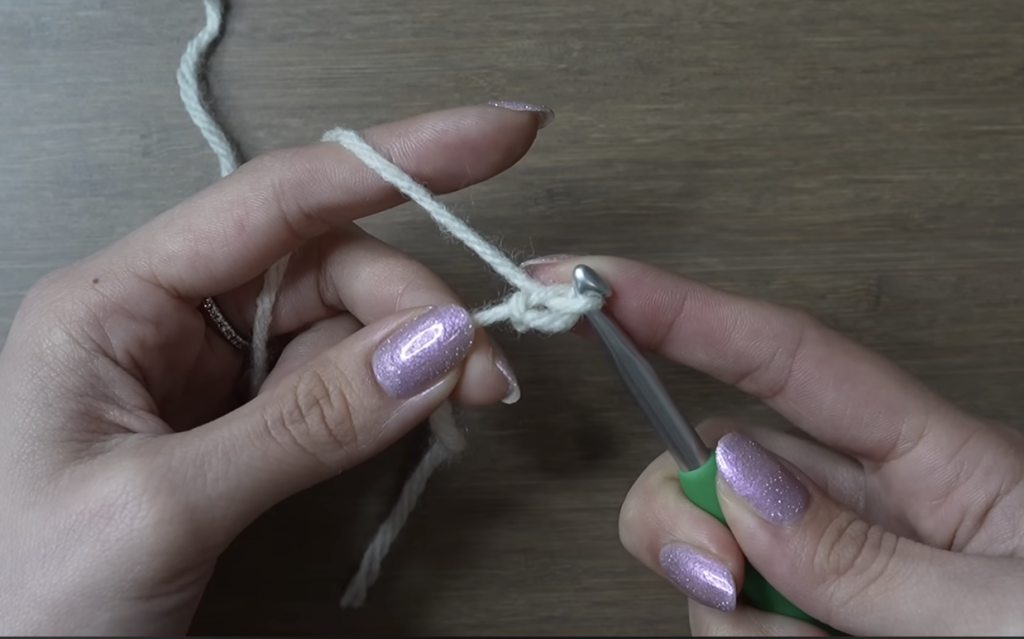
Now create 21 chain stitches. Each chain is made by yarning over and pulling the yarn through the loop already on your hook. Repeat until you have 21 chains total.
Beginner Tip
Try not to make your foundation chain too tight. Loose, even chains are considerably easier to crochet into during the first row. Tight chains are honestly one of the most common problems beginners run into early on.
How to Change the Bow Size
The foundation chain is what determines how long your finished bow ends up being. Want a smaller bow, make fewer than 21 chains. Want it bigger, make more. For example, using only 16 chains creates a noticeably smaller bow.
Row 1
Now you’ll work back across the chain.
Insert your hook into the second chain from the hook. Remember, the loop currently on your hook doesn’t count as a chain. Yarn over and pull up a loop, you should now have two loops on your hook. Yarn over again and pull through both loops.

Congratulations, you’ve just made your first single crochet.
Continue making one single crochet in every remaining chain across the row. When you reach the end, you should have 20 single crochet stitches.
Count Your Stitches
It’s a good habit to count your stitches after every row. The easiest way is to look along the top edge, each stitch forms a small “V” shape. Count each V carefully to make sure you still have 20 stitches.
Row 2
To begin the next row, chain 1 and turn your work.
That chain just helps you reach the height of the next row, it doesn’t count as a stitch. Instead of crocheting into it, insert your hook into the first actual stitch of the row.
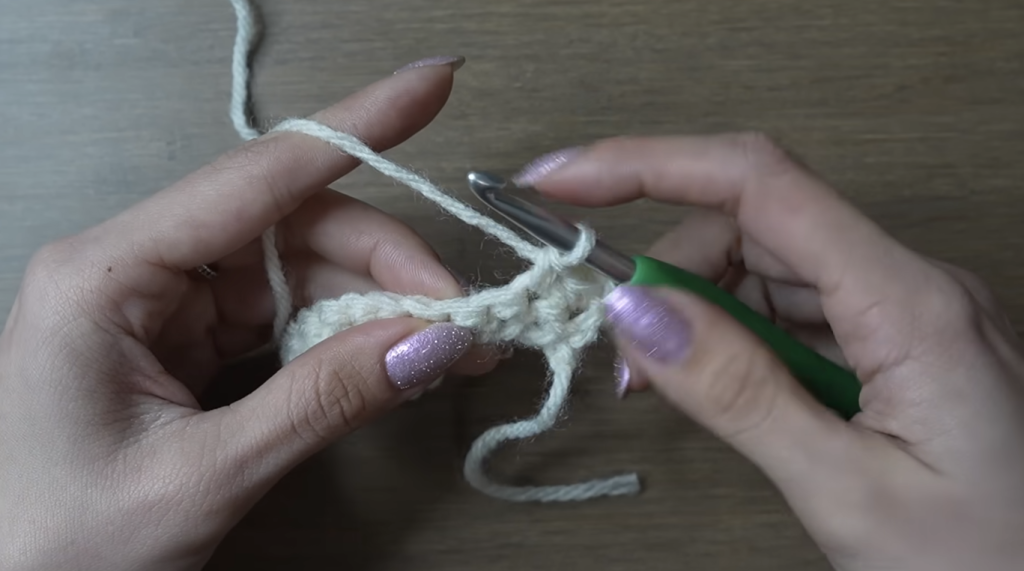
Work 1 single crochet in every stitch across.
When you reach the end, look carefully before stopping. A lot of beginners accidentally miss the final stitch since it sits right at the edge of the work. If your rectangle’s edge looks uneven or slanted, double check you’ve worked into that last stitch.
At the end of the row, you should still have 20 single crochet stitches.
Beginner Tip
If your stitch count changes from one row to the next, you’ve probably skipped a stitch somewhere or accidentally added an extra one. Counting after each row saves you from having to unravel your work later on.
Row 3
Chain 1 and turn your work again. Skip the turning chain and work directly into the first stitch.
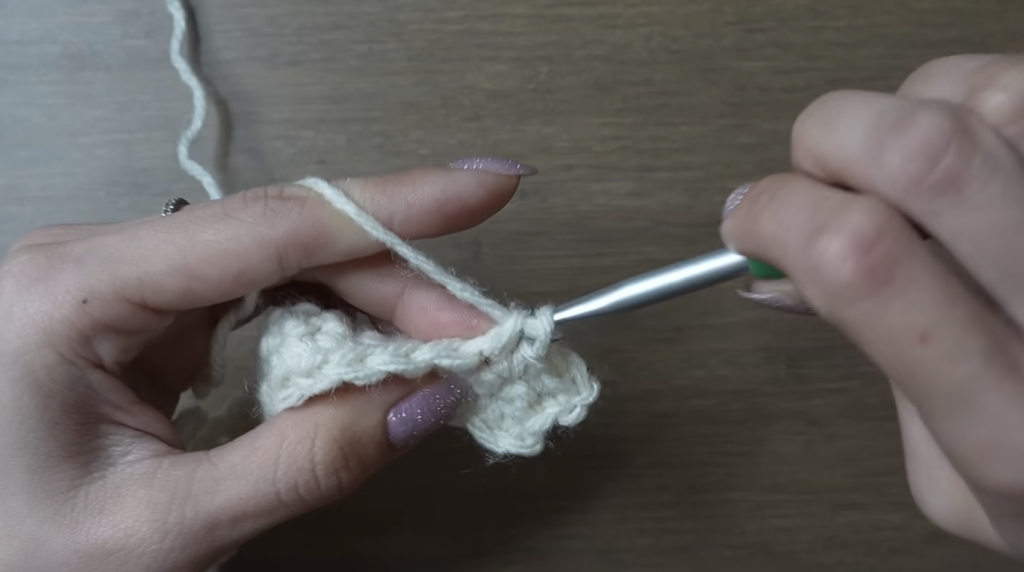
Make 1 single crochet in every stitch across the row and continue until you reach the opposite end. Once again, check that you still have 20 stitches.
Row 4
Repeat exactly the same process one final time. Chain 1, turn, and work 1 single crochet into every stitch.
When you’re finished, you’ll have completed 4 rows of single crochet. Your rectangle should now be looking nice and even.
Want a Wider Bow?
The number of rows is what controls the width of the bow. If you want something fuller and wider, just crochet a few additional rows before finishing. For a thinner bow, use fewer rows instead. Because this pattern is so simple, it’s incredibly easy to customize without touching anything else in the process.
Fasten Off
Once you’ve finished Row 4, chain 1. Cut the yarn, leaving a long tail about 45 cm (18 inches) long. Pull the yarn completely through the loop on your hook and tighten gently to secure it.
Don’t trim this long tail any shorter, we’ll be using it later to sew the bow together and wrap around the centre.
At this point your first rectangle, the main part of the bow, is complete.
Crochet the Bow Tail Piece
Now it’s time to crochet the second rectangle. The good news is it’s almost identical to the first one.
Repeat the exact same pattern, chain 21, Row 1 gives you 20 single crochet, and Rows 2 through 4 each give you 20 single crochets as well.
The only real difference comes when you fasten off. Instead of leaving that long 45 cm yarn tail, leave only a short tail of a few inches before cutting the yarn. This piece doesn’t need a long tail since it won’t be used for sewing later.
When you’re finished, you should have two matching crochet rectangles, one for the bow and one for the hanging tails.
Assemble Your Crochet Bow
Now that both rectangles are done, it’s time to turn them into an actual bow.
Don’t worry if you’ve never sewn crochet pieces together before. This project only needs a few simple stitches, and the assembly is honestly just as beginner friendly as the crocheting itself.
Take a few minutes to make sure both pieces are lying flat before you start, it’ll help your finished bow look neat and symmetrical.
Weave in the Loose Ends on the Tail Piece
We’ll start by finishing the smaller rectangle that becomes the bow tails.

Thread one of the short yarn tails onto your yarn needle. Insert the needle under several stitches on the back of the rectangle, weaving through the loops rather than straight across the fabric. Pull the yarn through gently until it’s snug, avoid pulling too tightly since that can cause the rectangle to pucker.
Once secure, trim the excess close to the fabric. Repeat the same process with the second short yarn tail.
When you’re finished, the tail piece should have no loose ends showing.
Tip: some crocheters like weaving the yarn back in the opposite direction for extra security. It’s not essential for a purely decorative project like this one, but it’s a good habit to build if you’re making items that will get handled a lot.
Set the tail piece aside for now.
Sew the Main Bow Piece Together
Next, pick up the larger rectangle. Remember that long yarn tail from earlier? That’s exactly what we’ll use to sew the ends together.
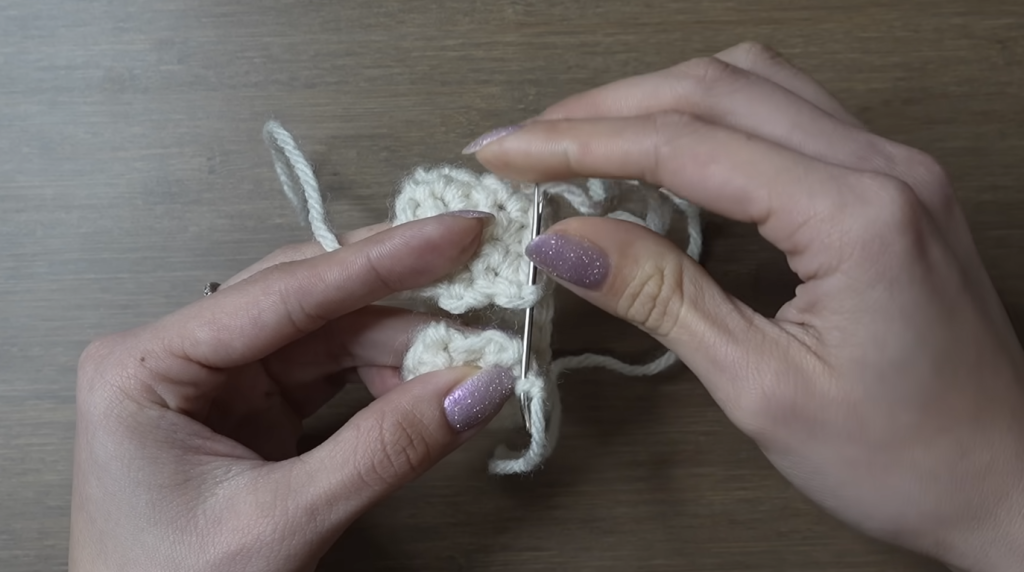
Fold the rectangle in half so the two short ends meet evenly. Thread the long yarn tail onto your yarn needle.
Starting at one corner, insert the needle through both layers of crochet, joining the matching corners together. Continue sewing across the open edge by passing the needle through both layers one stitch at a time.
There’s no need for complicated sewing stitches here, simply catching matching loops on both sides creates a strong seam that stays hidden once the bow is finished. Work your way all the way across until the entire edge is closed.
When you’re done, your rectangle will form a loop.
Position the Seam in the Centre
Lay the loop flat with the seam you just sewed sitting exactly in the middle. This seam becomes the back of the bow, so don’t worry if it’s not perfectly invisible.
Holding the seam centred also helps create two evenly sized loops on each side of the bow. Take a moment to adjust the shape before moving on.
Create the Bow Shape
Using that same long yarn tail, wrap the yarn around the middle of the loop. Bring it around the back and then across the front several times.
Each wrap gently pinches the centre, which is what gives the rectangle its classic bow shape. After the first few wraps, pull the yarn snug to define the centre. Continue wrapping several more times, making sure each wrap sits neatly beside the previous one.
The centre should look full and tidy without becoming bulky. Once you’re happy with the shape, tie a firm knot on the back of the bow. For extra security, tie a second knot too.
At this point you’ll clearly see the familiar bow shape starting to appear.
Beginner Tip: Pull the yarn firmly enough to shape the bow properly, but don’t over-tighten it. Wrapping too tightly can squash the bow loops and make them look flat instead of full.
Attach the Tail Piece
Now grab the second rectangle you made earlier. Fold it in half just to locate its centre, you don’t need to crease it permanently, this is simply an easy way to find the middle.
Place the folded centre directly underneath the bow, making sure both ends hang down evenly. If the bow has a visible knot on one side, turn it so the knot faces the back, this gives your finished project a cleaner look from the front.

Wrap Everything Together
Continue using the same long yarn tail. Wrap it around both the bow and the tail piece together several times.
As you wrap, pause every couple of rounds to gently tighten the yarn. This helps keep everything securely in place while maintaining a nice rounded shape.
Before making the final wraps, check that both tails hang evenly. If one side is longer than the other, adjust the tail piece before tightening completely.
Once everything is centred, finish wrapping until only a short length of yarn remains. Tie two secure knots on the back of the bow, these keep all the wrapped yarn from loosening over time.
Weave in the Final Loose Ends
Thread one remaining yarn tail onto your yarn needle. Instead of weaving through the bow loops, weave the yarn through the wrapped centre and into the tail piece underneath.
Run the needle under several stitches before pulling the yarn through, then trim the excess close to the fabric. Repeat with the final yarn tail.
Once both ends have been woven in and trimmed, your crochet bow is completely assembled.
Shape the Bow
Although your bow is technically finished, spending an extra minute shaping it makes a difference.
Gently pull outward on each loop to make the bow look fuller. Then adjust the hanging tails so they extend slightly beyond the centre wraps. If needed, smooth the edges with your fingers until both sides match nicely.
Because crochet fabric is naturally flexible, these small adjustments can give your bow a considerably more polished, finished look.
Turn Your Bow into a Keychain (Optional)
One of the easiest ways to use this crochet bow is turning it into a cute little keychain.
Attach a split key ring to your keychain clasp if it isn’t already connected. Then slide the split ring underneath the yarn wraps around the centre of the bow. This securely holds the key ring in place without needing to sew anything extra.
If you find it tricky to open the split ring with just your fingers, use your yarn needle to help separate the ring as you slide it through.
Once attached, your crochet bow keychain is ready to use on your keys, purse, backpack, zipper pull, or as a handmade gift for someone.
Easy Ways to Customize Your Crochet Bow
One of the best things about this pattern is how easy it is to personalize. A few ideas:
Use different yarn colours and make bows for holidays, birthdays, baby showers, or a favourite sports team. Adjust the size by adding or removing foundation chains to change the length, and crochet more or fewer rows to make the bow wider or narrower. Try different yarn weights, lightweight yarn creates delicate bows while bulky yarn makes soft, oversized ones. Add embellishments like a button, pearl bead, small charm, or rhinestone sewn onto the centre for extra decoration. Or turn it into something else entirely, attach the bow to a hair clip, headband, gift wrap, tote bag, hat, or bookmark instead of a keychain.
Beginner Tips for the Best Results
If this is one of your first crochet projects, these simple tips will help you get a neater finish. Count your stitches after every row to make sure you still have 20. Don’t crochet your foundation chain too tightly, or the first row becomes difficult to work into. Remember to skip the turning chain at the start of each row. Always work into the final stitch of every row to keep the rectangle straight. Leave that long yarn tail on the main bow piece since it’s used for both sewing and wrapping the centre. And shape the bow gently after assembly for a fuller, more balanced look overall.
Final Thoughts
This easy crochet bow is a fun project for beginners and experienced crocheters alike. Since it only uses simple stitches and a small amount of yarn, it’s a great way to practice your crochet skills while making something that’s both cute and practical.
Whether you use it as a keychain, hair accessory, gift topper, or decoration, this little bow comes together quickly and can easily be customized in different sizes and colours. Once you’ve made one, you’ll probably find yourself making several more for gifts, craft fairs, or just to use up leftover yarn from other projects sitting around.