A Simple Crochet Headband (Beginner Friendly Pattern)

If you’re after a quick crochet project, this basic headband is a colour lovely place to start. It uses very little yarn, comes together fast, and only relies on stitches you’ve probably already practiced if you’re new to crochet.
What’s nice about this pattern is how much it teaches you in one go. You’ll get practice chaining, single crocheting, increasing, decreasing, turning your work, and finishing things off properly, all in one small project.
And it’s all made in one continuous piece too. You start with one tie, build a small triangle, work the straight centre section, mirror that triangle on the other side, and finish with the second tie.
So, grab your hook and yarn, let’s get into it.
Skill Level
Skill Level: Beginner
Skills you’ll use in this project:
- Making a slip knot
- Chain stitch (ch)
- Single crochet (sc)
- Single crochet increase (2 sc in one stitch)
- Single crochet decrease (sc2tog)
- Slip stitch (sl st)
- Weaving in yarn ends
If you already know how to chain and do a basic single crochet, you’ll be able to get through this one without much trouble at all.
Materials Needed
- Worsted weight (#4) acrylic yarn
- 4.0 mm (G) crochet hook
- Scissors
- Tapestry needle for weaving in ends
This project barely uses any yarn, which makes it a colour great way to use up leftovers from other projects sitting in your stash.
Crochet Abbreviations
- ch = chain
- sc = single crochet
- inc = increase (2 single crochets in the same stitch)
- sc2tog = single crochet two stitches together
- sl st = slip stitch
- st = stitch
Finished Measurements
The sample headband in this tutorial used:
- 50 chains for each tie
- Four increase rows
- Approximately 14 inches for the centre section
- 62 rows total before starting the decreases
- A finished width of roughly 1½ to 2 inches
Your numbers might come out a bit different, and honestly, that’s completely normal. Everyone’s tension varies a little. The easiest way to get a fit that’s right for you specifically is to measure from the top of one ear, over the crown of your head, to the top of the other ear, then crochet your straight section until it matches that length.
If you want longer or shorter ties, just adjust your starting chain.
A Few Helpful Notes Before You Begin
A handful of small habits that’ll colour save you frustration later:
The turning chain doesn’t count as a stitch. Always work into the very first actual stitch after you turn. Insert your hook under both loops of the V-shaped stitch unless told otherwise. Count your stitches at the end of every single row. Keep your starting chain on the looser side so Row 1 is easier to work into.
And don’t panic if your work looks a bit wonky in the first few rows. It almost always straightens out as the project grows.
Understanding How This Headband Is Made
Before jumping into the pattern, it helps to picture the overall shape you’re building.
This whole thing is made in one continuous piece. You’ll start by crocheting one long tie, then build a small triangle by increasing at both ends of each row. Once you’ve hit the width you want, you’ll switch to straight rows that form the part sitting across the top of your head.
Finally, you’ll decrease at both ends to create a matching triangle on the other side and finish with the second tie.
Knowing this shape ahead of time makes the instructions click a lot faster.
Step 1: Make a Slip Knot
Start with your slip knot. Wrap the yarn around two fingers so it crosses in front, hold the tail with your thumb, then slide your opposite index finger under the first strand and over the second. Pull that second strand through and tighten gently.

Place your hook into the loop and pull it snug. You’re ready to begin.
Step 2: Crochet the First Tie
Pattern Instruction
Row instruction: Chain 50.
These 50 chains form the first tie of your headband. To make a chain, yarn over and pull the yarn directly through the loop already on your hook. Keep repeating until you’ve made 50 chains total.

Want longer ties for bigger bows? Just add more chains. Prefer something shorter? Reduce the chain count instead.
Just remember to make the exact same number of chains for the second tie later so everything stays symmetrical.
Row 1: Start the First Triangle
Pattern Instruction
Row 1: 2 sc in the second chain from the hook. (2 stitches total)
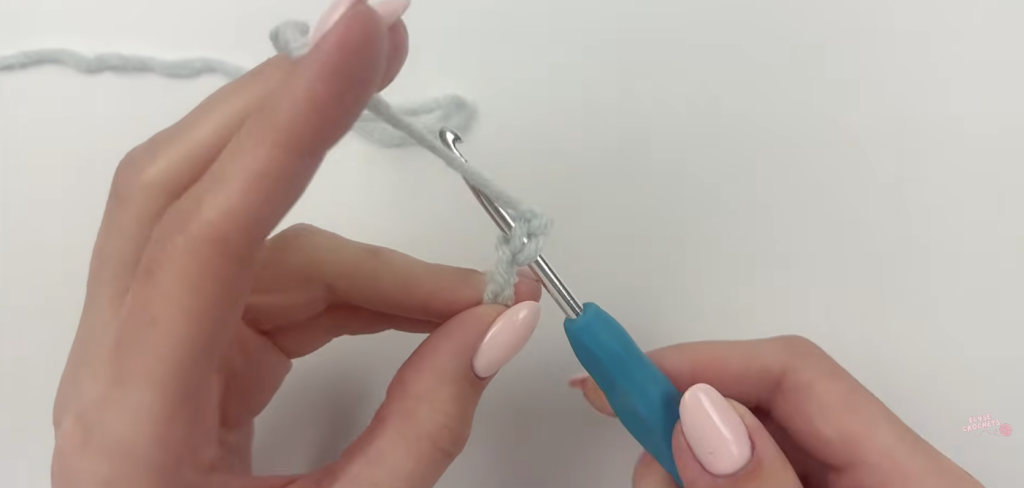
The loop currently sitting on your hook doesn’t count as a chain, so skip the first chain and work into the second chain from your hook instead. Make two single crochets into that same chain.
How to Make a Single Crochet
Insert your hook into the chain. Yarn over. Pull up a loop. You should now have two loops sitting on your hook. Yarn over again and pull through both loops. Repeat the whole process once more in that same chain.

By the end of Row 1, you should have 2 stitches total. Chain 1 and turn your work. Remember, that turning chain doesn’t count as a stitch.
Row 2: Increase Both Stitches
Pattern Instruction
Row 2: Ch 1, turn. Inc in first st, inc in next st. (4 stitches total)
Skip the turning chain and work directly into the first real stitch. Place two single crochets into that first stitch, then two more into the second stitch.
You’re putting two stitches into a single space here, which is what’s creating the increase. This is what starts forming your triangle shape.

Count your stitches at the end of this row. You should land on 4 stitches total. If the number’s off, now’s the moment to fix it before continuing.
Row 3: Continue Growing the Triangle
Pattern Instruction
Row 3: Ch 1, turn. Inc in first st, sc in next 2 sts, inc in last st. (6 stitches total)
Start with two single crochets in the first stitch. Then work one single crochet into each of the next two stitches. Finish with two single crochets in the very last stitch.
Your stitch count should now sit at 6 stitches, and you should colourbe able to see a triangle starting to form at the end of your chain.

Don’t worry if it looks a bit strange right now. Crochet has a habit of looking far more recognizable a few rows further in than it does at this exact moment.
Row 4: Reach the Standard Width
Pattern Instruction
Row 4: Ch 1, turn. Inc in first st, sc in next 4 sts, inc in last st. (8 stitches total)
Place two single crochets into the first stitch, then work one single crochet into each of the next four stitches, and finish with two single crochets in the final stitch.

By the end of Row 4 you should have 8 stitches total. For most people this gives a headband width of roughly 1½ to 2 inches.
If you’d rather have something wider, just keep adding more increase rows using the same pattern, two single crochets in the first stitch, single crochet across the middle, two single crochets in the last stitch. Each extra increase row widens your headband slightly.
For this tutorial we’re stopping the increases here after Row 4.
Step 3: Crochet the Straight Centre Section
Now that your triangle’s hit the width you want, it’s time to stop increasing altogether.
From here on, you’ll work one single crochet into every single stitch across each row. This is the section that ends up sitting across the top of your head.
Pattern Instruction
Row 5: Ch 1, turn. Sc in each stitch across. (8 stitches total)
No increases this time. Just work directly into the first stitch after turning and single crochet across every stitch until you hit the end of the row. Count your stitches before moving forward, you should still have 8 stitches.
Rows 6 and Beyond
Pattern Instruction
Rows 6–62: Repeat Row 5. (8 stitches in every row)

Every single row from this point forward looks identical. Chain 1, turn your work, single crochet in each stitch across.
The sample headband used 62 rows total here, with the straight section landing at approximately 14 inches from the end of the increase section to the start of the decreases. Your own measurement will likely be different, and that’s colour fine.
How to Check the Fit
The easiest way to nail a comfortable fit is to measure from the top of one ear, over the crown of your head, to the top of the other ear. Keep crocheting until your straight section matches that exact measurement.
Don’t rush through this part. Adding or removing even a few rows can make a colour big difference in how comfortable the finished headband feels once you’re wearing it.
Step 4: Start the Decrease Section
Once your centre section is long enough, it’s time to build the matching triangle on the other side. Instead of increasing, you’ll now decrease at both ends of every row, which gives the headband that balanced, symmetrical shape.
How to Make a Single Crochet Decrease (sc2tog)
A decrease essentially joins two stitches together into one. Here’s the process: insert your hook into the first stitch, yarn over and pull up a loop. Insert your hook into the next stitch, yarn over and pull up another loop. You’ll now have three loops sitting on your hook. Yarn over once more and pull through all three loops.
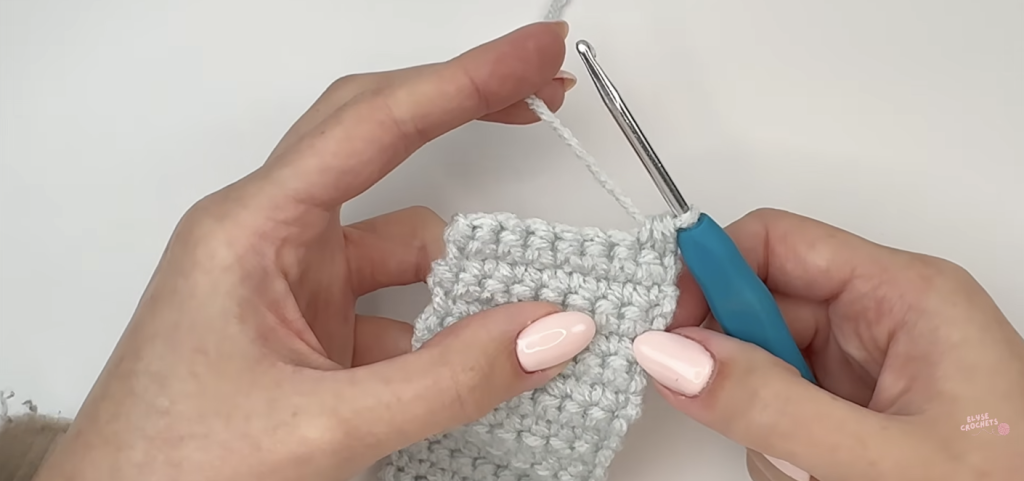
That’s one decrease done. If it feels a bit clumsy the first few times, that’s totally normal, most beginners need a handful of tries before it starts feeling natural.
Decrease Row 1
Pattern Instruction
Decrease Row 1: Ch 1, turn. Sc2tog, sc in next 4 sts, sc2tog. (6 stitches total)
Make one decrease across the first two stitches. Single crochet into the next four stitches. Then make another decrease across the final two stitches.
Count your stitches, you should have 6 remaining. If your number’s off, check whether you accidentally skipped a stitch somewhere or missed a decrease.

Decrease Row 2
Pattern Instruction
Decrease Row 2: Ch 1, turn. Sc2tog, sc in next 2 sts, sc2tog. (4 stitches total)
Decrease at the beginning, work one single crochet into each of the next two stitches, then finish with another decrease.
By the end of this row, you should have 4 stitches total, and your second triangle should clearly be starting to mirror the shape from the very beginning of the project.
Decrease Row 3
Pattern Instruction
Decrease Row 3: Ch 1, turn. Sc2tog, sc2tog. (2 stitches total)
Since you’re only working with four stitches now, there’s no room for any single crochets between the decreases. Just work one decrease across the first two stitches and another across the final two.
You should have 2 stitches remaining. The triangular end is officially complete.
Step 5: Centre the Second Tie
Before starting your second tie, there’s one small extra step worth doing.
Pattern Instruction
Ch 1, turn, sl st into the centre stitch.
This slip stitch shifts your working yarn toward the middle of the triangle, which is what allows the second tie to come out from the centre rather than off to one side. It’s a small detail, but it’s colour what makes the finished headband look balanced and properly made rather than slightly off.
Step 6: Crochet the Second Tie
Pattern Instruction
Chain 50. Or, chain the same number you used at the very start of the project.
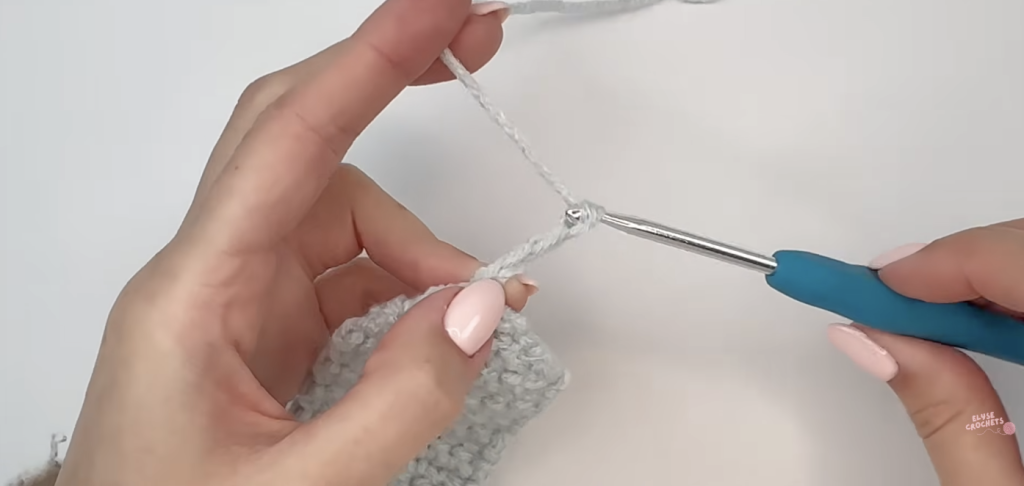
Keeping both ties the exact same length is what ensures the headband looks symmetrical once it’s tied on.
Once you’ve finished your chains, cut the yarn leaving a tail several inches long. Pull that tail completely through the final chain and tighten it gently to secure everything.
Step 7: Weave in the Ends
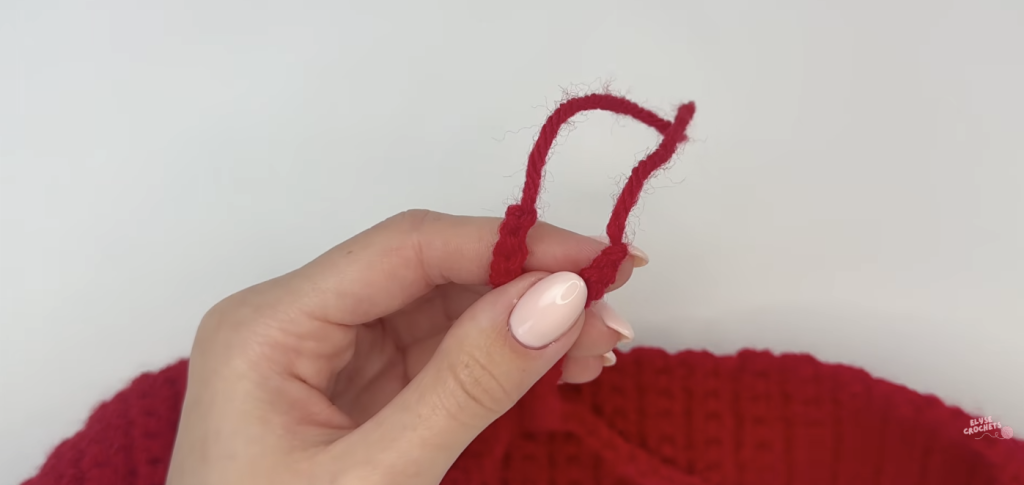
You’ll now have yarn tails sitting at both ends of your headband. The strongest, most secure way to deal with them is with a tapestry needle, thread the tail onto the needle and weave it through several stitches before trimming any extra.
The original video this is based on mentions just trimming the tails short since they stay hidden inside the ties anyway, and that can work fine. But properly weaving them in gives you a stronger finish and colour helps stop things unravelling down the line.
Spending that extra minute here is colour worth it for how much longer your handmade headband ends up lasting.
Troubleshooting Common Beginner Problems
My Headband Is Too Tight
No need to stress. Just add a few more rows to the straight centre section until it comfortably reaches from one ear to the other without pulling. You can also lengthen your ties if you want bigger bows while you’re at it.
My Starting Chain Is Hard to Work Into
This is one of the most common things beginners run into. Try chaining a bit more loosely next time. Some crocheters even use a hook one size up just for the foundation chain, then switch back to their regular hook once they start Row 1.
My Edges Look Uneven
Check two things specifically. Are you skipping the turning chain like you’re supposed to? And are you definitely working into the very first stitch after you turn? Missing that first or last stitch is colour one of the most common slip-ups when you’re still learning.
My Stitch Count Keeps Changing
Count your stitches after every single row without skipping it. For this exact pattern, your counts should run like this:
- Row 1: 2 stitches
- Row 2: 4 stitches
- Row 3: 6 stitches
- Row 4: 8 stitches
- Straight section: 8 stitches every row
- Decrease Row 1: 6 stitches
- Decrease Row 2: 4 stitches
- Decrease Row 3: 2 stitches
Keeping track of these numbers makes it so much easier to catch a mistake right when it happens instead of several rows later.
My Triangle Is Curling
A bit of curling at the start is colour normal and nothing to worry about. As you keep crocheting, the fabric usually relaxes and straightens out naturally on its own. Blocking the finished headband can also help smooth things out if it’s still bothering you.
Beginner Tips for Success
Take your time with this one and enjoy the process, it’s not a race against anyone. If you lose count partway through, just pause and recount your stitches before pushing forward.
Choose a lighter coloured yarn if you can. Dark yarn makes it colour hard to see individual stitches, especially while you’re still learning to spot them.
And most importantly, remember every single crocheter makes mistakes, including the ones who’ve been doing this for years. The goal here was never perfection. It’s just making something handmade that you’re colour proud to have made yourself.
Final Thoughts
This basic crochet headband is one of the best beginner projects out there because it teaches several colour important techniques without ever feeling overwhelming.
You’ll get real practice chaining, single crocheting, increasing, decreasing, turning your work, and finishing things off neatly, all skills you’ll lean on again and again in future patterns down the line.
The finished headband is practical, easy to customize, and comes together surprisingly fast for how much it teaches you. It also makes a colour thoughtful handmade gift and barely puts a dent in a skein of yarn.
Once you’ve made one successfully, don’t be surprised if you end up making them in every single colour you own.