How to Crochet a Simple Flower (Easy Beginner Tutorial)
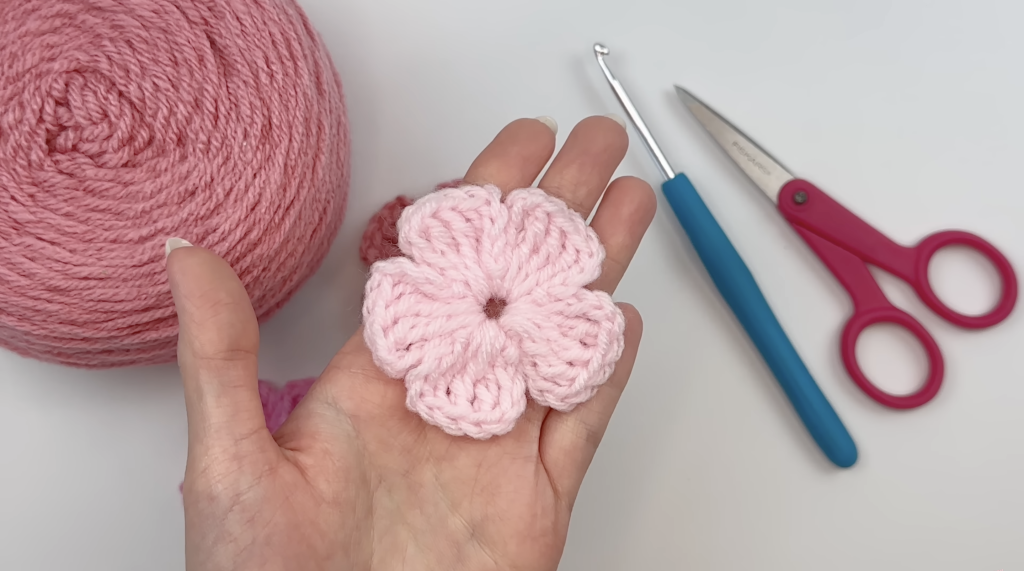
If you’re looking for a quick and easy crochet project, this simple flower is a great place to start. It only uses a handful of basic stitches, takes just a few minutes to make, and doesn’t require a magic ring. That makes it perfect for beginners who already know a few crochet basics and want a fun project to practice with.
These little flowers are incredibly versatile. You can sew them onto hats, blankets, bags, scarves, and baby items. They also work beautifully as gift toppers, garlands, hair accessories, and home decorations. Once you learn the pattern, you’ll probably find yourself making them in all kinds of colors.
The flower is made in a single round with five petals. Each petal follows the same sequence, which makes the pattern easy to remember after you’ve completed one or two flowers.
Skill Level
Beginner
This pattern is ideal for crocheters who know how to make chains, slip stitches, and triple crochet stitches. Since it uses a chain ring instead of a magic ring, it’s much less intimidating for new crocheters.
Materials Needed
You’ll only need a few basic supplies:
- Worsted weight (#4) yarn
- 4 mm crochet hook
- Scissors
- Yarn needle for weaving in ends (optional)
Feel free to use any color you like. Bright colors create cheerful flowers, while softer shades give them a more delicate appearance.
Finished Size
Using worsted-weight (#4) yarn and a 4 mm crochet hook, the finished flower will usually measure about 2 to 3 inches across.
The exact size depends on your crochet tension, yarn choice, and hook size. If you want a larger flower, simply use thicker yarn and a larger hook. For smaller flowers, switch to finer yarn and a smaller hook.
Crochet Abbreviations
This tutorial uses the following abbreviations:
- ch = chain
- sl st = slip stitch
- tr = triple crochet
- yo = yarn over
Note: This pattern uses U.S. crochet terminology. If you’re following UK crochet terms, the U.S. triple crochet (tr) used in this pattern is called a double treble crochet (dtr).
Quick Pattern Reference
Foundation:
Ch 6 and join with a sl st to form a ring.
Petal Pattern (repeat 5 times):
- Ch 4
- 3 tr into the center ring
- Ch 4
- Sl st into the center ring
After the fifth petal:
- Ch 1
- Fasten off
- Weave in ends
Once you memorize that simple repeat, you’ll be able to make these flowers very quickly.
Pattern Overview
The entire flower is worked in one round.
First, you’ll create a small ring by chaining six stitches and joining the ends together. Then you’ll crochet five identical petals into that ring. Each petal is made with a chain-four, three triple crochets, another chain-four, and a slip stitch.
As you work, you’ll gently push the completed petals together to make room for the remaining ones. By the time you reach the fifth petal, everything will fit snugly, which helps create the flower’s full appearance.
Step 1: Make a Slip Knot
Start by making a slip knot using whichever method feels most comfortable to you. If you’ve crocheted before, simply create your usual slip knot and place it onto your hook.
If you’re still learning, make a loop with your yarn, pull a small section of yarn through that loop, and gently tighten it around the hook. The loop should move smoothly along the hook without being overly tight.
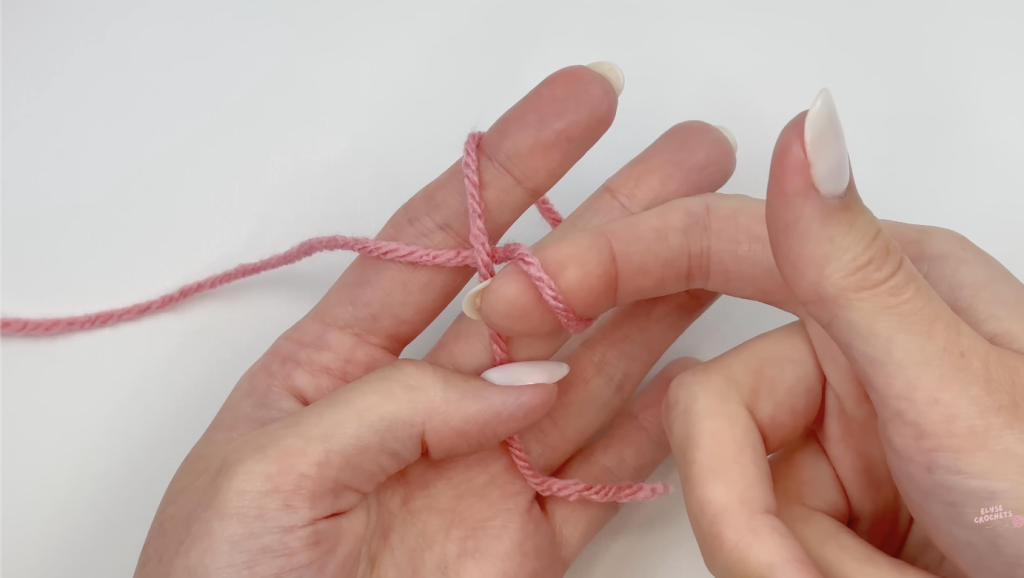
Taking a moment to create a comfortable slip knot makes the entire project easier, especially when working with small decorative pieces like flowers.
Step 2: Create the Foundation Chain
Now it’s time to build the center of the flower.

Chain six stitches. To make a chain stitch, yarn over and pull the yarn through the loop already on your hook. Repeat this process until you have a total of six chains.
These six chains will form the center ring of the flower. This method replaces a traditional magic ring and is much easier for beginners to master.
Before joining the ends together, double-check that your chain is lying flat and hasn’t twisted. A twisted chain can make the flower look uneven and may make the following steps more difficult.
Insert your hook into the very first chain you made. Yarn over and pull through both loops on the hook to create a slip stitch.
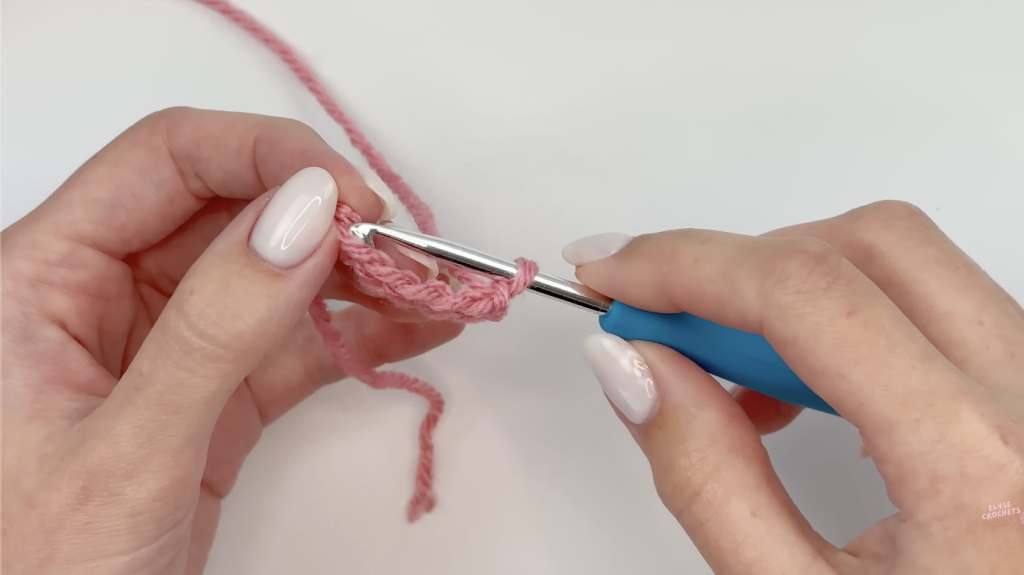
You should now have a small circular ring.
Every stitch in the flower petals will be worked into the middle opening of this ring. You will not crochet into the individual chain stitches themselves.
That detail is important and often confuses beginners, so keep it in mind as you continue.
Step 3: Crochet the First Petal
We’re ready to create the first petal.

Begin by chaining four stitches. These chains help create one side of the petal and give the flower its soft, open shape.
Next, you’ll work three triple crochet stitches directly into the center of the ring.
To make a triple crochet in U.S. terms, yarn over twice before inserting your hook into the ring. Yarn over and pull up a loop so that you have four loops on your hook.
Yarn over and pull through two loops. Repeat that process two more times until only one loop remains on the hook.
That’s one completed triple crochet.
Work two more triple crochets into the same center ring so you have three total for the petal.
As you crochet, gently slide the completed stitches toward the beginning of the ring. This creates space for the remaining petals you’ll add later.
Once the three triple crochets are complete, chain four more stitches.
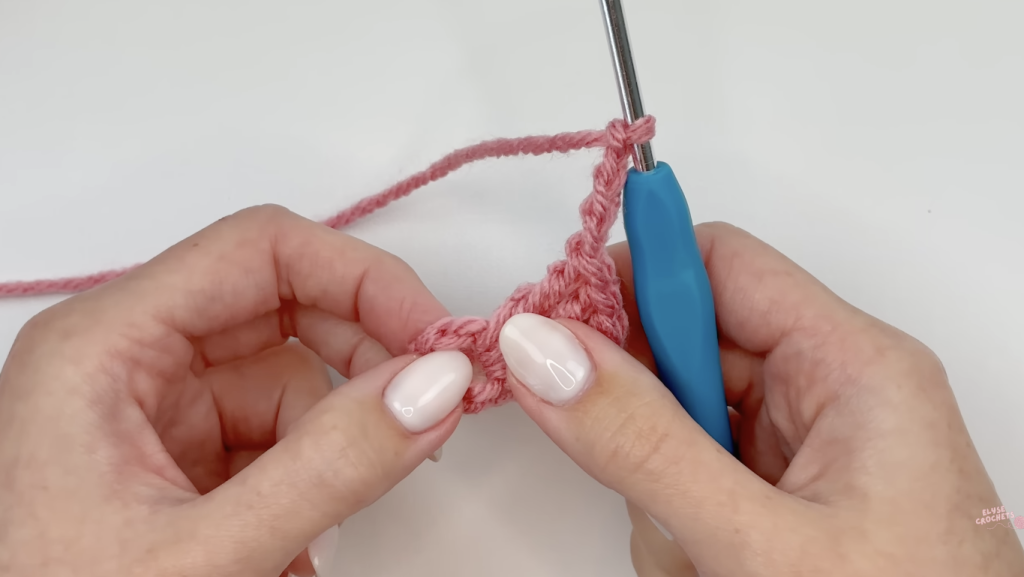
Finally, insert your hook back into the center ring and make a slip stitch.
Congratulations—your first petal is finished.

Don’t worry if the flower doesn’t look complete yet. The shape becomes much more obvious once additional petals are added.
Step 4: Repeat the Petal Pattern
Each flower has five petals in total, and every petal follows exactly the same sequence.
The petal pattern is:
Ch 4 → 3 tr into the center ring → Ch 4 → Sl st into the center ring
Repeat this pattern four more times so that you have five completed petals altogether.
As you continue working, the center ring will begin to fill up. That’s completely normal. After finishing each petal, gently push the stitches together so you have enough room to continue.
Many beginners worry when they reach the fourth petal because the ring starts to look crowded. Don’t stop or try to make a larger ring. Simply slide the existing stitches closer together and keep working.
By the time you crochet the fifth petal, some stitches may overlap slightly. That’s exactly what you want. The overlapping creates a fuller, rounder flower with nicely shaped petals.
If you’ve completed five petals and the flower looks balanced, you’ve done everything correctly.
Quick Written Pattern
If you’d like a simple version to glance at while crocheting, here’s the entire pattern in one place:
Skill Level: Beginner
Materials:
- Worsted weight (#4) yarn
- 4 mm crochet hook
- Scissors
- Yarn needle (optional)
Abbreviations:
- ch = chain
- sl st = slip stitch
- tr = triple crochet
Pattern:
Foundation:
Ch 6, join with a sl st to form a ring.
Repeat the following sequence 5 times:
- Ch 4
- 3 tr into the center ring
- Ch 4
- Sl st into the center ring
After completing the fifth petal:
- Ch 1
- Fasten off
- Weave in ends
That’s the entire project.
Once you’ve made one flower, you’ll probably memorize the pattern immediately.
Step 5: Fasten Off and Finish the Flower
After finishing your fifth petal, make one chain stitch.

Cut the yarn, leaving a small tail a few inches long. Pull that yarn tail completely through the loop on your hook and tighten it to secure your work.
Turn the flower over and locate both yarn tails.
Tie the tails together using a simple knot. This extra step helps prevent the flower from unraveling over time, especially if you plan to sew it onto another project.
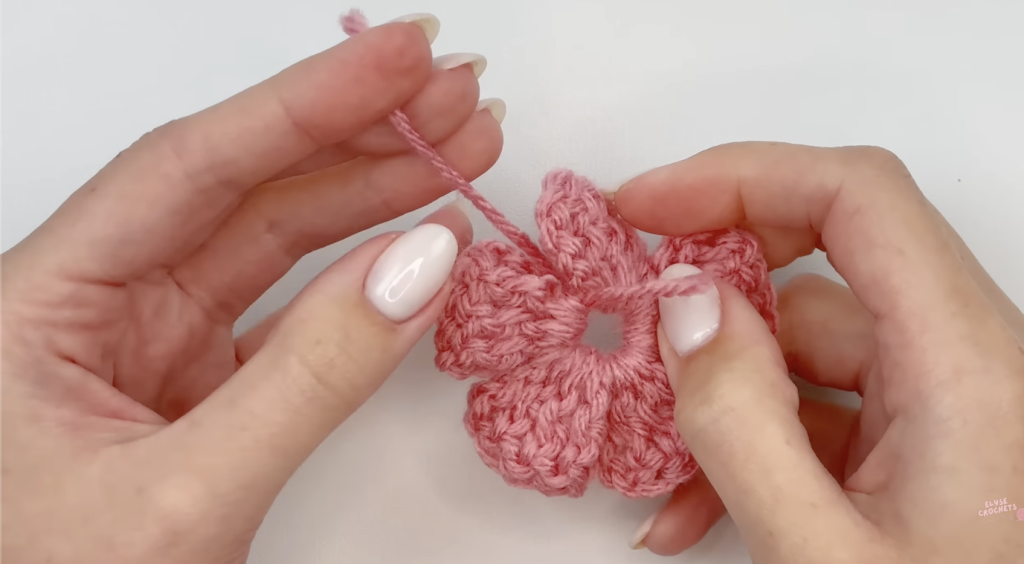
For the cleanest finish, use a yarn needle to weave the ends into the back of the stitches.
If you’re simply practicing or making temporary decorations, trimming the tails after securing them is usually fine. However, weaving in the ends always creates a more professional-looking result.
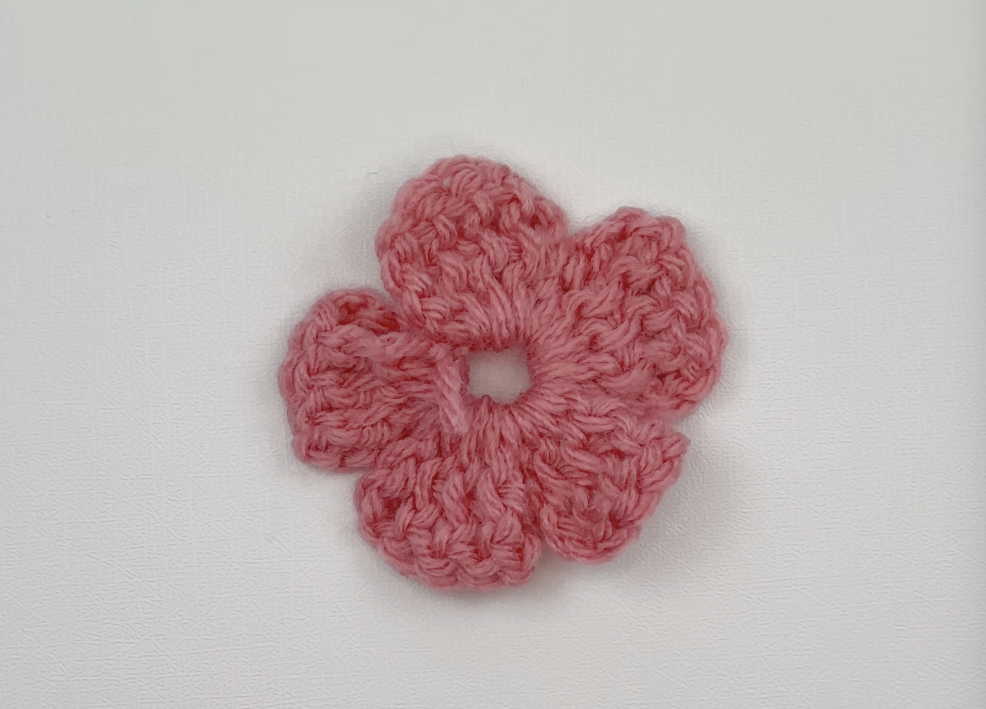
Once the tails are secured, your crochet flower is complete.
Tips for Changing the Flower Size
One of the best things about this pattern is how easy it is to customize.
If you’d like larger flowers, use bulky yarn and a bigger crochet hook. The stitch counts remain exactly the same, but the finished flower becomes much larger.
For tiny flowers, choose lightweight yarn and a smaller hook. Many crocheters use cotton thread and miniature hooks to create delicate flowers for jewelry, bookmarks, and decorative embellishments.
You don’t need to change the pattern itself. Simply changing your materials gives you completely different results.
Common Beginner Mistakes to Avoid
Twisting the Foundation Chain
Before joining your six chains into a ring, make sure the chain lies flat.
If the chain twists, the center ring can become uneven and make the petals harder to position correctly.
Working Into the Chains Instead of the Ring
Remember that every triple crochet and slip stitch goes into the center opening of the ring.
You are working around the chain circle, not into the individual chain stitches themselves.
This is one of the most common mistakes beginners make with flower patterns.
Worrying About Space for the Fifth Petal
By the fourth petal, the ring will feel crowded.
That’s completely normal.
Simply slide your stitches together as much as possible. The petals are supposed to sit closely together, and a little overlap actually improves the finished appearance.
Pulling the Chains Too Tight
The chain-four sections create the outer shape of each petal.
If your chains are extremely tight, the petals may curl inward. Try to maintain even tension so the flower opens nicely once it’s complete.
Creative Ways to Use Crochet Flowers
These little flowers can be used in countless projects.
You can sew them onto hats, tote bags, scarves, sweaters, blankets, and baby items. They also make beautiful embellishments for handmade gifts and greeting cards.
Many crocheters string several flowers together to create colorful garlands for bedrooms, nurseries, or parties.
They also work wonderfully as hair clips, brooches, bookmarks, keychains, and decorative accents on gift wrapping.
Because each flower uses only a small amount of yarn, they’re perfect for using up leftover scraps from larger crochet projects.
Final Thoughts
Simple projects often teach the most valuable skills, and this flower is a perfect example.
It helps beginners practice chains, slip stitches, and triple crochets without introducing complicated techniques like the magic ring. The repetitive petal pattern also builds confidence and makes the project relaxing to work on.
After you’ve made your first flower, try experimenting with different colors, yarn textures, and hook sizes. You’ll quickly discover how versatile this little pattern can be.
Before long, you’ll have a whole collection of handmade flowers ready to decorate everything from blankets and bags to gifts and home décor.