15 Creative Nail Polish Crafts to Make
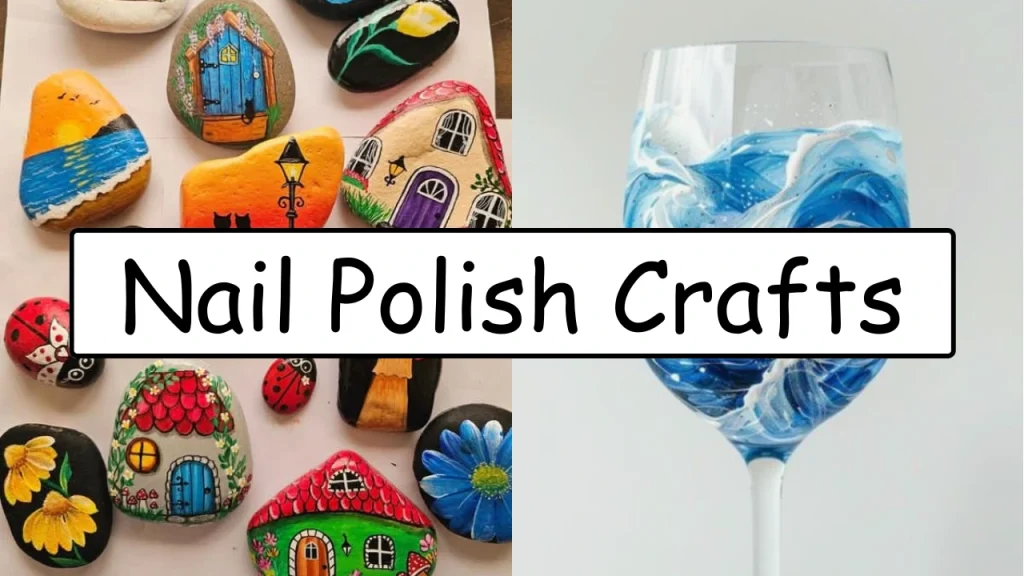
If you’ve got a few bottles of old nail polish sitting forgotten in a drawer somewhere, don’t toss them out. Nail polish isn’t only good for painting nails, it can be used to make colourful, unique crafts that are a lot easier to pull off than you’d expect. The glossy finish, the huge range of colours available, and how quickly it dries all make it a fun craft supply for total beginners and experienced DIY lovers alike.
Most nail polish crafts only need a handful of cheap and inexpensive materials, and the majority of these projects can be finished start to finish in under an hour. Whether you’re after a creative weekend activity, some handmade gift ideas for the holidays, or small items you might sell at a local craft fair or online, there’s something here worth trying.
Below are 15 of the best nail polish craft ideas out there, simple, affordable, and popular among people who do this regularly rather than just theoretical Pinterest projects that never work.
Table of Contents
1. Marble Coffee Mugs
Marble mugs are one of the most popular nail polish crafts around, mainly because they look elegant while being easy to make. Since the swirl pattern forms randomly on the water, every single mug comes out looking different, which means whatever you make is going to be completely one of a kind.
What You’ll Need
- Plain white ceramic mug
- Nail polish (2–3 colours)
- Disposable container filled with warm water
- Wooden stick or toothpick
- Rubber gloves
How to Make It
Add a few drops of nail polish onto the surface of the warm water, and work quickly here since polish starts setting almost immediately once it hits water. Swirl the colours together using your toothpick to create a marbled pattern, then slowly dip the outside of the mug down through the floating design.
Lift the mug back out carefully, let it dry completely somewhere undisturbed, and then clean up any excess polish that’s landed around the rim or handle.
Keep in mind these mugs are really meant to be decorative unless you go a step further and seal them with a proper food-safe coating. As they are, they’re perfect for holding pens, makeup brushes, paintbrushes, or a small plant on a desk or windowsill.
2. Marbled Flower Pots
Plain terracotta pots can look a little plain and boring sitting on a shelf, but nail polish gives them an almost instant colourful makeover with barely any effort involved. This project is especially great if you already enjoy growing herbs, succulents, or other small indoor plants and want the pots to match your style.
What You’ll Need
- Small terracotta flower pot
- Nail polish
- Bucket or large bowl of water
- Protective gloves
How to Make It
Drip several different nail polish colours onto the surface of the water and gently swirl them together with a stick until you’re happy with the pattern. Slowly dip the flower pot down into the water until the outer surface is fully coated with that beautiful marble effect.
Let it dry overnight before you plant anything in it, giving the polish plenty of time to fully cure and harden.
Bright, bold colours create a playful, fun look, while a combination of white, gold, and black produces a much more modern marble finish that ends up looking considerably more expensive than it cost to make.
3. Decorative Bobby Pins
If you’re after a genuine five-minute craft, decorative bobby pins are hard to beat for how little time and effort they take. They’re cheap to make and can easily be customized to match different outfits or seasons depending on your mood.
What You’ll Need
- Plain metal bobby pins
- Nail polish
- Small rhinestones or pearls (optional)
- Clear top coat
How to Make It
Paint the flat side of each bobby pin with one or two coats of nail polish, letting each coat dry before adding the next. You can keep them as solid colours, or get a bit more creative with dots, stripes, tiny flowers, or even a scattering of glitter for extra sparkle.
Finish everything off with a clear top coat, which helps the design last a lot longer and hold up to everyday wear and tear.
These also make cute stocking stuffers, small birthday gifts, or little extras to tuck into a bigger handmade gift set for someone.
4. Colourful Wooden Bead Jewellery
Wooden beads absorb nail polish colour really beautifully, which makes them ideal for this kind of craft. You can turn them into bracelets, necklaces, earrings, or even a decorative garland depending on what you’re in the mood to make.
What You’ll Need
- Unfinished wooden beads
- Nail polish
- String, elastic cord, or jewelry wire
How to Make It
Paint each bead individually, and let it dry completely before adding a second coat if the colour needs it. You can create rainbow patterns, go for a metallic finish, or stick with simple colour combinations that match your own personal style.
Once everything’s fully dry, string the beads together to create bracelets or necklaces. Mixing your freshly painted beads in with some natural, unpainted wooden beads creates a modern handmade look that does really well at craft markets.
5. Marble Phone Cases
A plain clear phone case becomes so much more interesting once it’s got a colourful marble design running across it. And since no two marble patterns ever turn out exactly alike, your phone ends up with a one-of-a-kind look nobody else will have.
What You’ll Need
- Clear plastic phone case
- Nail polish
- Bowl of warm water
- Toothpick
- Gloves
How to Make It
Drop several colours of nail polish onto the surface of warm water and gently swirl them together into a pattern you like. Slowly dip the outside of the phone case down through the design, then carefully lift it back out and let it dry fully before using it again.
Metallic shades mixed together with white or black tend to create a stylish, sophisticated design, while brighter, bolder colours give the case a much more fun and playful appearance instead.
6. Painted Glass Vases
Glass vases don’t have to stay plain and transparent forever. A bit of nail polish can completely transform how they look and help them match the rest of your home decor a lot better.
What You’ll Need
- Clear glass vase
- Nail polish
- Cotton swabs
- Rubbing alcohol
How to Make It
Clean the vase thoroughly with rubbing alcohol first, since any leftover residue or oils can stop the polish from sticking properly. From there you can paint small dots, stripes, abstract shapes, or even try marbled sections around the outside of the vase.
Let each layer dry fully before adding another colour on top, otherwise things can smudge together in ways you don’t want.
These decorative vases look lovely holding fresh flowers, dried flowers, or artificial arrangements placed around different rooms of the home.
7. Decorative Stones and Paperweights
Smooth river rocks make excellent little canvases for nail polish art. They’re fun and low pressure to decorate, and they can be used just as easily indoors as they can outdoors in a garden.
What You’ll Need
- Smooth stones
- Nail polish
- Clear protective sealer
How to Make It
Paint geometric designs, small flowers, hearts, polka dots, or any colourful pattern that comes to mind directly onto each stone. Once everything’s completely dried, apply a clear protective sealer over the top to help the finish last a lot longer without chipping or fading.
These painted stones can be used as paperweights, scattered around as garden decorations, kept as desk accessories, or given as thoughtful handmade gifts.
8. Handmade Magnets
Homemade magnets are one of the easiest nail polish crafts for anyone just starting out. They’re cheap, only need a few basic supplies, and make excellent gifts for almost anyone.
What You’ll Need
- Flat glass gems or wooden circles
- Nail polish
- Strong craft magnets
- Craft glue
How to Make It
Decorate the front of each glass gem or wooden disc with colourful nail polish designs of your choosing. You could go for a marble effect, simple little flowers, colourful stripes, or a bit of glitter for extra shine.
Once everything’s fully dried, glue a small magnet onto the back of each piece.
These magnets look great on a fridge, an office filing cabinet, or a magnetic board. They’re also popular items for school fundraisers, craft fairs, and small handmade gift baskets since they’re affordable to make and so easy to personalize for whoever you’re giving them to.
9. Marbled Christmas Ornaments
If you enjoy making seasonal decorations, marbled Christmas ornaments are a fun project worth adding to your list. They’re cheap to put together and look beautiful hanging on a tree or displayed somewhere around the house during the holidays.
What You’ll Need
- Clear plastic or glass ornaments
- Nail polish (2–3 colours)
- Bowl of warm water
- Toothpick
- Gloves
How to Make It
Drop a few different colours of nail polish onto the surface of warm water and gently swirl them together into a marbled pattern. Dip the ornament down into the design, then carefully remove it and set it aside to dry completely.
Classic holiday colours like red, green, gold, and silver all work really well for this, though you can also lean into white and blue for more of a winter inspired look instead. These ornaments make thoughtful handmade gifts during the holiday season too.
10. Decorative Picture Frames
A plain wooden or plastic picture frame can easily become a colourful piece of home decor with just a little nail polish and some time.
What You’ll Need
- Plain picture frame
- Nail polish
- Small paintbrush (optional)
- Clear top coat
How to Make It
Paint the edges of the frame using solid colours, stripes, polka dots, or abstract patterns depending on what fits the room it’s going into. If you’d rather have a marble effect, try using the water marbling technique on removable frame pieces if that’s possible with your particular frame.
Once everything’s dry, finish it off with a clear top coat to help protect the design over time. These frames work well for displaying family photos, travel pictures, or a favorite inspirational quote somewhere in the house.
11. Marbled Coasters
Handmade coasters are practical, attractive, and easy to personalize for whoever you’re making them for. They’re also one of the most popular DIY gifts out there simply because almost everyone can use a set.
What You’ll Need
- Ceramic tiles or plain wooden coasters
- Nail polish
- Bowl of warm water
- Felt pads
- Clear waterproof sealer
How to Make It
Create a marbled design by swirling nail polish across the surface of warm water, then dip each coaster carefully into the pattern one at a time. Let the coasters dry completely before applying a waterproof sealer over the top of each one.
Attach felt pads underneath to help protect furniture from scratches once they’re in use. Every single coaster will end up with its own unique marble pattern, which makes each finished set feel one of a kind.
12. Decorative Candle Holders
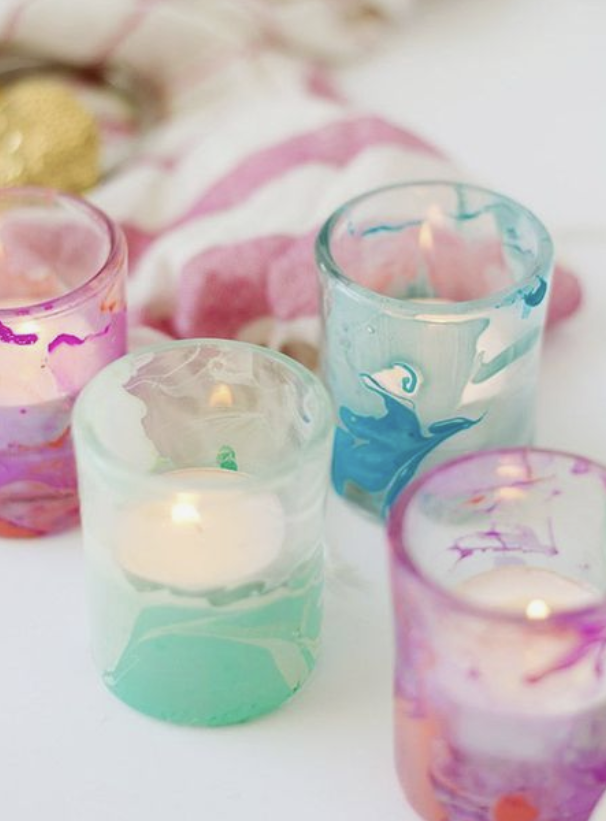
Glass candle holders look considerably more interesting once they’ve got some colourful nail polish detailing on them. This project works well whether you’re decorating for your own home or putting together handmade gifts for someone else.
What You’ll Need
- Glass candle holders
- Nail polish
- Cotton swabs
- Rubbing alcohol
How to Make It
Clean the glass thoroughly with rubbing alcohol before you start decorating it. Paint simple dots, abstract lines, floral designs, or marble patterns around the outside of the holder, letting each layer dry fully before adding any additional details on top.
One important thing to remember here, keep all the nail polish strictly on the exterior of the holder only. Since nail polish is flammable, you should never apply it inside the holder or anywhere it could come into direct contact with an actual flame.
13. Resin-Style Keychains
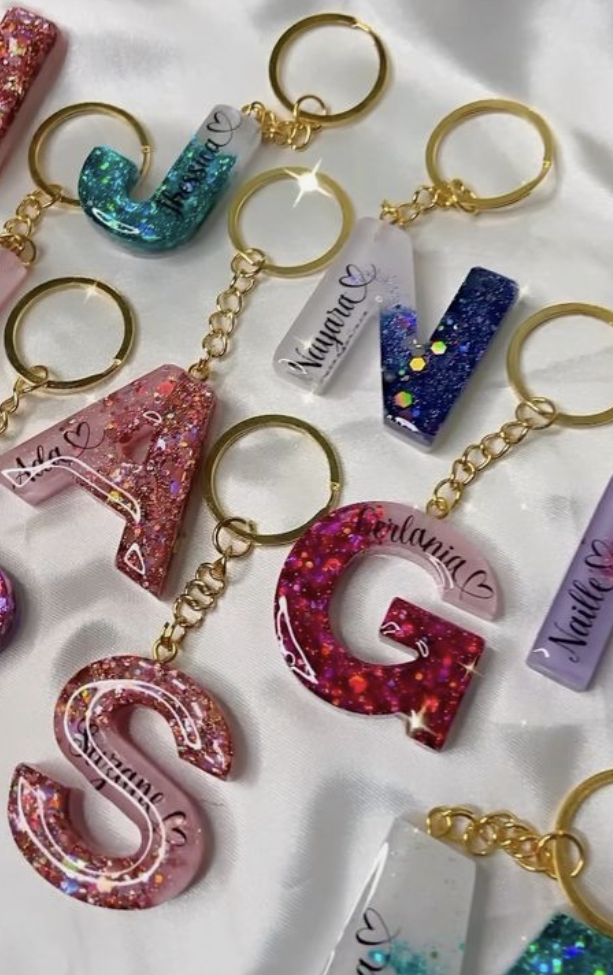
Colourful keychains are fun to make and easy to customize depending on your personal style. Nail polish can add bright swirls and decorative little details to acrylic blanks or resin keychain pieces without much effort.
What You’ll Need
- Acrylic or resin keychain blanks
- Nail polish
- Key rings
- Clear protective top coat
How to Make It
Paint swirls, colour blocks, or a marble effect directly onto the blank piece. You can also work in a bit of glitter nail polish if you want some extra sparkle in the mix. Once everything’s fully dry, apply a clear top coat to help reduce scratches that come from everyday use.
Personalized keychains like these are popular at craft fairs since they’re affordable, lightweight to carry around, and easy to gift to almost anyone.
14. Decorative Wine Glasses
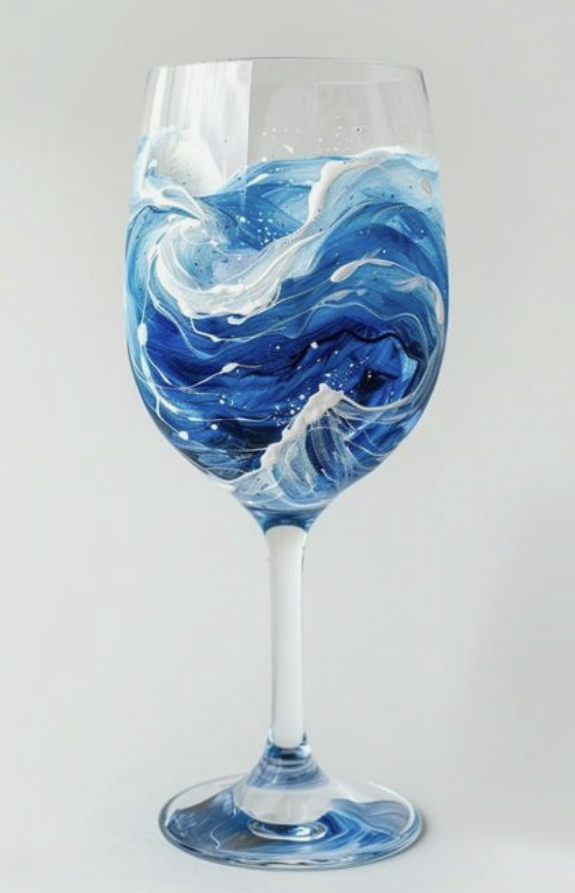
If you enjoy making handmade home decor, decorative wine glasses are another simple project that’s worth trying at least once.
What You’ll Need
- Plain wine glasses
- Nail polish
- Cotton swabs
- Rubbing alcohol
How to Make It
Paint small floral designs, dots, hearts, or geometric patterns onto the outside of the glass, allowing each coat to dry fully before adding any more detail on top.
Worth noting, these glasses should really be used for decorative purposes only unless they’re finished with a proper food-safe product afterward. A lot of people end up displaying them on a shelf, using them as party centrepieces, or turning them into candle holders instead of drinking out of them.
15. Marbled Jewellery Dishes
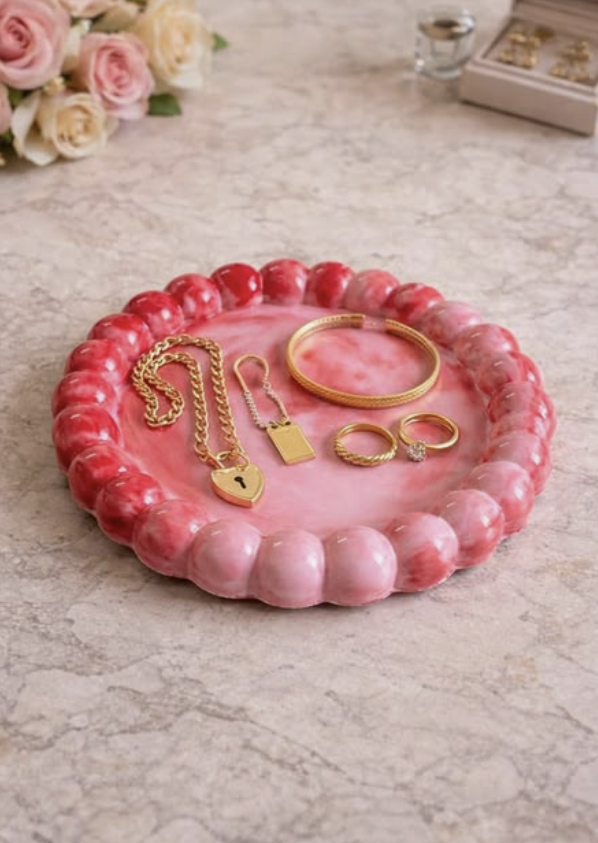
Small ceramic jewellery dishes are perfect for holding rings, earrings, bracelets, and other everyday accessories that would otherwise end up scattered across a dresser. Adding a nail polish marble finish makes them look considerably more stylish and handmade.
What You’ll Need
- Small ceramic trinket dish
- Nail polish
- Bowl of warm water
- Toothpick
- Gloves
How to Make It
Create a marble pattern by swirling nail polish across the surface of warm water, then carefully dip the outside of the dish down into the design. Let it dry completely before handling it again.
Gold, white, grey, and blush pink together create a modern, elegant look, while brighter colours make the dish stand out a lot more if that’s the vibe you’re after. These also make beautiful handmade gifts for birthdays, Mother’s Day, or weddings.
Tips for Making Crafts with Nail Polish
A handful of simple tips can make your finished projects look cleaner and last a lot longer.
Work in a well-ventilated room since nail polish gives off pretty strong fumes that build up quickly in an enclosed space. Use inexpensive nail polish for your larger craft projects to keep costs down, since you’ll likely go through more than you’d expect. Protect your work surface with newspaper or a disposable tablecloth before you start, since drips and spills happen more than you’d think.
Work quickly when you’re creating marble designs specifically, because nail polish starts drying fast the moment it hits water and you’ll lose your window for swirling it properly. It’s also worth testing new colour combinations on some scrap material first before committing to your final project, just so you know what the colours look like together.
Let every project dry completely before you handle it again, otherwise you risk fingerprints and smudges ruining the finish. And finish decorative items with a suitable clear sealer when it makes sense to, since that helps protect the design from everyday scratches going forward.
Safety Tips
While nail polish is fun to craft with, it’s worth taking it seriously in terms of how you use it.
Always keep nail polish well away from open flames, candles, and any other heat sources, since it’s highly flammable and this matters more than people realize. Work in a room with decent airflow to cut down on how much you’re exposed to the fumes, and wear gloves if you’re doing the water marbling technique specifically, since it keeps your hands from ending up stained.
If kids are helping make any of these crafts, adult supervision is recommended throughout the whole process. And once you’re finished for the day, store your nail polish bottles tightly closed so they don’t dry out and become unusable for next time.
Final Thoughts
Nail polish is one of those craft supplies a lot of people already have sitting around the house, which makes it a really inexpensive way to start making unique DIY projects without spending much extra money. From colourful flower pots and marbled coasters to handmade keychains and decorative Christmas ornaments, there are plenty of fun ideas here you can make without needing any advanced crafting skills or experience.
If you’re simply after a creative weekend activity, these projects are easy enough for complete beginners to enjoy from start to finish. And if you’re hoping to earn a little extra money on the side, quite a few of these crafts can easily be customized and sold as handmade gifts or home decor items at markets or online. Start with a couple of simple projects, experiment with different colour combinations as you go, and you’ll quickly discover just how versatile nail polish is outside of your usual manicure routine.