How to Make a Simple Granny Square (Beginner Friendly Guide)
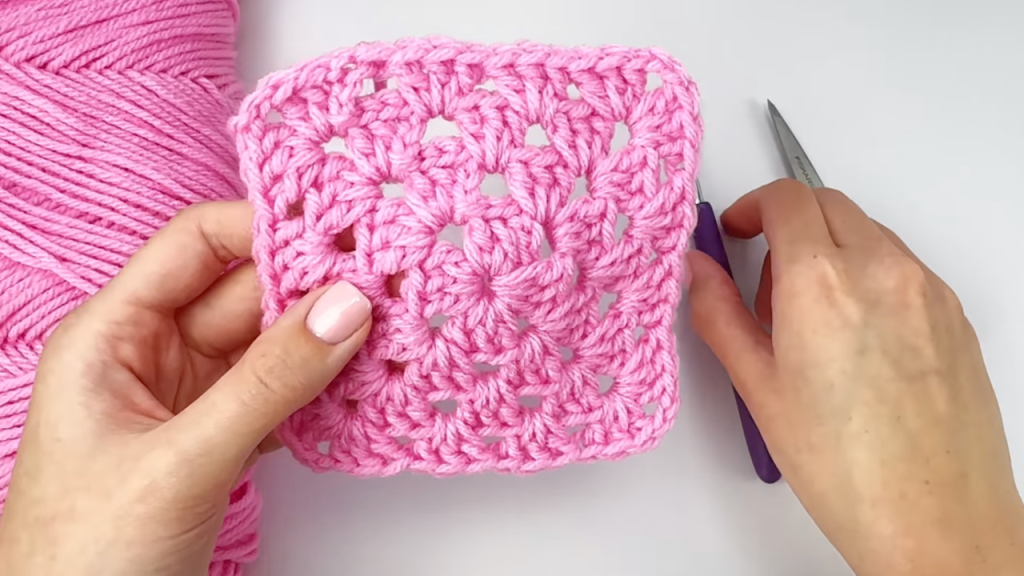
Granny squares are among the very first things crocheters learn. They’re simple, relaxing to make, and once you know how, you can turn them into blankets, tote bags, sweaters, pillow covers, basically anything.
If you’ve never made one before, you need not worry. This tutorial walks through everything step by step that’s meant for beginners. You won’t need to figure out a magic circle, and the pattern just repeats over and over, which makes it way easier to get into your hands and your head.
By the time you finish this guide, you’ll know how to and have a classic four-round granny square sitting in front of you. And if you want it a little bit bigger, you just keep repeating the same pattern as many times as you wish.
Before You Start
This tutorial is beginner friendly, but you’ll want to already know these four basic stitches:
- How to make a slip knot
- How to chain (ch)
- How to make a slip stitch (sl st)
- How to make a double crochet (dc)
If those four are already in your toolkit, you’re good to go.
Materials You’ll Need
- 1 skein of worsted weight (#4) acrylic yarn
- A 5 mm (H-8) crochet hook
- Scissors
- A yarn needle for weaving in ends
You can swap in a different yarn weight if you so wish. Just keep in mind thicker yarn gives you a bigger square and thinner yarn gives you a smaller one. The pattern itself stays exactly the same either way.
Crochet Abbreviations
We’ll be using these throughout:
- ch = chain
- dc = double crochet
- sl st = slip stitch
- sp = space
What Is a Cluster?
You’re going to see the word “cluster” a lot in this tutorial, so let’s get it out of the way early.
For this pattern, a cluster is just 3 double crochets worked into the same space. That’s it.
So, whenever the instructions say “make a cluster,” all that means is you’re placing 3 double crochets into one spot.
The Easy Granny Square Rule
Before diving in, it helps to lock these three rules into your memory:
- Every corner = 3 dc, ch 2, 3 dc
- Every side space = 3 dc
- Every round ends with a slip stitch
Once these three rules click, granny squares stop feeling complicated almost immediately.
Finished Size
Using worsted weight yarn and a 5 mm hook, your finished four-round square should land somewhere around 4 to 4½ inches across.
Everyone’s tension is a little different though, so don’t worry if yours comes out slightly bigger or smaller. That’s completely normal.
Step 1: Make a Slip Knot
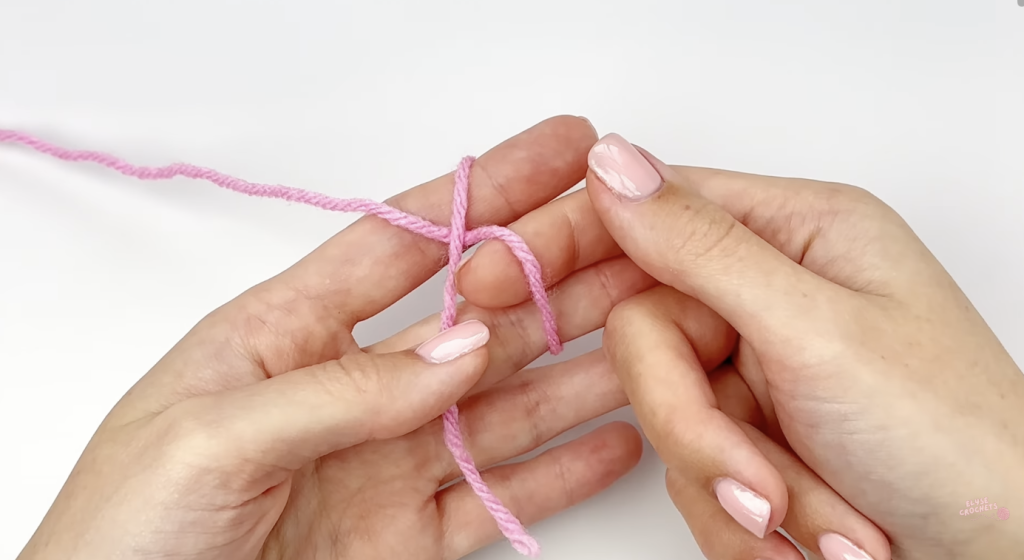
Start with a slip knot. Wrap your yarn around your fingers to form a loop, pull one strand through the other to create the knot, then slide your hook into that loop.
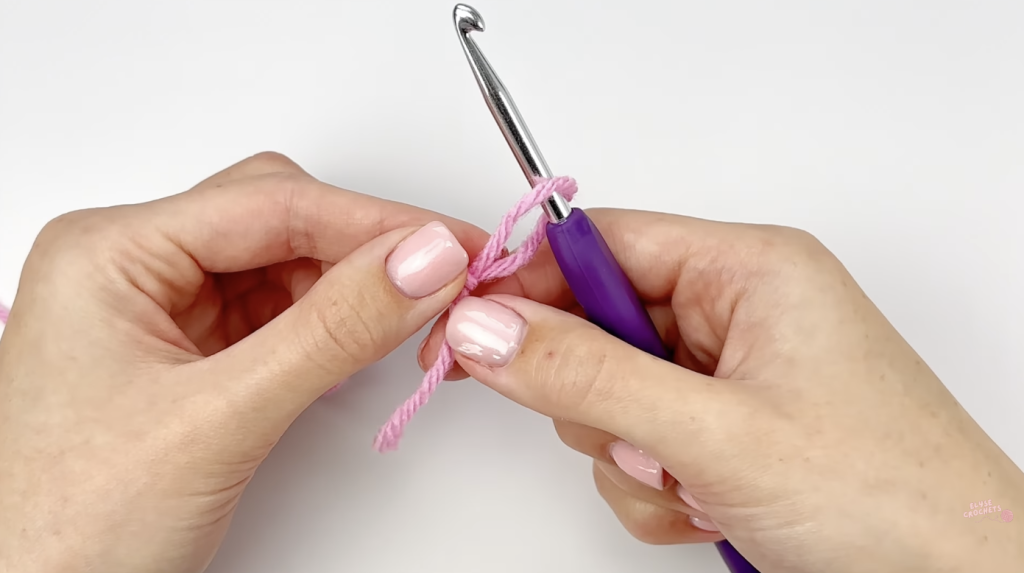
Give the yarn tail a gentle pull until the knot sits comfortably on your hook. You want it to move freely, not feel stuck or too tight.
Step 2: Chain 4
Now chain 4. To make a chain, yarn over and pull the yarn through the loop already sitting on your hook. Do those four times total.
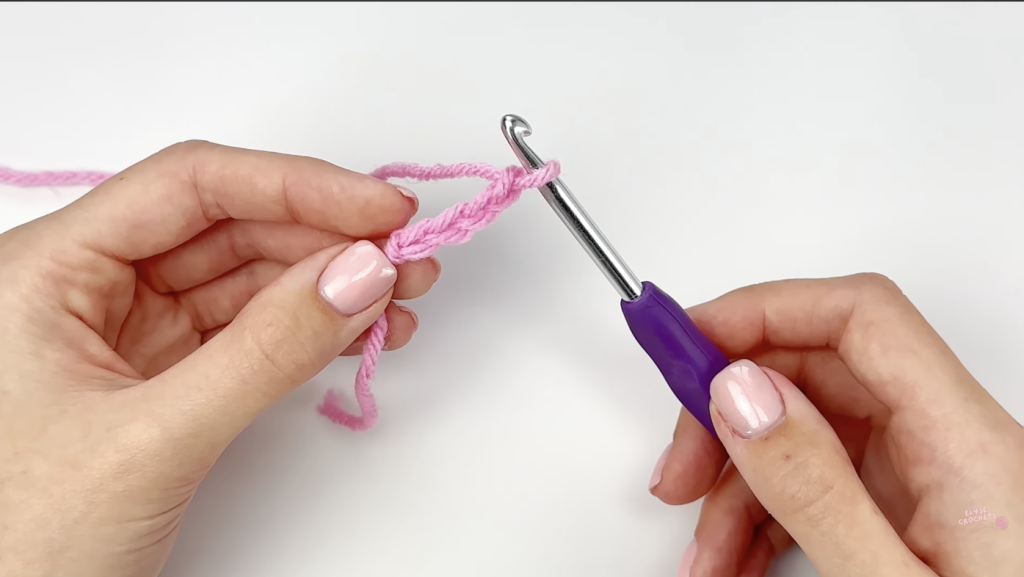
These four chains are going to form the centre ring your whole square builds around.
Step 3: Join Into a Ring
Insert your hook into the very first chain you made. Yarn over, pull up a loop, then pull that loop straight through the loop already on your hook.
That’s a slip stitch. You should now be looking at a small ring in the centre, and that ring is where all of Round 1 happens.
Round 1
This round is all about building your four corners.
Step 1: Chain 4
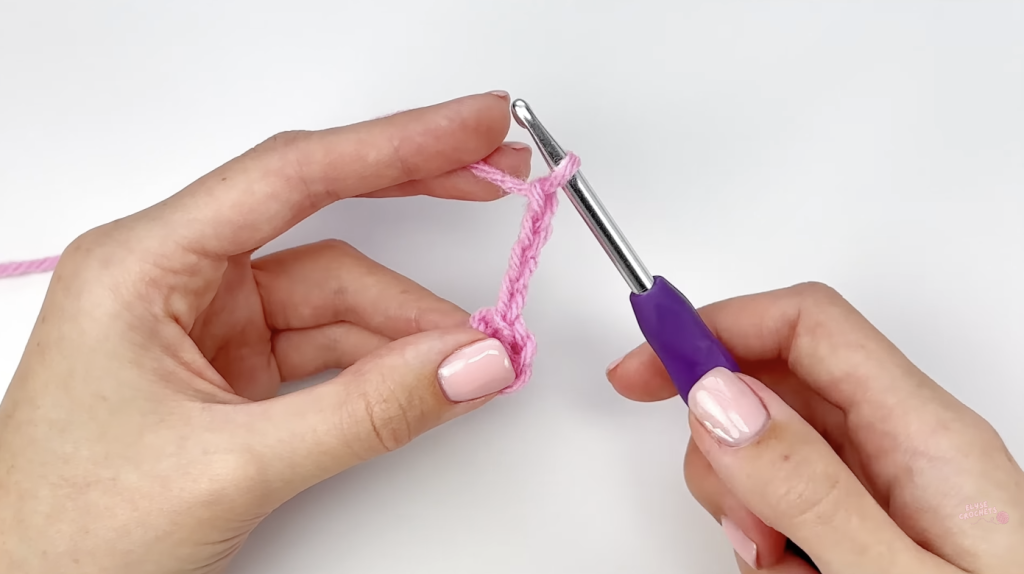
Chain 4. These chains count as your starting height for the round and you’ll also use them later to join the round.
Step 2: Make 2 Double Crochets into the Centre Ring
Work 2 double crochets into the centre ring. Combined with your beginning chains, this is your first cluster.
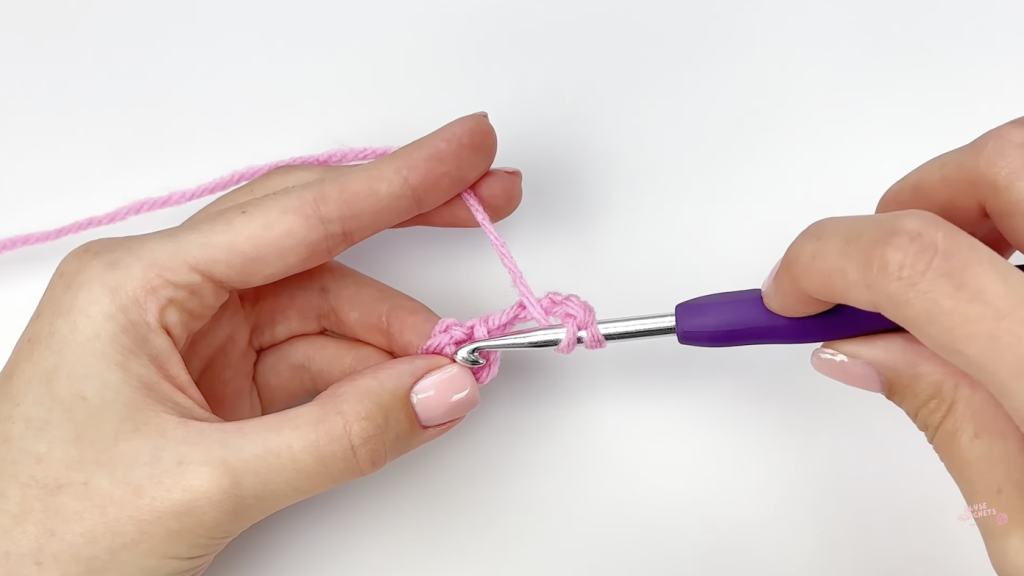
Step 3: Chain 2
Chain 2. This forms your very first corner.
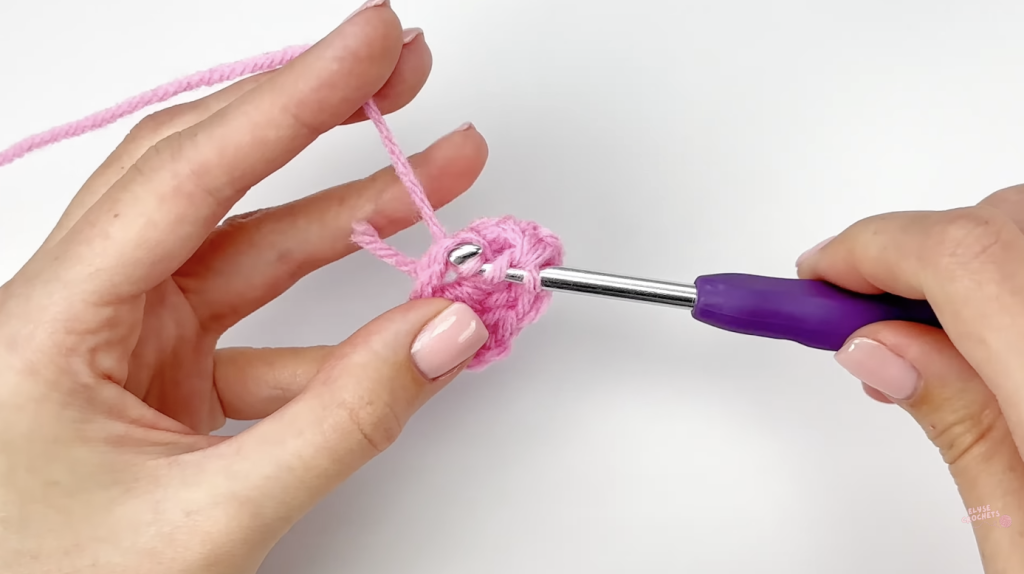
Remember, every corner in this pattern is always:
3 dc, ch 2, 3 dc
Step 4: Create the Remaining Corners
Into the centre ring, work:
3 dc, ch 2, 3 dc, ch 2, 3 dc, ch 2, 3 dc, ch 2
Once that’s done, all four corners are complete.
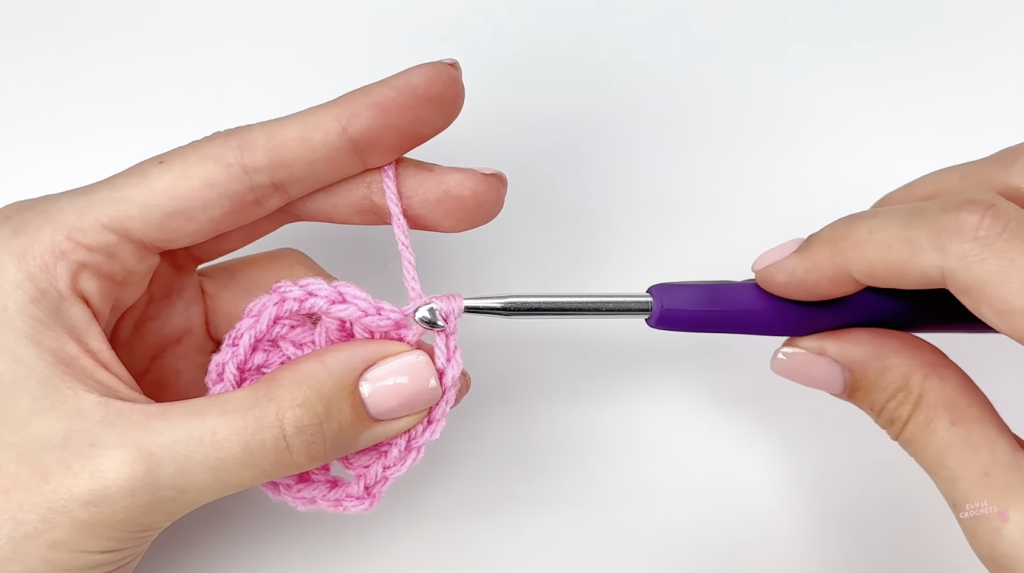
Round 1 Stitch Check
Pause here and count. You should have:
- 4 clusters total
- 4 chain-2 corners
- The beginning of a square shape
If anything looks off, this is the moment to recount before moving forward.
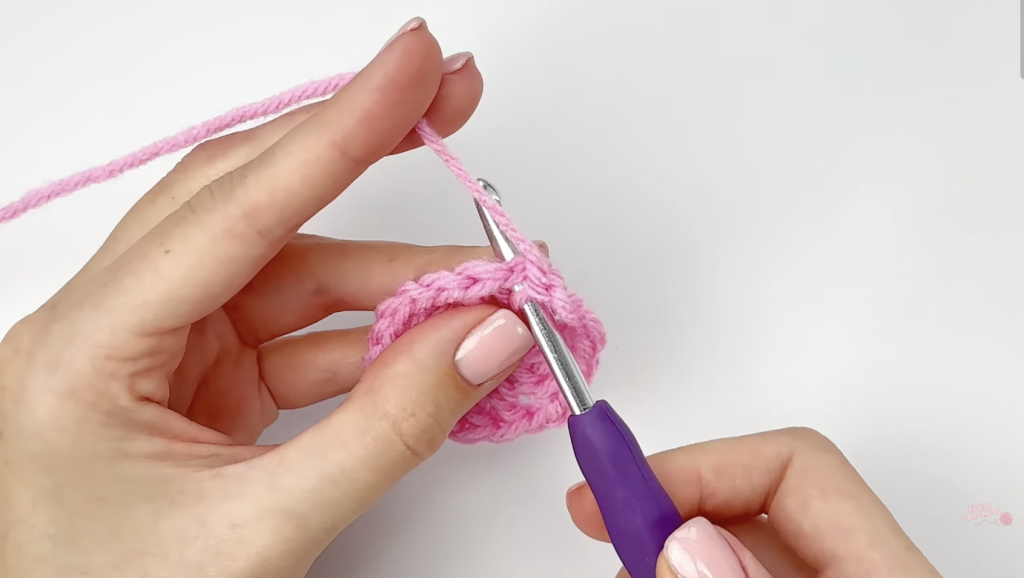
What Your Work Should Look Like
You should be looking at a small square with four clear corners. The centre hole should still be open and visible, and each corner should have its own chain-2 space.
Finish Round 1
Insert your hook into the top of your beginning chain-4 and slip stitch to join. Round 1 is done.
Round 2
This round introduces something you’ll repeat constantly from here on, so pay attention.
The only spots you’ll be working into are the corner spaces.
Step 1: Move Into the First Corner
You’re sitting at the top of your previous stitches right now. Slip stitch your way across until you land inside the first chain-2 corner space.
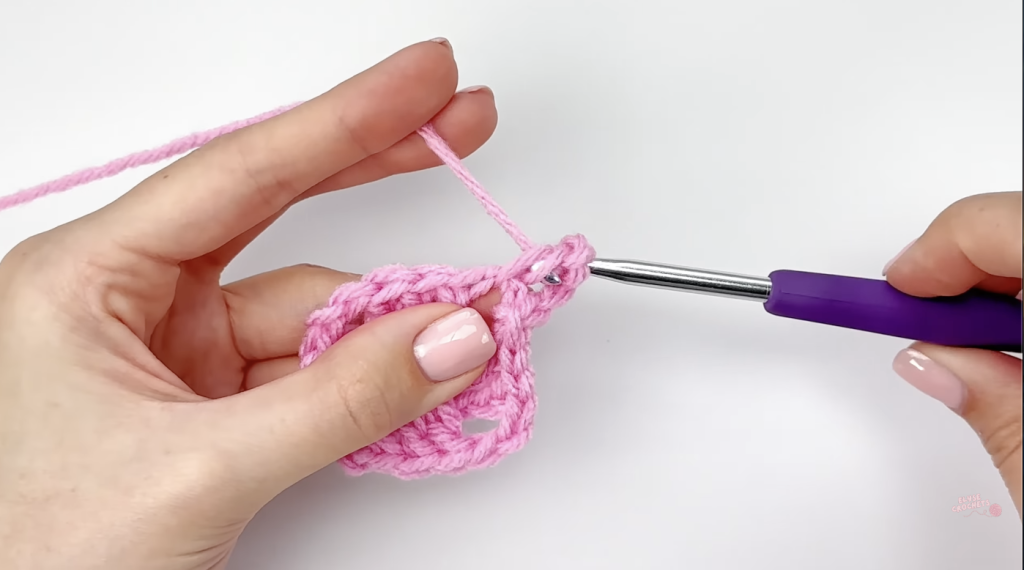
Step 2: Create Your First Corner
Chain 4. Work 2 double crochets into that same corner space. Chain 2. Then work 3 more double crochets into that same space.
That’s a complete corner. well done if this is your first one.
Remember, corner = 3 dc, ch 2, 3 dc, and that formula never changes from here on.
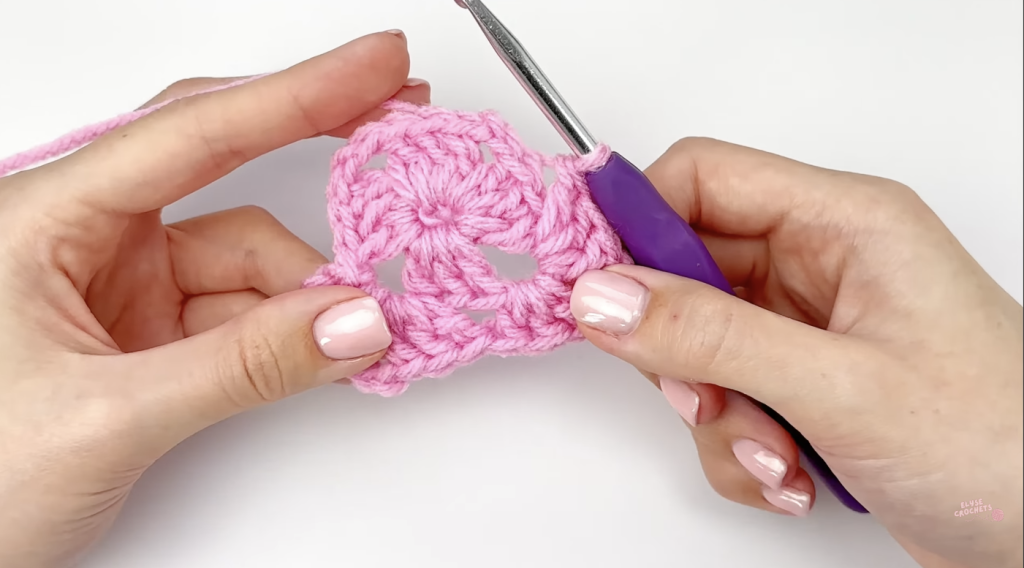
Step 3: Repeat in Every Corner
Move to the next chain-2 space and work 3 dc, ch 2, 3 dc. Repeat this in all four corners.
There are no side spaces to worry about yet in this round. You’re purely working corners right now.
Round 2 Stitch Check
You should have:
- 4 corners
- 8 clusters total
- No side clusters between corners yet
Everything should still be lying flat at this point.
What Your Work Should Look Like
Your square should look noticeably bigger now. Each corner should have two groups of 3 double crochets with a chain-2 space sitting between them. If a corner’s missing that structure, it’s worth fixing before you continue.
Finish Round 2
Join with a slip stitch into the top of your beginning chain-4. Round 2 done.
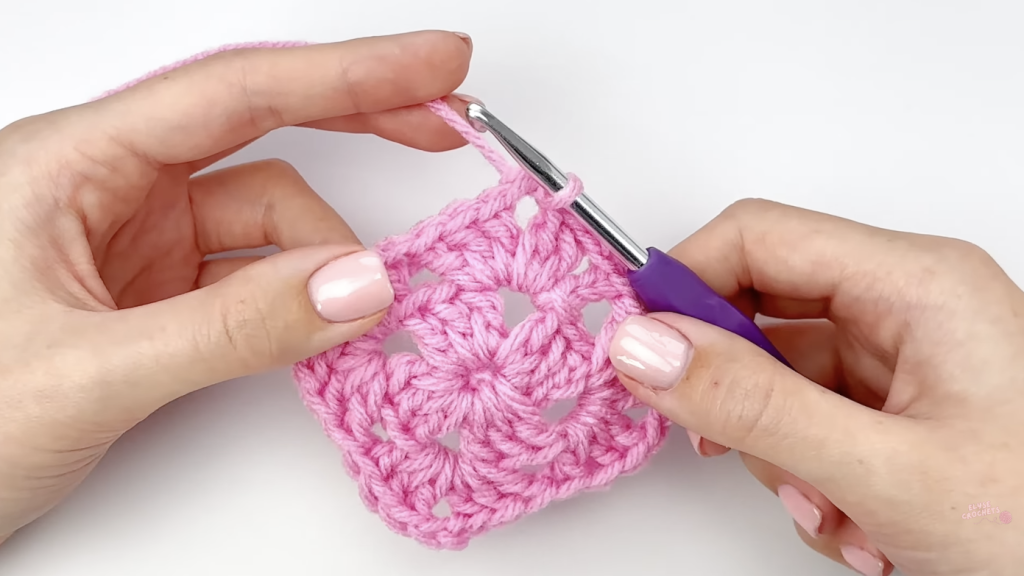
Round 3
This is where the classic granny square look really starts coming together.
Corners still work exactly the same, but now you’ll also have spaces between them, and those gaps get filled with regular granny clusters. It sounds like more to track but it really isn’t.
Step 1: Move to the First Corner Space
Same as before, slip stitch across until you’re inside the first chain-2 corner space.
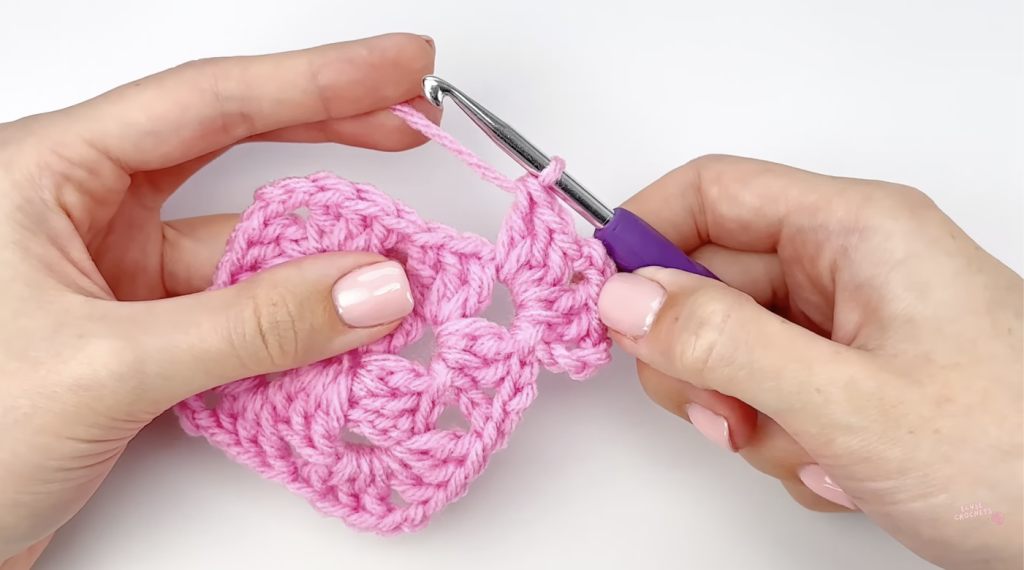
Step 2: Make Your First Corner
Chain 4. Work 2 double crochets into that corner space. Chain 2. Work 3 more double crochets into the same space. Corner complete.
That rule again, corner = 3 dc, ch 2, 3 dc, never changes.
Step 3: Work Into the Side Space
You should now see one open space between this corner and the next one. Work 3 double crochets into it. That’s your granny cluster. No chain needed between side clusters here.
Step 4: Make the Next Corner
When you reach the next corner space, work 3 dc, ch 2, 3 dc. Then drop another cluster of 3 double crochets into the next side space.
Keep this going all the way around the square.
The Pattern for Round 3
If it helps to picture it, think of this round as:
Corner → Side Cluster → Corner → Side Cluster → Corner → Side Cluster → Corner → Side Cluster
That’s the whole round.
Round 3 Stitch Check
Before joining, count again. You should have:
- 4 corners
- 4 side clusters
- 12 clusters total
Each side of your square should show one corner on either end with one cluster sitting in the middle.
What Your Work Should Look Like
Your square should be looking pretty defined by now. The sides should be straight, with exactly one cluster between each pair of corners. If one side has more clusters than the others, you’ve probably slipped an extra group in somewhere.
Finish Round 3
Insert your hook into the top of your beginning chain-4 and slip stitch to close. Round 3 complete.
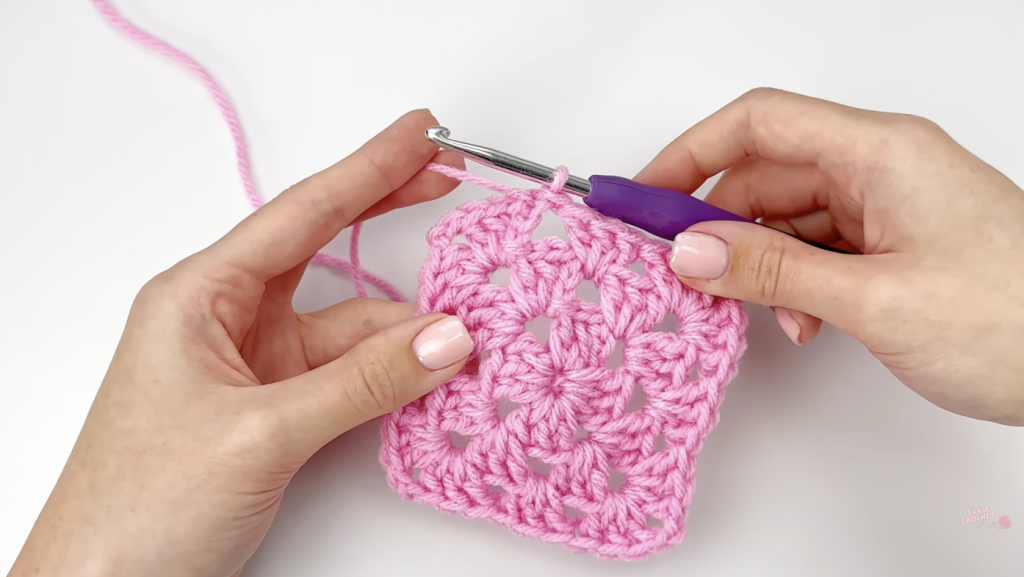
Round 4
Same pattern as before, just with one small change. Each side now has two spaces instead of one, which means two side clusters per side instead of just one.
Step 1: Move Into the First Corner
Slip stitch across to reach the first chain-2 corner space.
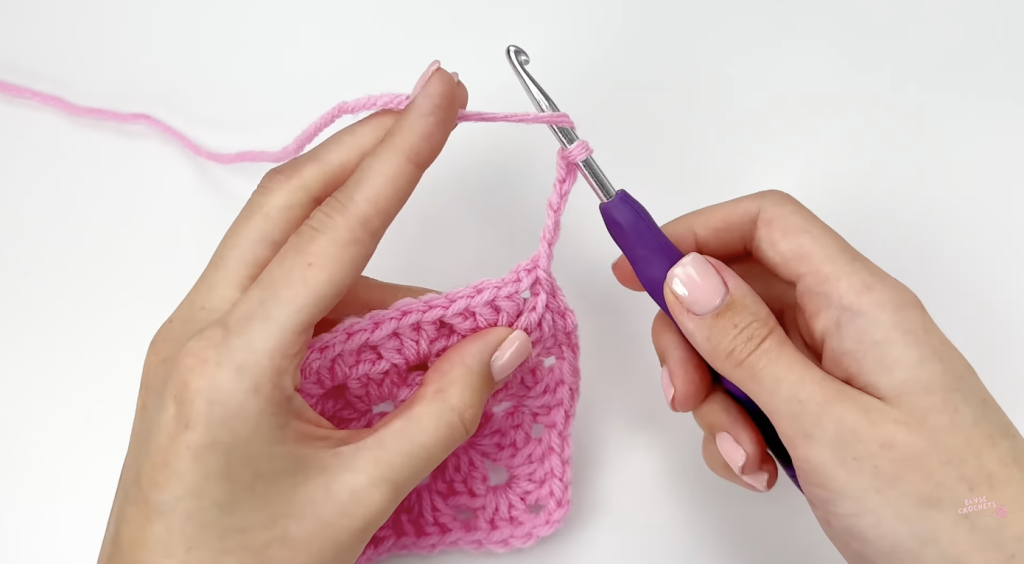
Step 2: Make Your Corner
Chain 4. Work 2 double crochets into the same corner space. Chain 2. Work 3 more double crochets into that space. Corner done.
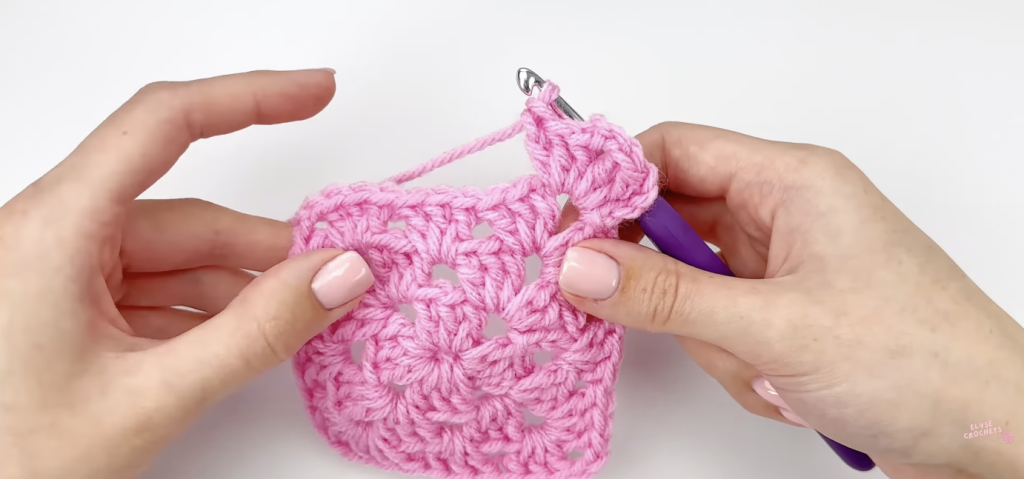
Step 3: Work Into the Side Spaces
You’ll now have two spaces between corners. Work 3 double crochets into the first one, then 3 double crochets into the second one. Every side space gets its own cluster.
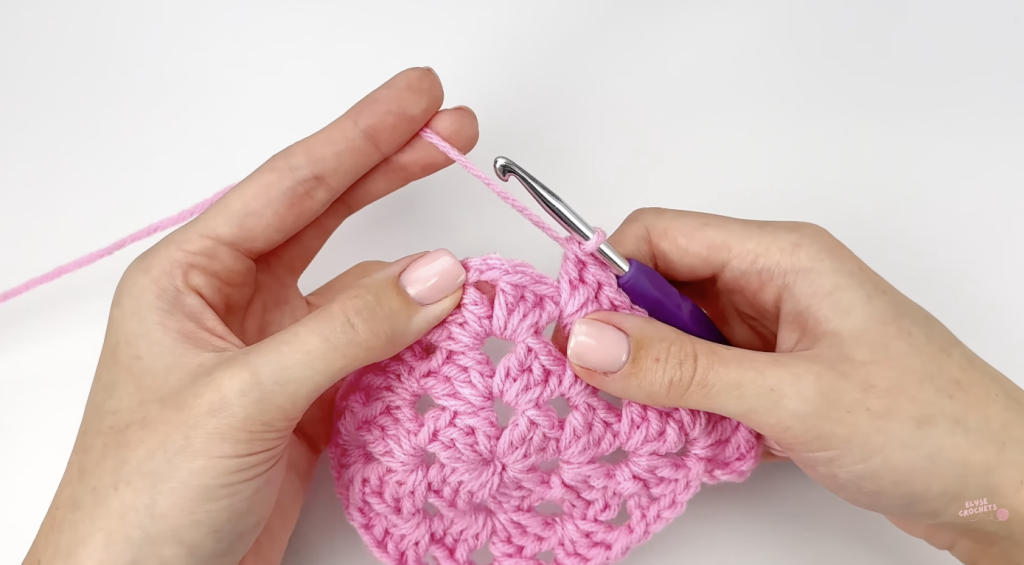
Step 4: Create the Next Corner
At the next corner space, work 3 dc, ch 2, 3 dc, then keep placing a cluster into every side space as you go.
Repeat all the way around.
The Pattern for Round 4
Think of it as:
Corner → Cluster → Cluster → Corner
Repeat that sequence four times total.
Why Do More Spaces Appear Each Round?
This trips up a lot of beginners, so don’t worry if it feels confusing at first.
Every new round adds one extra space to each side. So:
- Round 2: 0 side spaces
- Round 3: 1 side space
- Round 4: 2 side spaces
- Round 5: 3 side spaces
- Round 6: 4 side spaces
The bigger the square gets, the more side spaces you’ll need to fill. But the rule itself never changes, one cluster goes in every side space, no matter how many there are.
Round 4 Stitch Check
Count everything before joining. You should have:
- 4 corners
- 8 side clusters
- 16 clusters total
Each side should show a corner, two clusters, then another corner.
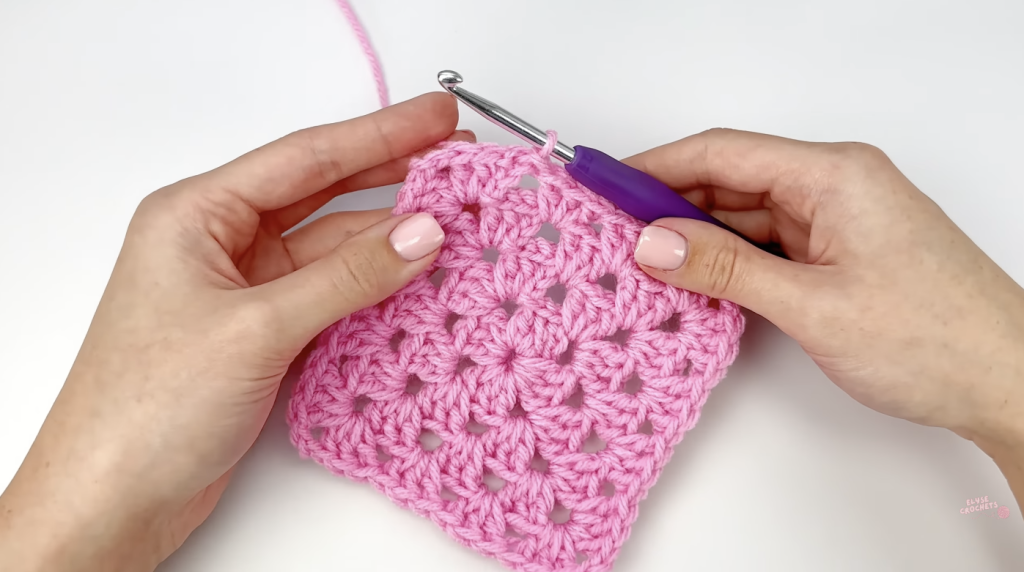
What Your Work Should Look Like
Your square should sit flat on a table at this point. Edges should be straight and all four corners should look basically identical to each other.
If your square is curling inward, your tension is probably a bit too tight. If the edges look wavy instead, your stitches are likely a touch too loose.
Finish Round 4
Join with a slip stitch into the top of your beginning chain-4. Your granny square is officially finished.
How to Make Your Granny Square Bigger
The really nice thing about granny squares is that the pattern just doesn’t change no matter how big you go. For every new round, just follow this:
- Slip stitch into the first corner space
- Chain 4
- Make a corner: 3 dc, ch 2, 3 dc
- Work one cluster into every side space
- Make another corner
- Repeat all the way around
- Join with a slip stitch
That’s the entire pattern. Once it clicks, you can keep going as large as you want.
Fastening Off
Once you’ve hit your desired size, it’s time to wrap up things. Cut your yarn, leaving a tail about 6 inches long. Pull that tail all the way through the final loop on your hook and gently tighten.
Use a yarn needle to weave the tail through the backs of several stitches, changing direction once or twice so it stays secure and doesn’t work itself loose later. Do the same thing with your starting tail too.
Trim any extra yarn and your granny square is properly finished.
Common Beginner Mistakes
My square is curling up
This usually means your stitches are a bit too tight. Try loosening your grip slightly or move up to a bigger hook.
My square looks wavy
The opposite problem, your stitches are probably too loose. Focus on keeping your tension even and consistent throughout.
One side has more clusters than another
Stop and count. Every side needs the same number of side clusters, so you’ve likely added an extra one into the wrong space somewhere along the way.
My corners don’t look right
Every single corner needs to be 3 dc, ch 2, 3 dc. If you skip the chain-2 part, your square won’t hold its shape properly.
I keep losing my place
Take thirty seconds at the end of every round to count your clusters. Catching a small mistake right away is so much easier than trying to unpick it several rounds later.
Quick Granny Square Cheat Sheet
Worth saving this for next time:
- Corner = 3 dc, ch 2, 3 dc
- Side space = 3 dc
- Move to the next round using slip stitches
- Finish every round with a slip stitch
- Every new round adds one more side space
That covers all of it.
Final Thoughts
Learning the classic granny square is among the most useful things a crocheter can pick up early on. Once you’ve got this simple pattern down, blankets, scarves, tote bags, sweaters, pillow covers, table runners, the list of things you can make just keeps going.
The best part is how quickly it becomes second nature. After a few rounds you’ll stop consciously counting every stitch and just fall into the rhythm, corner, clusters, corner, clusters, without really thinking about it anymore.
If this was your very first granny square, give yourself some credit. You’ve just learned one of the real building blocks of crochet, and it opens the door to a huge number of projects down the line.