Tiny Crochet Sun Pattern: Best Beginner Friendly Amigurumi
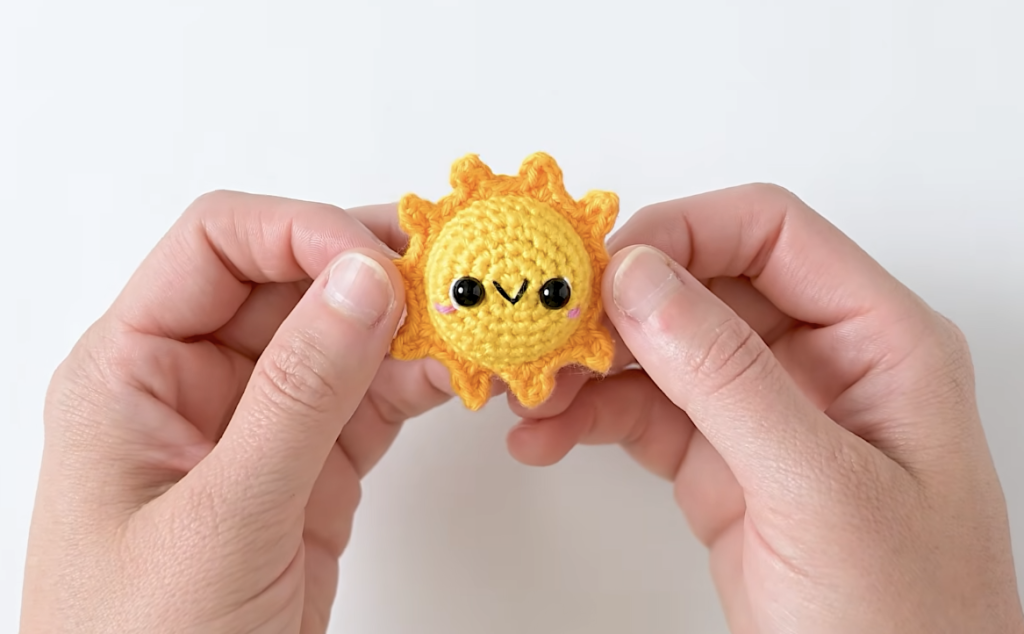
If you’re looking for a quick, cheerful crochet project that won’t take you days to finish, this tiny sun is a perfect choice. It’s small, beginner friendly, and there’s no sewing involved at all. The little sun rays get crocheted directly onto the body, which makes the whole thing considerably simpler and honestly a lot more fun.
What I love about projects like this is that you can realistically finish one in an afternoon and then immediately have something you can use. Turn it into a keychain, add it to a garland, use it as nursery decor, or pair it with other little weather themed amigurumi pieces if you’re feeling ambitious.
If you’re still fairly new to crochet, don’t worry at all. I’ll walk through everything step by step and pay extra attention to the parts that tend to confuse beginners, especially the round where we create the sun rays.
Materials You’ll Need
For this project I used:
- Weight 1 (super fine) cotton yarn in bright yellow for the sun body
- Weight 1 (super fine) cotton yarn in dark yellow for the rays
- A small amount of light pink yarn for the cheeks
- 2.25 mm (Size B) crochet hook
- Two 6 mm safety eyes
- Fiberfil stuffing
- Black embroidery floss for the smile
- White embroidery floss for eye highlights
- Yarn needle
- Embroidery needle
- Three stitch markers
- Scissors
You only need a tiny amount of each colour, so this is a great project for using up scraps from your stash.
And if you don’t have super fine cotton yarn, that’s completely fine. You can use a thicker yarn with a larger hook and your finished sun will just come out bigger than mine, which is equally cute.
Finished Size
Using weight 1 cotton yarn and a 2.25 mm hook, the finished sun measures about 2 to 2½ inches across including the rays.
Your exact size might vary a little depending on your tension and yarn choice, and that’s totally normal.
Crochet Abbreviations
- MR = Magic Ring
- ch = Chain
- sc = Single Crochet
- hdc = Half Double Crochet
- inc = Increase (2 single crochets in one stitch)
- inv dec = Invisible Decrease
- FLO = Front Loops Only
- BLO = Back Loops Only
Skills You’ll Need
This project uses a handful of basic amigurumi techniques:
- Making a magic ring
- Single crochet
- Increasing
- Invisible decreasing
- Chaining
- Half double crochet
- Working in front loops only
- Working in back loops only
- Crocheting into the back bumps of chains
If those all sound familiar, you’re ready to dive in.
Before You Begin
This pattern is worked in continuous rounds, which means we won’t be joining each round with a slip stitch.
Place a stitch marker in the last stitch of every round and move it up as you go. It makes keeping track of your stitches so much easier than trying to remember where you are.
As you work, make sure the right side of your crochet stays facing outward. Sometimes the piece naturally wants to curl the other way, so if that happens just flip it back so the smoother side is on the outside.
Round 8 is the trickiest part of this whole pattern because we’ll be creating the sun rays using only the front loops, and then coming back to the back loops to keep building the body. I’ll explain everything carefully when we get there, so please don’t stress about it now.
Tiny Crochet Sun Pattern
Round 1
Using your bright yellow yarn, make a magic ring.
Work 6 single crochets into the ring.
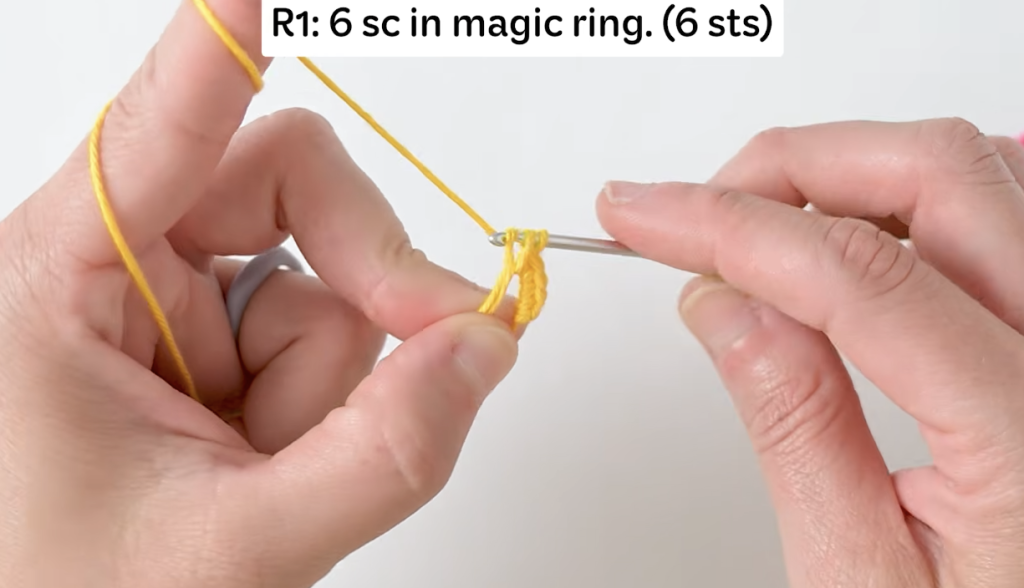
Pull the tail firmly to close the centre hole.
Stitch count: 6
Round 2
Increase in every stitch around.
Pattern: inc x 6
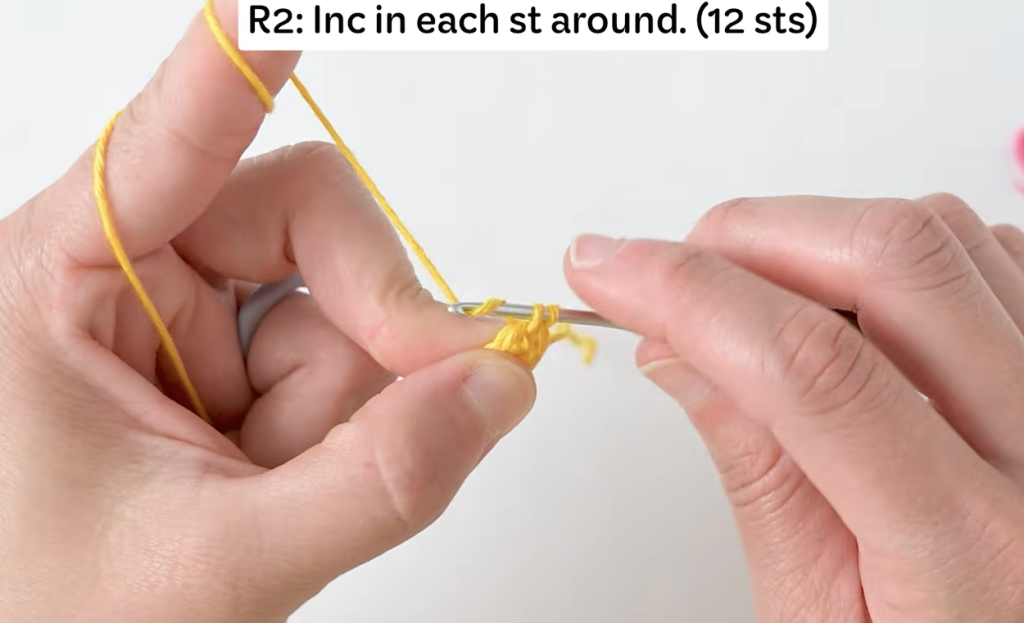
You should now have 12 stitches. Place your stitch marker in the last stitch.
Stitch count: 12
Round 3
Work: (sc 1, inc) x 6
At the end of this round you’ll have 18 stitches.
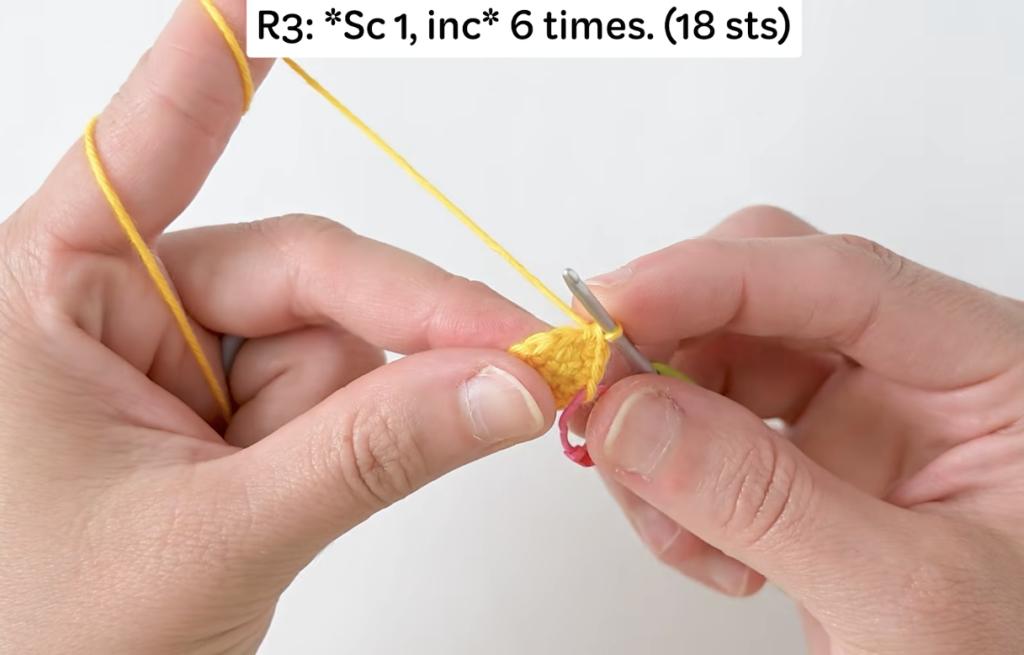
Take a moment to count before moving forward. Catching mistakes early saves a lot of frustration later.
Stitch count: 18
Round 4
To keep the circle nice and even, we offset the increases slightly here.
Work:
sc in the first stitch
inc in the next stitch
(sc 2, inc) five times
sc in the final stitch
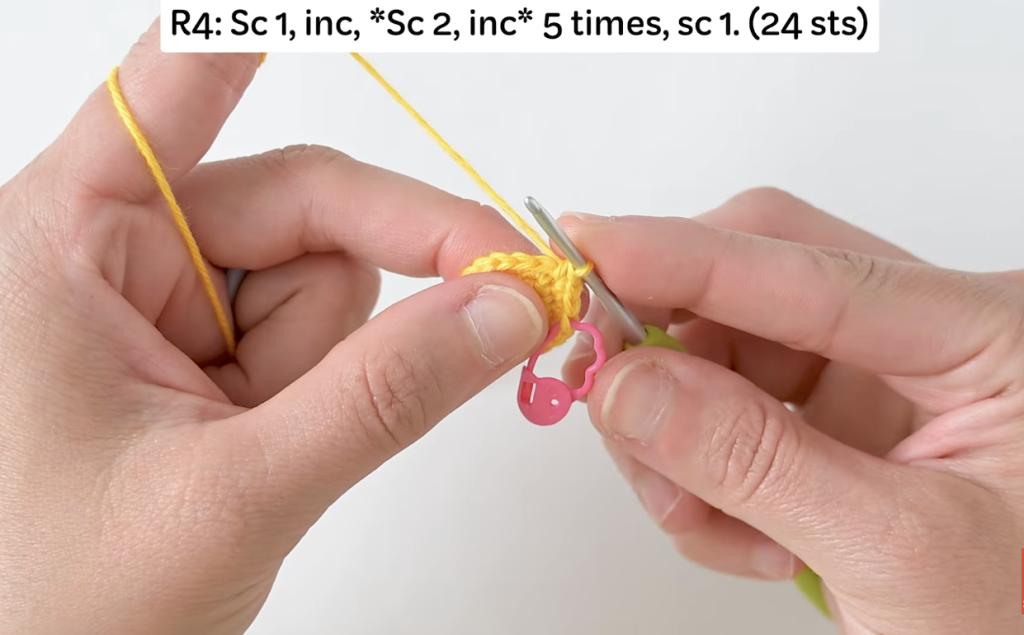
You should end up with 24 stitches.
Stitch count: 24
Round 5
Work: (sc 3, inc) x 6
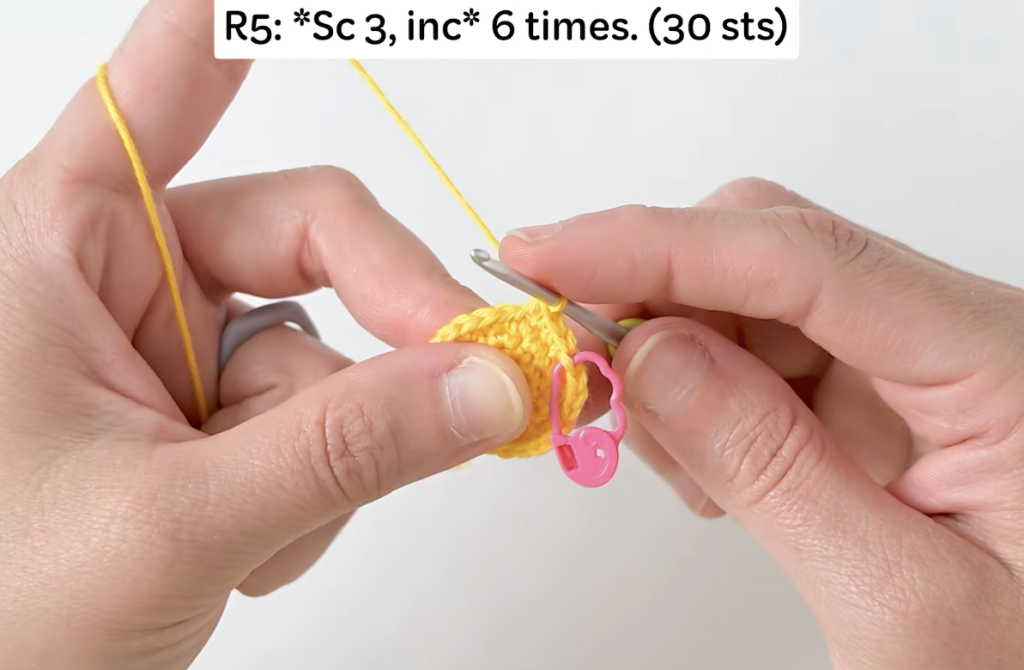
Your circle should be noticeably wider and flatter now.
If the edges start curling a little, don’t worry about it. That’s completely normal in amigurumi.
Stitch count: 30
Rounds 6 and 7
Single crochet in every stitch around.
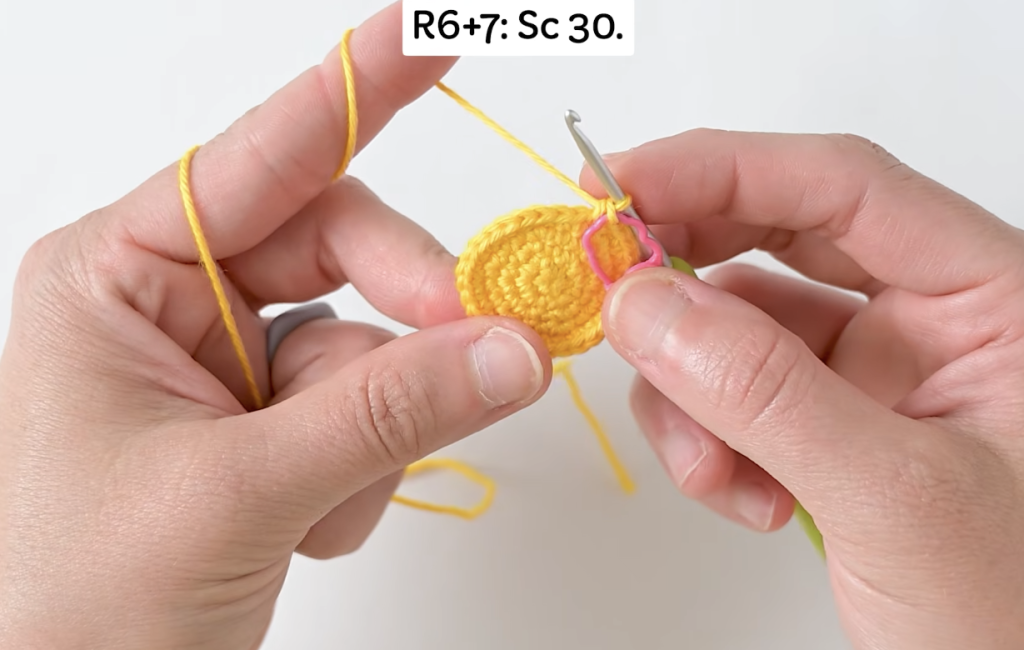
That means: sc 30 for both rounds.
No increases and no decreases here. These rounds give the sun a little thickness before we add the rays.
Stitch count after each round: 30
Changing Colours
At the end of Round 7, begin your final single crochet as usual. Insert your hook, yarn over and pull up a loop.
Before completing the stitch, drop the bright yellow yarn and pick up your dark yellow yarn. Pull the new colour through the loops on your hook to finish the stitch.
Leave the bright yellow yarn attached. We’ll be coming back to it very shortly.
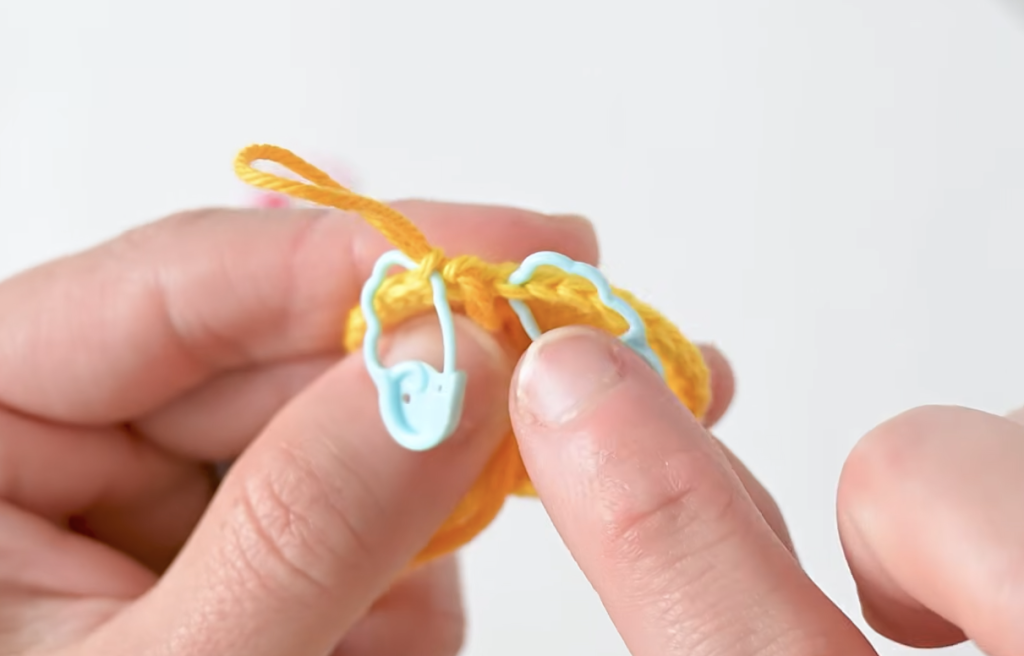
Mark the Back Loops
Before starting the next round, place two stitch markers:
- One in the back loop of the last stitch from Round 7
- One in the back loop of the first stitch of the new round
This small step makes a big difference later because those loops become much harder to find once the rays are finished.
Round 8: Create the Sun Rays (FLO)
For this round we’ll work only into the front loops.
If you’re not sure what that means, look at the top of any stitch and you’ll see two strands forming a little V shape. The strand closest to you is the front loop. The strand farther away is the back loop. During this round, only insert your hook into the front strand.
Start by working:
sc in the first front loop
sc in the next front loop
Now we’ll make our first ray.
Chain 3.
Turn the chain slightly so you can see the small bumps running along the back, these are called the back bumps and working into them creates a much cleaner finish.
Work:
sc in the second chain from your hook
hdc in the next chain
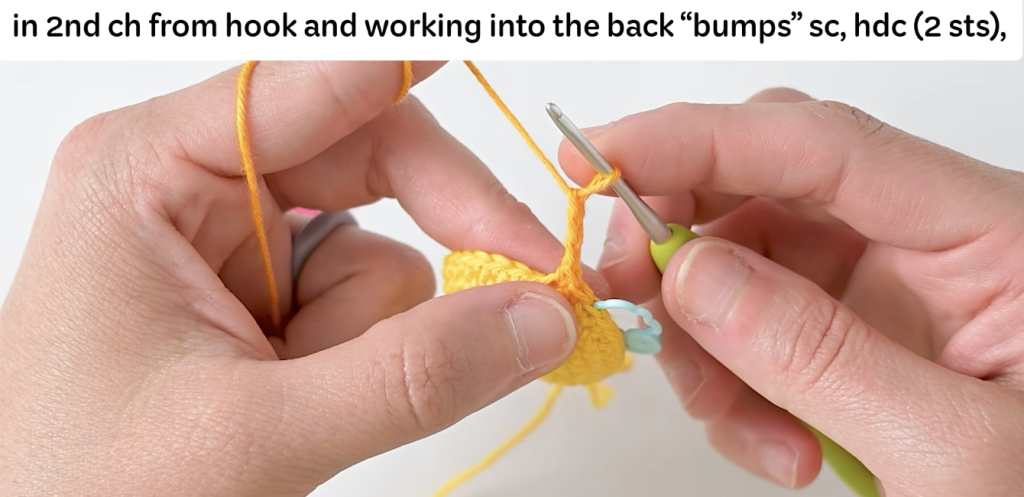
Now place one single crochet back into the same front loop stitch where the chain began.
Your very first sun ray is complete and it already looks adorable.
Continue Around the Circle
Repeat the following sequence all the way around:
sc in the next front loop
sc in the next front loop
ch 3
sc in second chain from hook
hdc in next chain
sc back into the same stitch
You’ll repeat this pattern ten times in total.
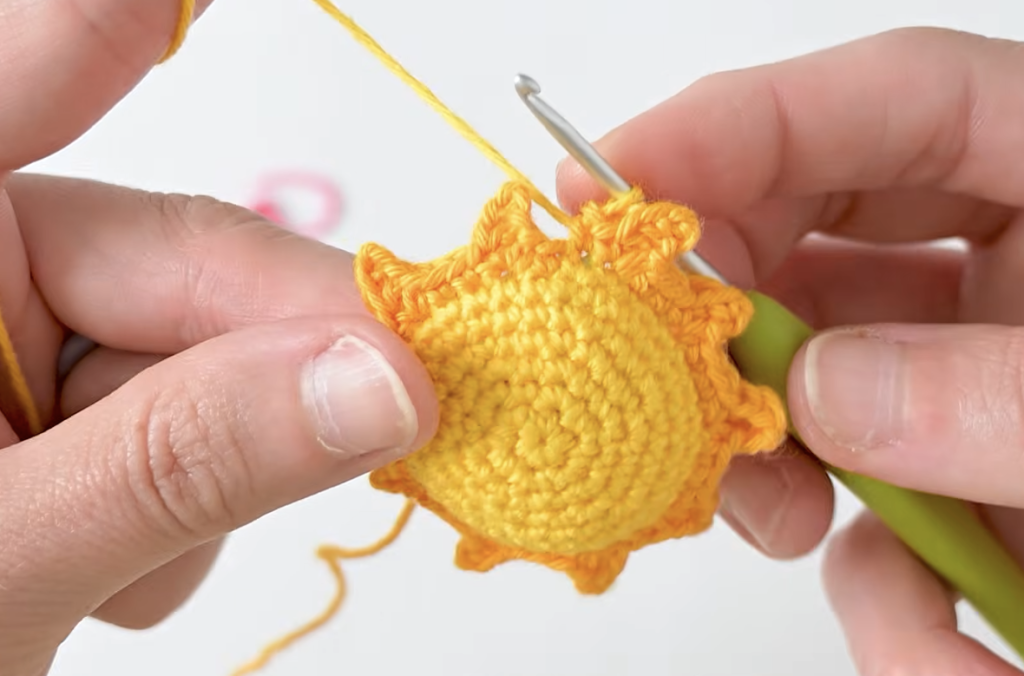
When you’re finished you should have ten evenly spaced rays surrounding your little sun. The piece already looks cute at this point but we’re not done yet. Next, we’ll return to the back loops, add the face and begin shaping the back of the body.
Round 8B: Return to the Back Loops
Now it’s time to switch back to your bright yellow yarn.
Since we left it attached earlier, just pick it up and continue. Fasten off the dark yellow yarn and weave in or trim those ends later.
Remember those stitch markers we placed in the back loops? This is exactly where they come in handy.
Remove the first stitch marker and begin working into that back loop.
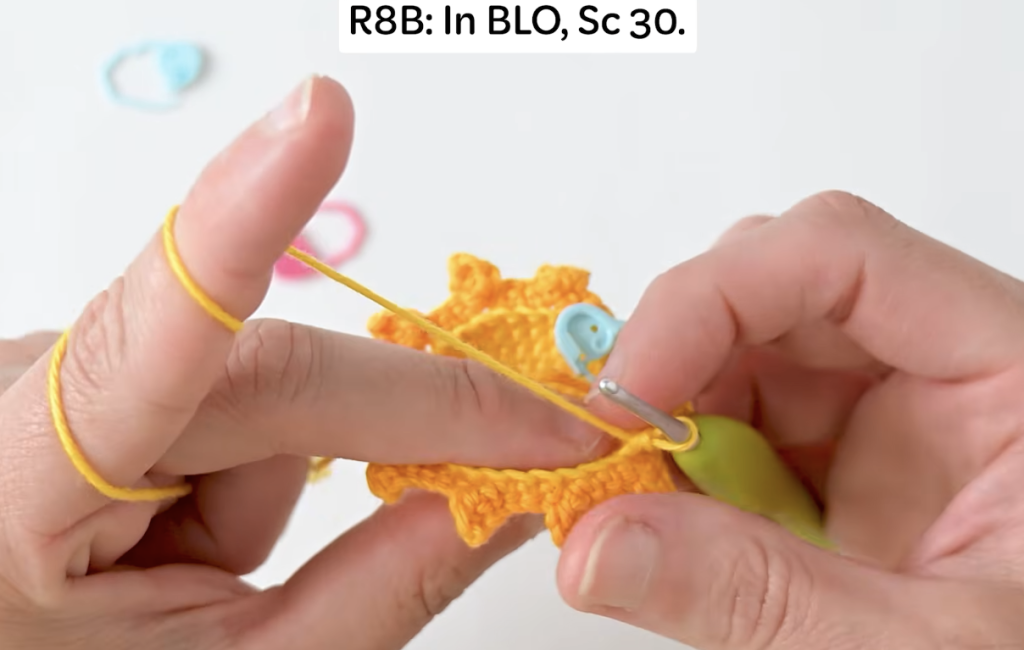
Work: sc 30 in BLO
That means one single crochet into each of the 30 back loops all the way around.
The rays will naturally fold outward as you crochet, which makes it easier to see the stitches underneath. If they get in your way, just gently push them upward with your fingers.
When you finish, place your stitch marker in the final stitch.
Stitch count: 30
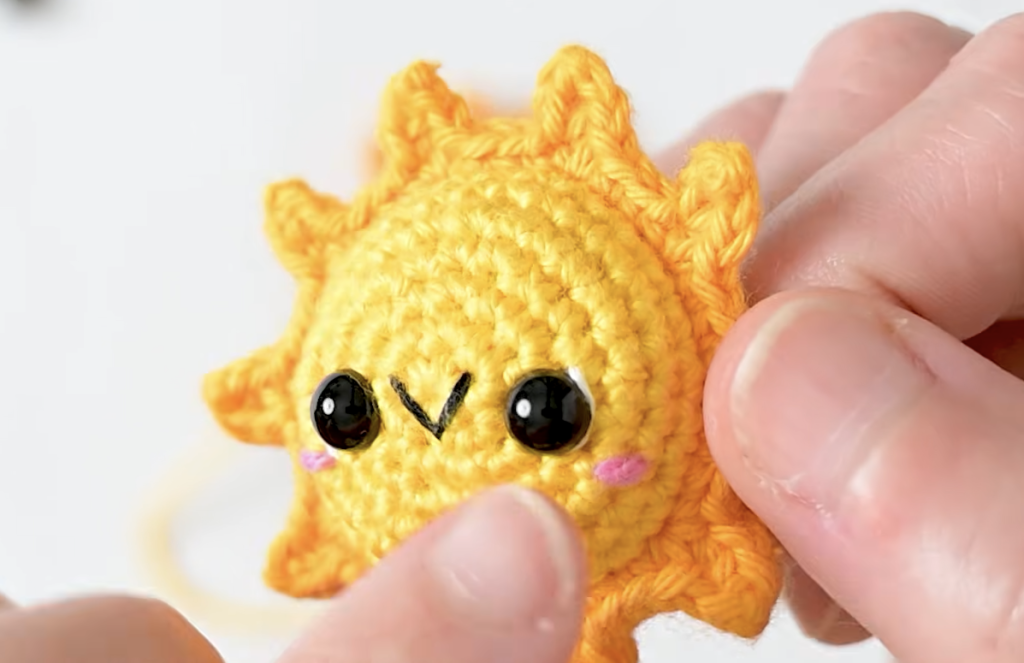
Add the Face
Before we close up the body, now is the perfect moment to add the eyes, smile and cheeks. It’s so much easier to do all of this while the back of the sun is still open.
Place the Safety Eyes
The eyes go between Rounds 3 and 4.
Lay your piece flat with the magic ring centred at the top. Count four stitches from the centre toward the left and insert the first 6 mm safety eye. For the second eye, count nine stitches across the top from the first eye and insert it there.
Before snapping the backs on, take a moment to step back and check that the face looks centred. Small adjustments now are infinitely easier than trying to reposition things later.
Add the White Eye Highlights
Using white embroidery floss, create a tiny highlight on the outer edge of each eye.
Bring the needle up beside the safety eye, wrap the floss around the outer edge, and insert the needle back into the same area. Don’t pull it too tightly, leaving it slightly relaxed keeps the highlight visible.
Tie a knot on the inside and trim the ends.
These tiny details make such a difference and give your sun a much more cheerful, lively expression.
Embroider the Smile
Thread your needle with black embroidery floss and place a small curved smile directly between the eyes. Keep it simple and slightly rounded upward.
If this is one of your first amigurumi faces, remember that less really is more here. A tiny smile almost always looks better than a large one.
Secure the floss inside with a knot and trim the excess.
Add the Pink Cheeks
Using a small piece of light pink yarn, stitch one cheek underneath each eye. The cheeks should sit slightly below and toward the outside edges of the eyes.
You only need a few small stitches to create a soft, sweet blush effect. Tie a knot on the inside and trim the yarn.
Round 9
Now we continue building the back of the sun.
Work: sc 30
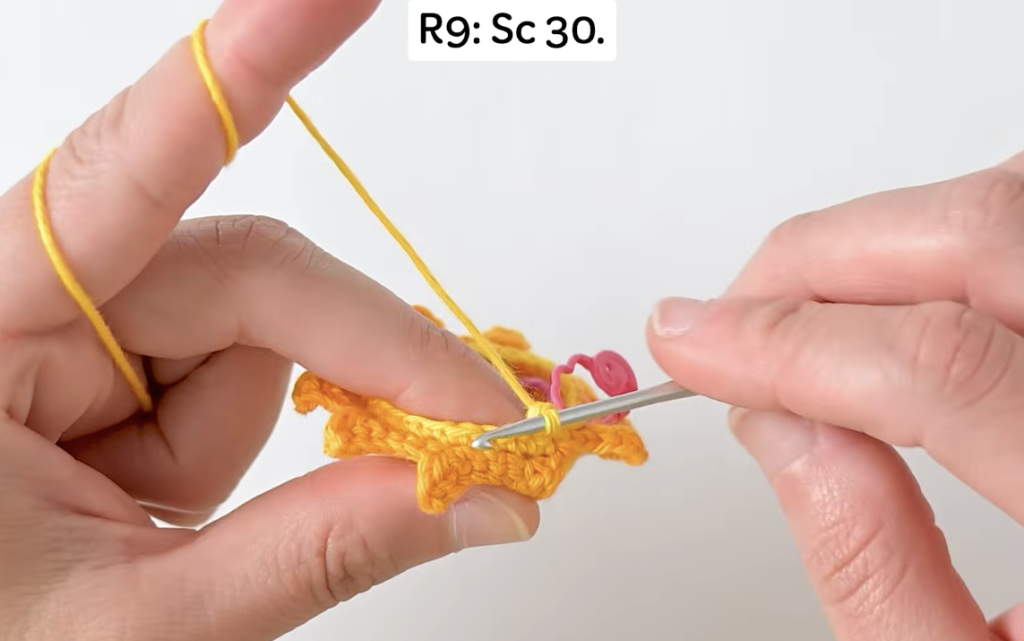
One single crochet into every stitch around. No increases or decreases in this round.
This gives us enough room for the stuffing later.
Stitch count: 30
Round 10
Now we start decreasing to close up the back.
Work: (sc 3, inv dec) x 6
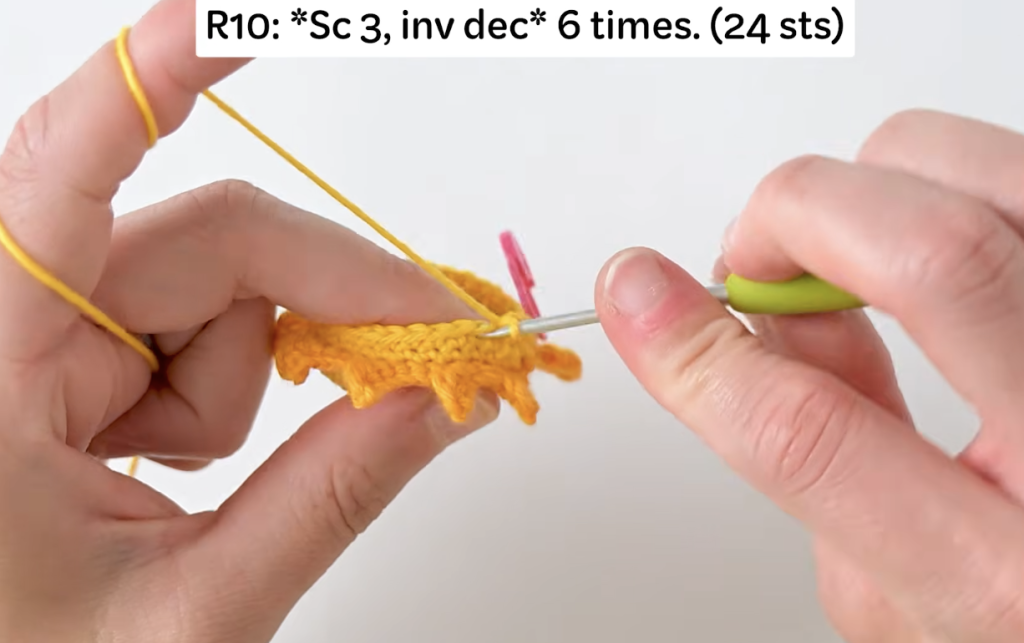
Take your time with the invisible decreases. They create a much smoother finish than regular decreases and help prevent those little gaps from appearing.
Stitch count: 24
Start Adding Stuffing
Before moving on, begin stuffing your mini sun.
Use small pieces of fibrefill rather than one large chunk. This creates a much smoother shape and prevents lumps from forming inside.
Push the stuffing outward so it fills the area behind the rays. A chopstick, pencil or the back end of your crochet hook can help you reach the edges.
You want the sun to feel soft but firm. Try to avoid overstuffing since that can stretch the stitches and make the stuffing visible underneath.
Round 11
Work: (sc 2, inv dec) x 6
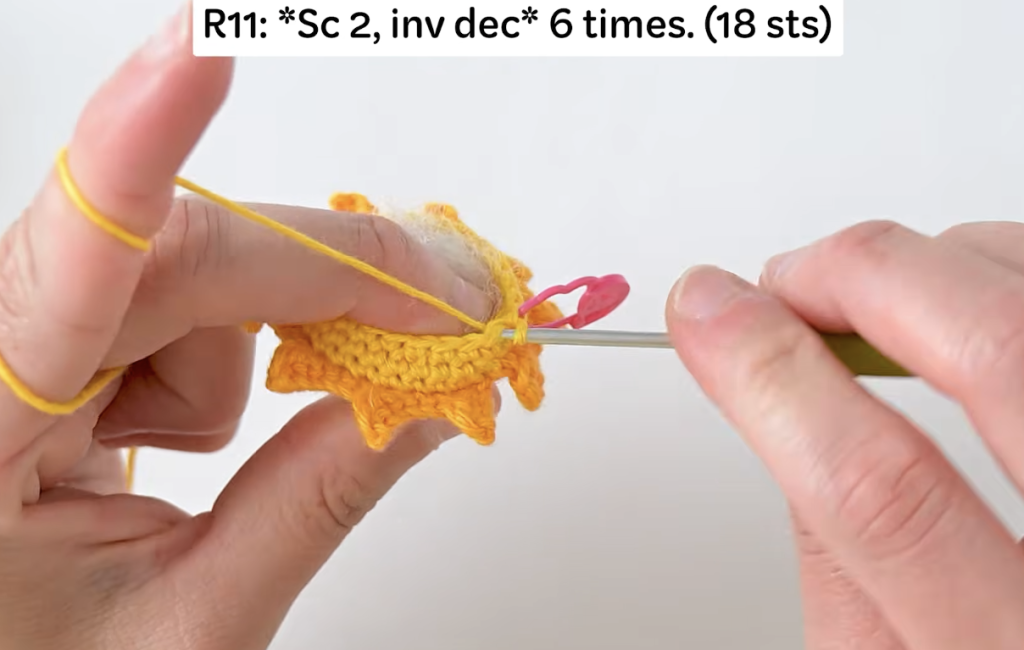
This brings the stitch count down further. Keep checking that your stuffing is staying evenly distributed as you go.
Stitch count: 18
Add a little more fibrefill at this point if needed before continuing.
Round 12
Work: (sc 1, inv dec) x 6
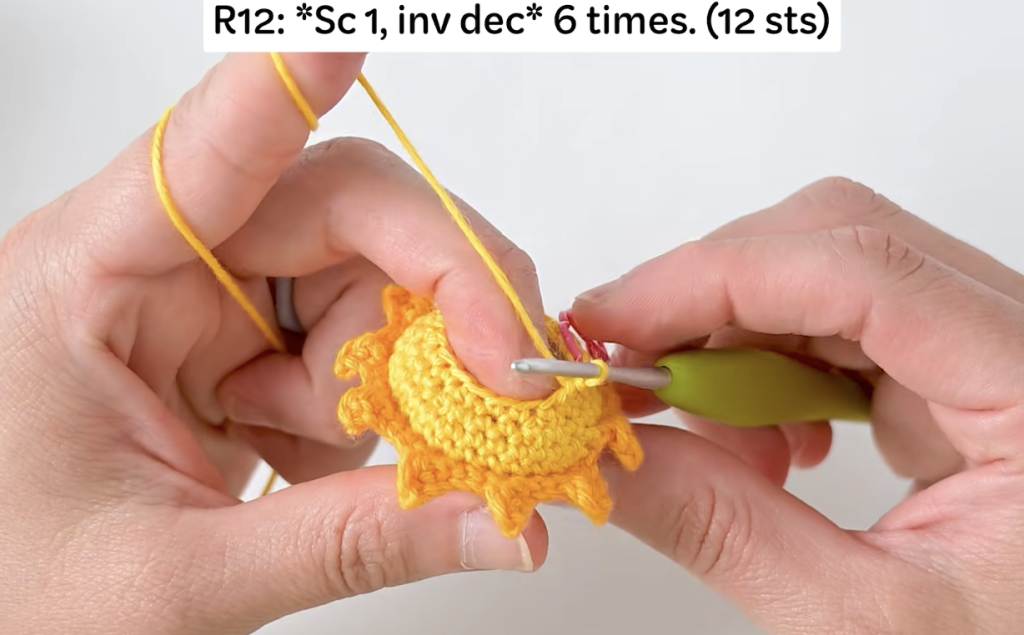
The opening will be getting noticeably smaller now.
This is your final real opportunity to adjust the stuffing. Give the sun a gentle squeeze and shape it with your hands. If one side feels flatter than the other, add a small amount of fibrefill before moving on.
Stitch count: 12
One Last Stuffing Check
Before closing the sun completely, take a moment to make sure:
- The front looks smooth
- The face is centred
- The rays are evenly spaced
- The stuffing reaches all the way to the edges
- The sun feels nicely plump without being overly firm
Spending a minute here makes a big difference in how the finished piece looks.
Round 13
We’re almost there!
For the final round, work an invisible decrease in every pair of stitches around.
(inv dec) x 6
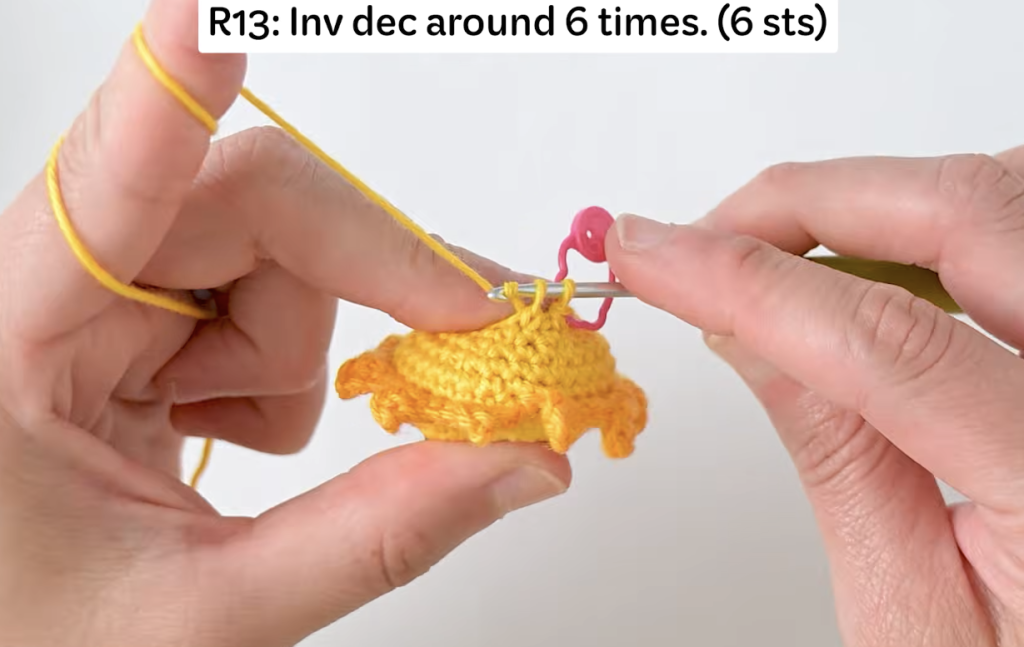
This reduces the opening down to just six stitches. Take your time and keep these decreases neat, it really shows in the finished result.
Stitch count: 6
Fasten Off
Cut the yarn leaving a tail about 6 inches long. Pull the yarn completely through the final loop to fasten off.
Thread the tail onto your yarn needle so we can close up that remaining opening.
Close the Hole
To get a really clean finish, we’ll work through the front loops only of the remaining six stitches.
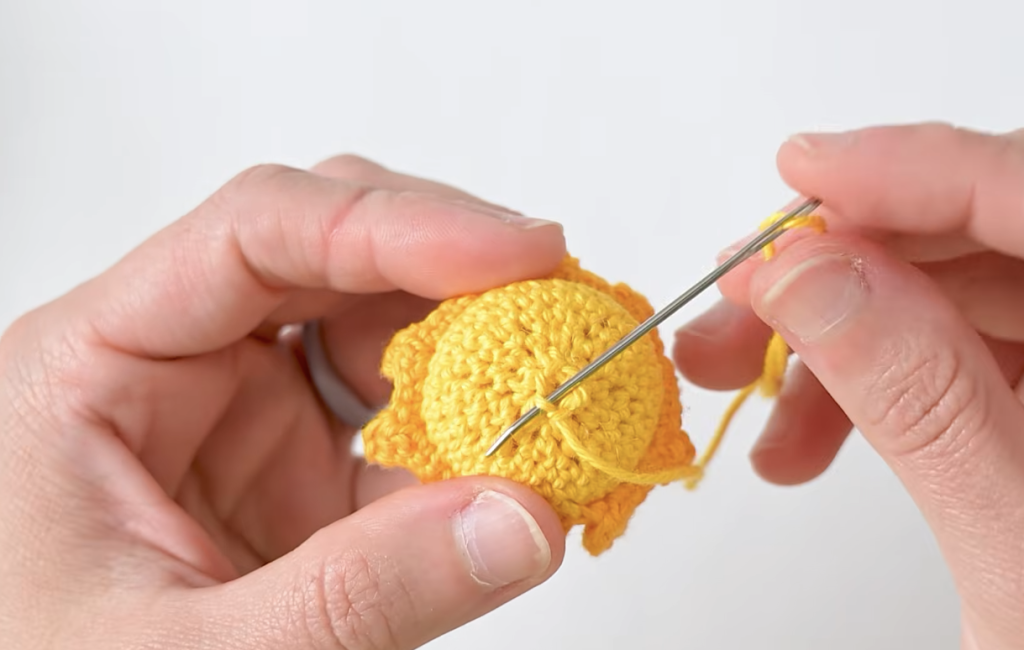
Insert your needle from the inside of the opening to the outside and pick up the front loop of each stitch. Continue all the way around until you’ve collected all six front loops.
Once that’s done, gently pull the yarn tail. The opening should close neatly like a little drawstring.
If you still see a small gap, just pull a little more firmly and use your fingers to shape the area.
When the hole is fully closed, insert the needle back through the centre and bring it out through the side of the sun. Give it a gentle tug to help hide the end inside the stuffing before you trim it.
Tie a secure knot, weave the remaining tail into the body and trim any excess yarn.
Shape Your Mini Sun
Now comes one of my favourite parts honestly.
Give your little sun a gentle squeeze and shape it with your hands. Push the stuffing evenly toward the edges and straighten any rays that need adjusting.
Sometimes one side looks slightly fuller than the other, and that’s completely normal with handmade projects. A little shaping usually sorts everything out.
Once you’re happy with how it looks, your tiny sun is officially finished.
Beginner Tips for Success
Use Stitch Markers Generously
Never feel like you’re only allowed one stitch marker. Adding extra markers before the more complicated rounds saves a lot of frustration later. The two markers we placed in Round 8 are especially important because the back loops become difficult to find once the rays are done.
Work With Small Pieces of Stuffing
A lot of beginners grab one big ball of fibrefill and shove it in. That almost always creates lumps. Pull apart small pieces and add them gradually instead. The finished sun will look considerably smoother and rounder.
Keep Your Tension Relaxed
Tight stitches make it hard to insert your hook, especially when you’re working into front loops and back loops specifically. Try to relax your hands and focus on being consistent rather than fast. Tension naturally improves with every project you finish.
Count Your Stitches Often
The stitch counts after every round are there to help you. If your numbers don’t match up, it’s so much easier to find the mistake right then than to discover it five rounds later. A quick count at the end of each round can save you a surprising amount of time.
Common Beginner Questions
Can I use thicker yarn?
Absolutely. Using worsted weight yarn with a larger hook will give you a bigger version of the same sun. The stitch counts stay exactly the same, your finished piece will just be larger.
Can I skip the safety eyes?
Yes. You can embroider sleepy eyes, happy curved eyes or simple dots using black embroidery floss instead. This is also the safer option if the toy is meant for very young children.
Can I turn this into a keychain?
Definitely. Just attach a keyring or lobster clasp to the top of one of the rays. These tiny suns make adorable bag charms and they’re a sweet handmade gift idea too.
Why are my rays curling differently?
Small variations are completely normal. After finishing, gently reshape each ray with your fingers. Cotton yarn generally holds its form really well once you’ve adjusted it.
My sun looks lumpy. What did I do wrong?
Most of the time uneven stuffing is the culprit. Using smaller pieces of fibrefill and distributing them carefully toward the edges almost always solves it.
Final Thoughts
I love small crochet projects like this one because they’re quick, cheerful and incredibly satisfying to finish. This little sun might be tiny but it packs in quite a few useful amigurumi techniques. You’ll practice continuous rounds, colour changing, front and back loop work, invisible decreases, adding safety eyes and shaping with stuffing, all in one small project.
If you’re still building confidence with crochet, projects like this are a wonderful way to develop your skills without ever feeling overwhelmed.
And once you’ve made one, don’t be at all surprised if you end up making a whole collection. Different colour combinations, different embroidered faces, keychain versions, they all give this simple pattern a completely different personality.
Happy crocheting!