Easy Ribbed Crochet Beanie (Beginner Friendly Pattern)
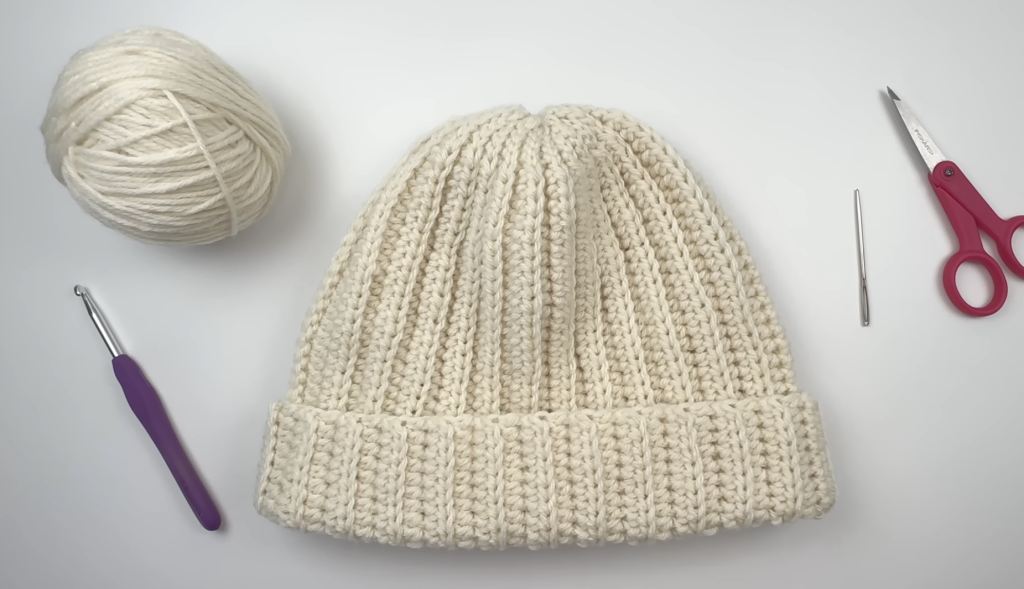
If you’ve been hunting for an easy crochet beanie that fits well without a big floppy chunk of fabric bunched up at the top, this pattern is a good place to start. A lot of beginner beanie patterns leave you with a bulky top that just doesn’t sit right on your head. This ribbed beanie is different because it’s designed to create a smooth, rounded shape while still staying simple enough for someone just starting out.
The whole hat is worked as one flat rectangle using just two basic stitches, the half double crochet and the slip stitch. Once you’ve crocheted the rectangle, you’ll seam the sides together and gather the top closed to finish it off. Because the ribbing comes from working into the back loops only, the finished hat has this stretchy, knit-like texture that’s soft, comfortable, and nice to wear.
One of the best things about this pattern is how easy it is to customize. You can make it shorter or taller depending on how you want the fit, and you can simply crochet more or fewer rows to create different sizes for kids, teens, or adults.
Whether this is your very first hat or you’re just after a quick weekend project, this tutorial walks you through every single step.
Skill Level
Beginner
This pattern only uses basic crochet stitches with simple repeats. If you already know how to chain, slip stitch, and half double crochet, or you’re willing to learn them along the way, you can absolutely make this beanie.
Materials You’ll Need
- Worsted weight (#4) acrylic yarn
- 5 mm (H/8) crochet hook
- Tapestry needle
- Scissors
- Measuring tape (recommended for checking the size)
Yarn Notes
Acrylic yarn is a great choice here since it’s soft, affordable, stretchy, and easy to wash. Most medium weight (worsted weight/#4) yarns will work well for this project.
If you go with a thicker or thinner yarn than recommended, your finished hat might turn out a bit larger or smaller than expected. If that happens, you may need to adjust your starting chain or row count slightly.
Crochet Abbreviations
- ch = chain
- sl st = slip stitch
- hdc = half double crochet
- BLO = back loop only
Finished Size
The sample beanie in this tutorial used:
- Starting chain: 45 chains
- Hat height: Approximately 12½ inches (32 cm)
- Total rows: 50
- Finished circumference before seaming: Approximately 19 inches (48 cm)
Since this pattern stretches nicely, it comfortably fits a lot of average adult head sizes.
Understanding How This Beanie Is Made
Unlike a lot of crochet hats that start with a magic ring and get worked in rounds, this beanie is crocheted as a flat rectangle.
Each row runs from the bottom edge of the hat up to the top. Once the rectangle reaches the right width, you’ll sew the short edges together to form a tube, then gather the top closed to finish the beanie shape.
That stretchy ribbed texture comes from working every stitch into the back loop only (BLO) instead of both loops.
Another thing that makes this pattern unique is the last five stitches of every row. These are worked as slip stitches rather than half double crochets. Since slip stitches are shorter than half double crochets, they naturally shape the top of the hat. This creates a rounded crown that fits your head properly and avoids that bulky, floppy top a lot of beginner beanies end up with.
How to Adjust the Size
This pattern is easy to customize.
To Make the Hat Taller
Your starting chain is what determines the height of the beanie. If you want a taller hat with a wider folded brim or something slouchier, just add more chains. For a shorter beanie, use fewer.
Before moving on to Row 1, hold your starting chain up against your head or measure it with a tape measure. It should be roughly the height you want your finished hat to be, including the folded brim if you’re planning on one.
To Make the Hat Wider
The number of rows is what determines the circumference of the beanie. If you’re making a larger size, just crochet additional rows. For a smaller size for a child or someone with a smaller head, stop after fewer rows.
A good way to check as you go is to wrap the rectangle comfortably around your head before you sew the seam.
Before You Start
A few tips that’ll make this project a lot easier.
Try not to make your foundation chain too tight, a loose, even chain makes Row 1 considerably easier to work into. Count your stitches at the end of every row, this helps stop your rectangle from slowly narrowing over time. And remember, the turning chain never counts as a stitch in this pattern.
You’ll work into the back loop only after the first row, and that’s exactly what creates the stretchy ribbed texture that makes this hat so comfortable to wear.
Step 1: Make a Slip Knot
Start with your slip knot. Wrap the yarn around two fingers, crossing it to form a loop. Hold the tail with your thumb, then slide a finger under the front strand and over the back strand. Pull the back strand through the front loop to form a new loop, then tighten it gently.
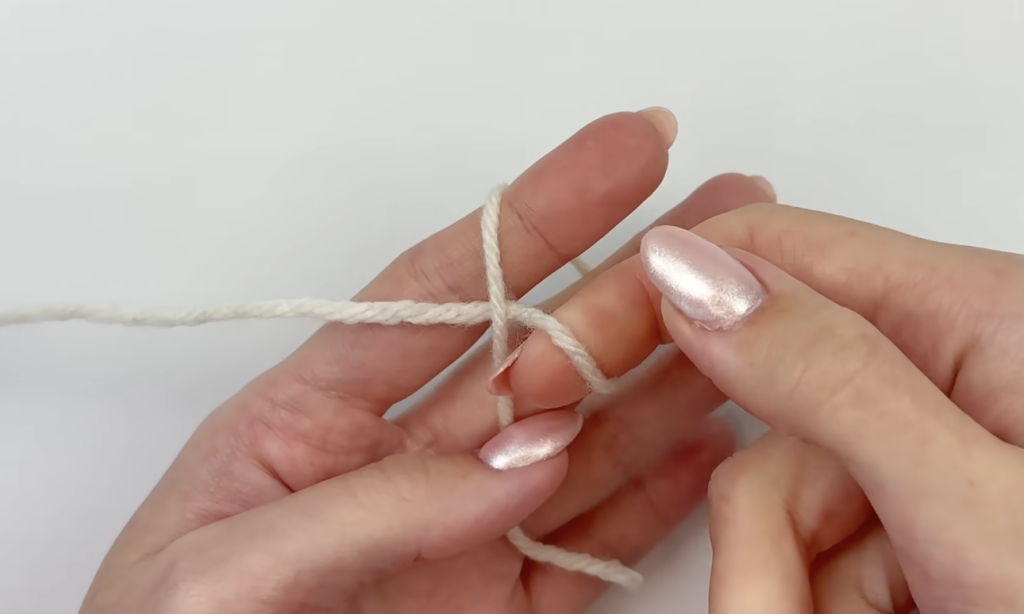
Place your hook through the loop and pull the working yarn until the slip knot sits snugly on the hook. You want it secure but still loose enough to slide smoothly.
Step 2: Make the Foundation Chain
To chain, yarn over by wrapping the working yarn over your hook from back to front, then pull it through the loop already on your hook. Each time you repeat that, you’ve made one chain.
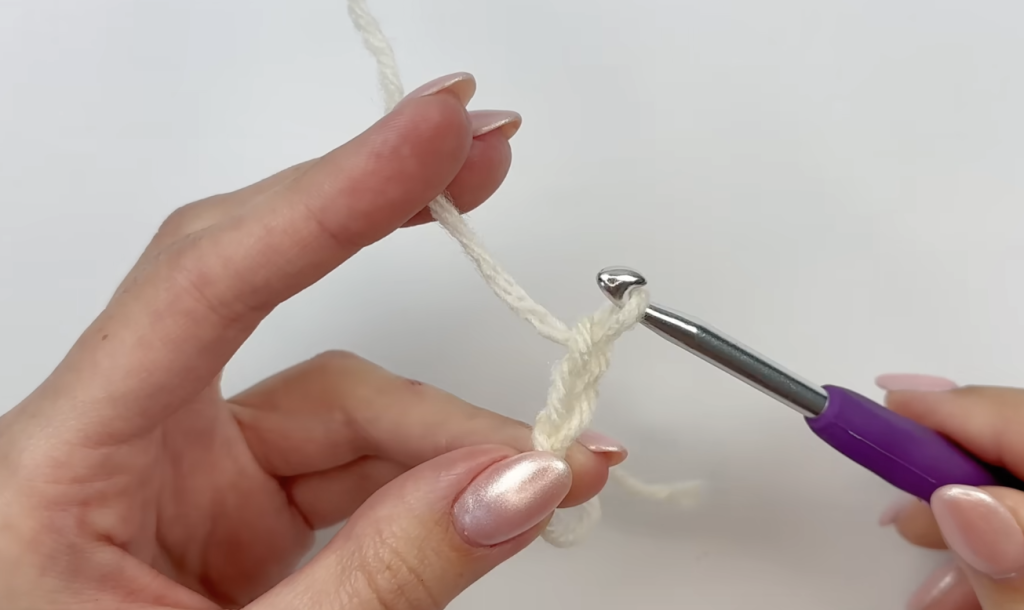
Keep going until you’ve made 45 chains.
This starting chain should measure approximately 12½ inches, which gives you a beanie with a comfortable folded brim.
Remember, this chain controls the height of your finished hat, so if you want it taller or shorter, adjust the chain count now before moving forward.
Once your foundation chain is done, you’re ready to crochet Row 1.
Step 3: Crochet Row 1
Row 1 is the only row where you’ll work into the foundation chain itself. After this, you’ll be crocheting into stitches instead of chains, which most beginners find considerably easier.
Row 1 Pattern
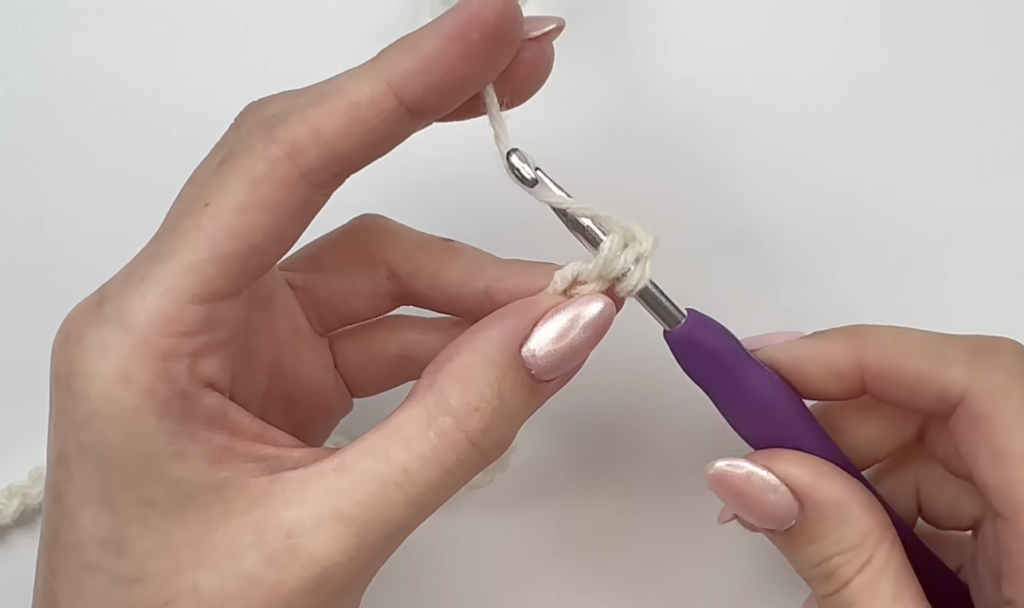
Skip the first chain from the hook. Work 1 half double crochet (hdc) into the second chain from the hook. Continue making 1 hdc in each chain until you have 5 chains remaining. Work 1 slip stitch (sl st) into each of the last 5 chains. Turn your work.
How to Find the Second Chain from the Hook
After making your foundation chain, don’t count the loop currently sitting on your hook, that’s not a chain. Look at the chain directly below your hook instead, that’s your first chain. The one right after it is the second chain, and that’s exactly where your first half double crochet goes.
Getting your first stitch in the right spot helps keep the edge of your work nice and straight.
How to Make a Half Double Crochet
If you’re new to this stitch, here’s the process: yarn over, insert your hook into the next chain, yarn over again and pull up a loop so you have three loops on your hook, yarn over one more time, and pull the yarn through all three loops.
That’s one-half double crochet done.
Keep placing one hdc into every chain until only the final five chains remain.
Why the Last Five Stitches Are Slip Stitches
Instead of continuing hdc all the way across, you’ll switch over to slip stitches for the last five chains.
This is the secret to that smooth, rounded top on the finished beanie. Since slip stitches are much shorter than half double crochets, they naturally shorten one edge of the rectangle. Once the hat is sewn together, that shorter edge becomes the top of the beanie, letting it curve neatly around your head instead of bunching up with excess fabric.
It might seem like a tiny detail but please don’t skip these five slip stitches. They’re honestly what gives this beanie its clean, fitted shape.
How to Make a Slip Stitch
A slip stitch is one of the easiest stitches out there. Insert your hook into the next chain, yarn over, then pull the yarn through the chain and through the loop already on your hook in one smooth motion.
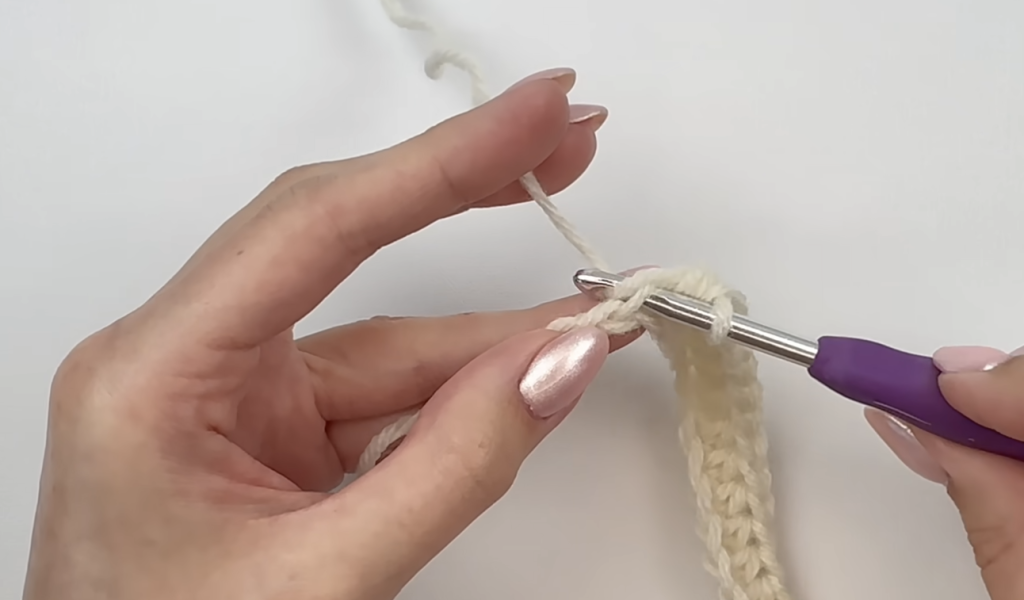
That’s one slip stitch. Repeat until you’ve worked one into each of the last five chains.
What Your Work Should Look Like
Once Row 1 is done, you’ll notice one end of your work is taller than the other. This is exactly what you want. The taller section is made of half double crochets, the shorter section is slip stitches, and that shorter section is going to eventually become the top of your beanie.
If your rectangle looks a bit uneven right now, don’t worry, that uneven height is part of the design.
Understanding the Top and Bottom of the Hat
Worth knowing before you go further. The half double crochet edge is the bottom of the beanie where the folded brim will sit. The slip stitch edge is the top of the beanie, which gets gathered closed later.
Keeping these two edges straight in your head makes the rest of the pattern so much easier to follow.
Step 4: Begin Row 2
Before every new row, you’ll follow the same two steps, chain 1, then turn your work.
The turning chain just brings your yarn up to the right height for the next row. It doesn’t count as a stitch, so you’ll always work your first stitch into the very first stitch of the previous row.
This is one of the easiest spots for beginners to slip up, so take a second to locate that first stitch before you keep going.
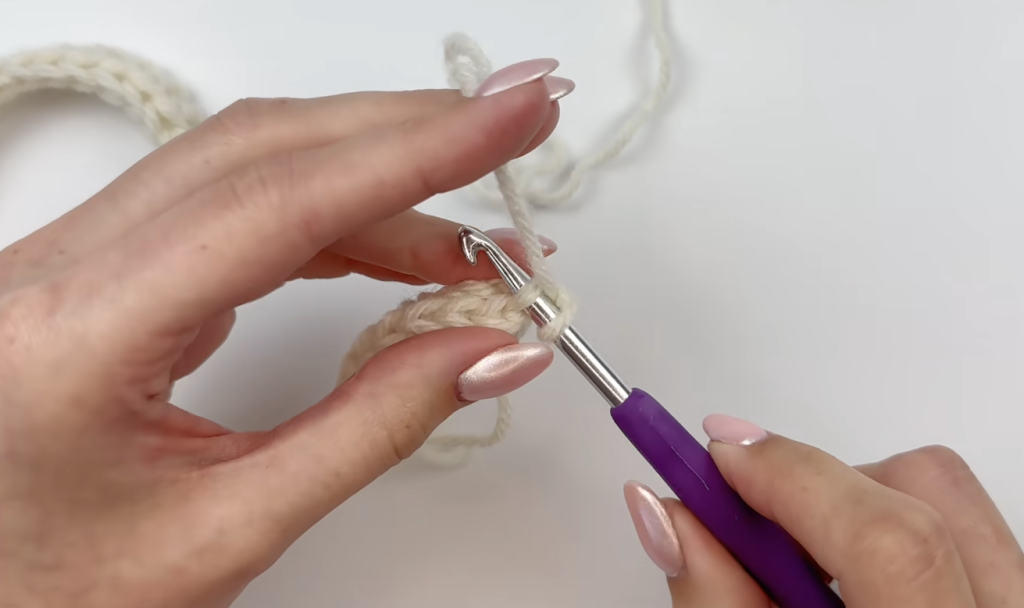
Working in the Back Loop Only (BLO)
Starting with Row 2, every single stitch in this pattern gets worked into the back loop only, often shortened to BLO.
If you look at the top of a crochet stitch, you’ll notice it forms a small “V” shape. That V has two loops, the front loop closest to you, and the back loop farther away. Instead of inserting your hook under both loops like you normally would, you’re only going under the back loop here.
Working into the back loop only creates those raised ridges across the fabric, giving the beanie its stretchy, knit-like ribbed look.
Be careful to catch the entire back loop each time. Accidentally crocheting under both loops will interrupt the ribbed texture and it’ll show.
Crochet the Slip Stitch Section
Since you’re starting Row 2 at the top edge of the hat, you’ll begin with slip stitches.
Work 1 slip stitch in the back loop only of each of the first 5 stitches.
You’re making slip stitches here because the stitches sitting below are also slip stitches. Throughout the rest of the pattern, you’ll always match whatever’s underneath, slip stitch on top of slip stitch, half double crochet on top of half double crochet.
Keeping this consistent is what preserves the hat’s shape and keeps the transition between crown and body looking clean.
Continue with Half Double Crochets
Once you’ve finished those five slip stitches, go back to half double crochets.
Work 1 half double crochet in the back loop only of every remaining stitch until you reach the end of the row.
Take your time here and make sure every stitch lands in the correct back loop. It’s easy to accidentally skip a stitch when you’re working in BLO and moving quickly.
Count Your Stitches
If you started with 45 foundation chains, you should have 44 total stitches in every row, made up of 39 half double crochets and 5 slip stitches.
Your stitch count should stay exactly the same throughout the whole project. If you ever finish a row with fewer than 44 stitches, you’ve probably skipped one somewhere. More than 44, and you likely worked twice into the same stitch by accident.
One stitch that’s especially easy to miss is the very last one at the end of the row. Before you turn your work, double check you’ve crocheted into it. Missing this repeatedly will make your beanie gradually narrower with every row, which is annoying to catch later.
Step 5: Crochet Row 3
Before starting Row 3, chain 1 and turn your work, exactly like you did for Row 2.
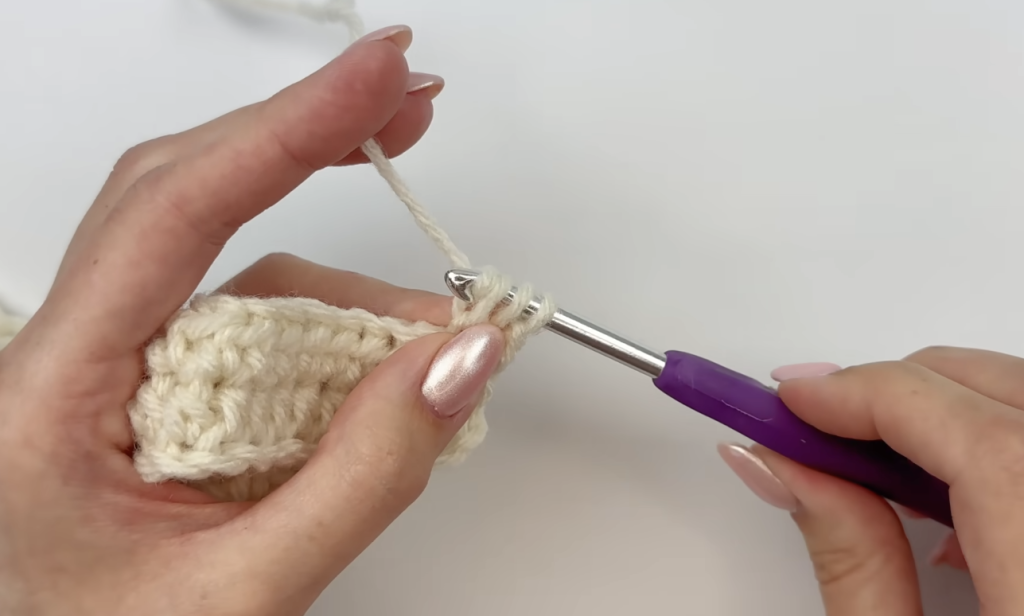
This time you’re starting from the bottom edge of the beanie, where the half double crochet stitches live. Since you’re now working over half double crochets, you’ll begin the row with half double crochet stitches too.
Remember, the turning chain doesn’t count as a stitch. Skip past it and place your first stitch into the actual first stitch of the row.
Row 3 Pattern
Work 1 half double crochet in the back loop only of each half double crochet across the row. When you reach the last 5 stitches, work 1 slip stitch in the back loop only of each one. Chain 1 and turn.
You’ll notice Row 3 is basically the mirror image of Row 2, the only real difference is which side you’re starting from.
As always, make sure every stitch goes into the back loop only.
The Repeat Pattern
Once you’ve gotten through the first three rows, the rest of the beanie becomes simple.
Every row follows the same idea, chain 1 and turn, work into the back loop only, slip stitches over slip stitches, half double crochets over half double crochets. That’s honestly it.
Since you’re repeating the same sequence over and over, this becomes a really relaxing pattern, perfect for crocheting while watching TV, listening to a podcast, or chatting with friends.
Keep an Eye on Your Stitch Count
Even though the pattern is repetitive, it’s still worth counting your stitches every few rows.
If you started with 45 chains, every row should contain 39 half double crochet stitches, 5 slip stitches, and 44 stitches total.
If that count ever changes, stop and figure out where things went wrong before continuing. Fixing one missed stitch right away is so much easier than trying to unpick the problem several rows later.
Common Beginner Mistakes to Avoid
Forgetting the last stitch
The final stitch at the end of each row is easy to overlook since it can feel a bit hidden along the edge. Before turning your work, check carefully that you’ve crocheted into it. Missing it repeatedly will make your rectangle progressively narrower.
Crocheting into both loops
After Row 1, every stitch should go into the back loop only. If you accidentally catch both loops, the ribbed texture won’t look consistent. Don’t stress if it happens once or twice, just try to keep your hook under only the back loop as you go.
Mixing up the stitches
Keep this simple rule in mind, half double crochet goes on top of half double crochet, slip stitch goes on top of slip stitch. Following this keeps the top shaping exactly where it needs to be.
Tight slip stitches
Slip stitches naturally sit shorter than other stitches, but they shouldn’t be so tight that you struggle to get your hook into them on the next row. Keep your tension relaxed, and if your slip stitches feel really tight, gently loosen them as you go.
Continue Until the Hat Fits
Keep repeating the same row pattern until your rectangle is wide enough to comfortably fit around a head.
The width of your rectangle is what determines the final circumference of the beanie.
For the sample in this tutorial, 50 total rows were crocheted, and the rectangle measured approximately 19 inches (48 cm) across. This size comfortably fits a lot of adults thanks to how much crochet fabric naturally stretches.
How to Check the Size
Rather than guessing, fold or wrap your rectangle around your head as you go. The short ends should almost meet comfortably without needing to stretch too hard. A little stretch is ideal here since it helps the finished hat stay snug once it’s done.
If the rectangle feels too short, keep crocheting more rows. If it feels too long, stop a few rows earlier than planned.
Since everyone’s head size differs a bit and yarn thickness can vary slightly too, checking the actual fit is much more reliable than blindly following an exact row count.
Make Sure You End on the Correct Side
Before moving on to seaming, check where your working yarn currently is.
Your last row should end at the bottom edge of the hat, the half double crochet side. Ending here makes joining the two sides so much easier since you can start seaming right away without fastening off and re-joining yarn.
If your working yarn happens to be at the top edge instead, just crochet one more row so it finishes at the bottom.
What Your Rectangle Should Look Like
By now your piece should have a few clear features. A stretchy ribbed texture running across the fabric. One long edge made entirely of half double crochets, which becomes the folded brim. The opposite long edge with the shorter slip stitch section, which then becomes the top of the beanie. And straight side edges ready to be joined.
If you fold the rectangle in half so the two short sides meet, you’ll start seeing the shape of your finished beanie taking form. The ribbing should run vertically from brim to crown, giving the hat that classic knitted look.
Step 6: Seam the Side of the Beanie
Once you’re happy with the size, it’s time to turn this rectangle into a beanie.
Lay your piece flat and fold it in half so the two short edges line up together. Try to match the ribbed rows as closely as you can, it helps create a much cleaner looking seam.
Your working yarn should be sitting at the bottom edge (the half double crochet side). If it is, you can start joining the edges right away.
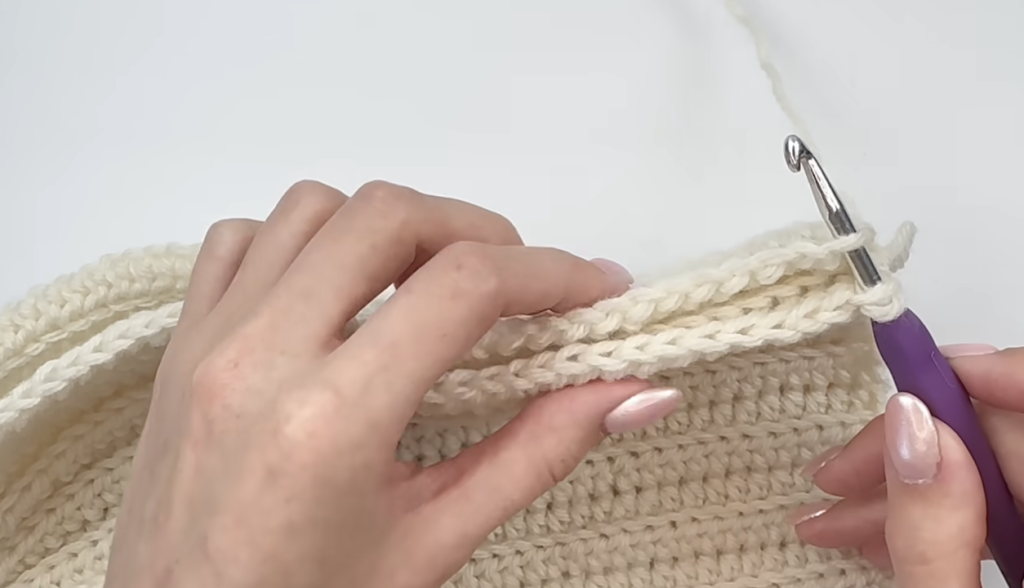
Join the Two Side Edges
We’re using slip stitches to seam the hat since they create a sturdy join while keeping things fairly flat.
Insert your hook through the back loop only of the stitch on the last row you crocheted, and through the matching loop on the opposite edge, which is the foundation chain from Row 1.
Since Row 1 was worked into the foundation chain, you’ll only have one loop available on that particular edge, and that’s completely normal.
Yarn over and pull the yarn through both layers and the loop already on your hook to complete a slip stitch. Keep working one slip stitch through each matching pair of stitches all the way up to the top of the hat.
Take your time with this part. Keeping the rows lined up evenly gives your finished beanie a considerably neater appearance.
Check the Fit Before Closing the Top
Once you’ve finished seaming the side, your beanie will look like a tube with the top still open. This is the perfect moment to try it on.
Slip it onto your head and check things over. Does it fit snugly without feeling too tight? Is the brim the height you wanted? Does it cover your ears comfortably? Would you prefer it a bit looser or tighter?
If you want to change the circumference, just undo the side seam, add or remove a few rows, and seam it back up again. Making adjustments now is so much easier than after you’ve already closed the top.
Step 7: Fasten Off
Once you’re happy with the fit, it’s time to prep the yarn for closing up the top.
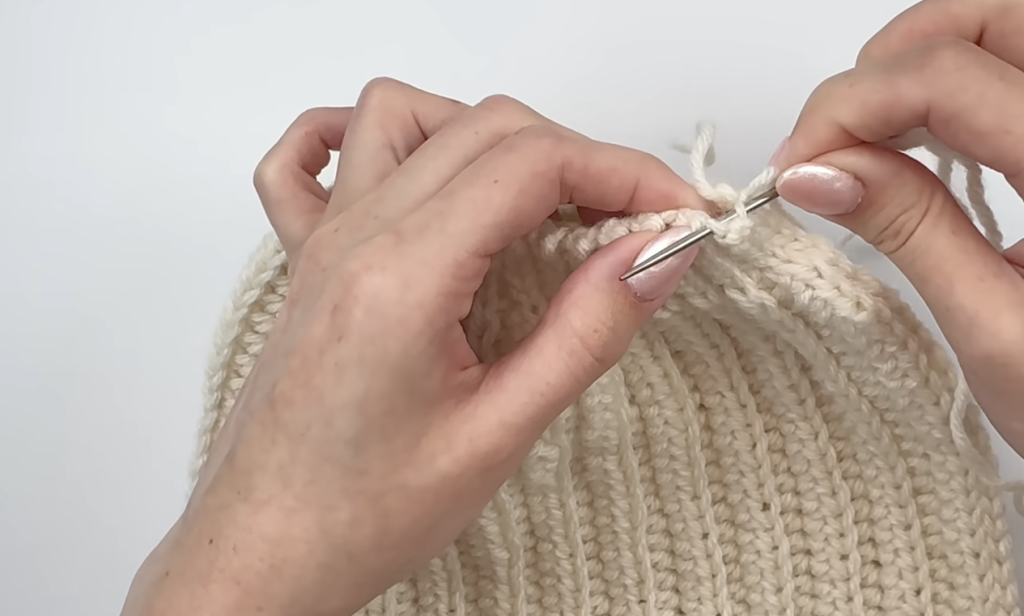
Chain 1. Cut the yarn leaving a long tail, around 12 to 18 inches (30 to 45 cm) is usually plenty for sewing the top, though a bit extra won’t hurt. Pull the yarn tail completely through the loop on your hook and tighten gently.
Thread that tails onto your tapestry needle.
Step 8: Gather the Top of the Beanie
Now for closing the opening at the top.
Starting at one side of the opening, weave your tapestry needle in and out through the stitches all the way around the top edge. You don’t need to sew through every part of each stitch, just catching the top loops around the edge is enough to create a strong gather.
Keep weaving around the whole opening until you’re back where you started.
Pull the Top Closed
Hold the beanie with one hand and gently pull the yarn tail with the other. As you pull, the opening will start gathering together like a little drawstring bag. Keep pulling firmly until it closes as much as it possibly can.
Don’t worry if there’s still a small hole left in the centre at this point. That’s completely normal and easy to fix.
Step 9: Close Any Remaining Opening
If there’s still a tiny gap at the top, use your tapestry needle to sew across the opening several times.
Rather than stitching in just one direction, sew back and forth from a few different angles. Crossing over the opening like this helps pull that remaining gap completely closed.
There’s no need to make these stitches perfectly neat, they’ll be hidden inside the finished hat regardless. Once you’re happy the top is secure, give the yarn one more gentle tug to make sure everything feels snug.
Step 10: Secure and Weave in the Ends
You’ll now have a couple of yarn tails left hanging inside the beanie.
Tie them together with a secure knot to help stop the seam loosening over time. Then weave each tail into the surrounding stitches using your tapestry needle or crochet hook. Run the yarn through several stitches, change direction once or twice, then trim away any excess.
Try not to cut the yarn too close to the knot. Leaving the tail woven through several stitches helps keep it securely tucked away, even after the beanie’s been washed and worn a few times.
Take a final look around the whole hat to make sure every loose yarn tail has been properly woven in.
Finish Your Beanie
Turn the beanie right side out if you need to, then fold up the brim to whatever width you prefer.
The folded brim adds a bit of extra warmth around your ears and gives the hat that classic ribbed beanie looks. If you’d rather have a slouchier style, fold the brim less, or skip folding it altogether for extra height.
Because the ribbing stretches so naturally, the beanie should sit comfortably while still holding its shape, without that bulky excess fabric a lot of beginner crochet hats end up with.
Congratulations, you’ve finished your easy ribbed crochet beanie.
Tips for the Best Results
A few things worth keeping in mind before your next beanie. Count your stitches every few rows to catch mistakes early. Keep your slip stitches relaxed so they’re easier to work into on the following row. Always work into the back loop only after the first row to maintain that ribbed texture. Don’t skip the final stitch at the end of each row, since missing it can gradually narrow the hat. Try the beanie on before gathering the top so you can adjust the width if it doesn’t feel right yet. And feel free to experiment with different yarn colours, stripes, or self-striping yarn to create something a bit more unique.
Easy Ways to Customize This Beanie
Once you’ve made one, it’s easy to start making more in different styles.
A few ideas worth trying: add a faux fur or yarn pom-pom to the top, crochet the hat in solid colours, stripes, or colour blocks, make a matching set with a scarf or fingerless gloves, use tweed, heather, or speckled yarn for a bit of extra texture, fold the brim once for a classic look or twice for a thicker cuff, or adjust the starting chain for a shorter everyday beanie versus a taller, slouchier style.
Since this pattern uses such simple stitches throughout, it’s also a great project for practicing even tension while you’re creating thoughtful handmade gifts for family and friends.
Final Thoughts
This beginner friendly ribbed beanie is honestly proof that you don’t need complicated stitches to make a hat that looks polished and fits well. By combining half double crochets with just five slip stitches at the top of each row, you create a smooth, rounded crown without the bulky excess fabric that shows up in so many beginner crochet beanies.
Once you’ve made your first one, you’ll find yourself coming back to this pattern again and again. It’s quick to crochet, easy to customize, and works for almost any size with just a couple of simple adjustments. Whether you’re making yourself a cosy hat or putting together a handmade gift for someone special, this timeless ribbed beanie is one you’ll be glad to keep in your back pocket.